Microsoft is pretty hopeful with the success of Windows 10 as they worked a lot in creating such an elegant OS version. In fact, the whole look of the OS is great but there are still some bugs which are like dirty fishes in clean water. One of those bugs is related to the working of Windows 10 Start Menu. I, myself have been facing this issue as I was unable to trigger the start menu. This thing frustrated me a lot and I know, it would be frustrating for you too.
A majority of Windows 7, 8 users migrated to Windows 10 right after its release. A number of them including me faced this issue. There was no solution to this and restarting the system didn’t help too.
Reasons Behind Start Menu not Working:
This issue is most common in Build 10074 after updating from Build 10061. This could be a bug that is causing the start menu not to be triggered. There could be a number of reasons behind this but the most common of them is System Restore.
Solutions to Fix Start Menu Not Working Issue:
There are numerous methods to solve this issue. You can try these methods sequentially if the first one doesn’t work.
Method # 1: Reverting Back and Updating Again
The first and the most effective solution to this problem is to revert back to the previous build 10049 of Windows 10, also called Windows 10 Technical Preview. After reverting back to build 10049, update you Windows again. Make sure to activate the Windows before rebooting your PC. Otherwise, it will be back where it was before.
Method # 2: Repair Windows Image
If the above mentioned method doesn’t make you happy, try this method to get your start menu back to its working state. For this, you have to repair your Windows image.
- Open Command Prompt (Admin) by pressing Win + X shortcut keys on your keyboard.
- Type the following line of code inside command prompt to scan and repair Windows image.

Restart you PC after the scan is completed and in most cases, it will work for you.
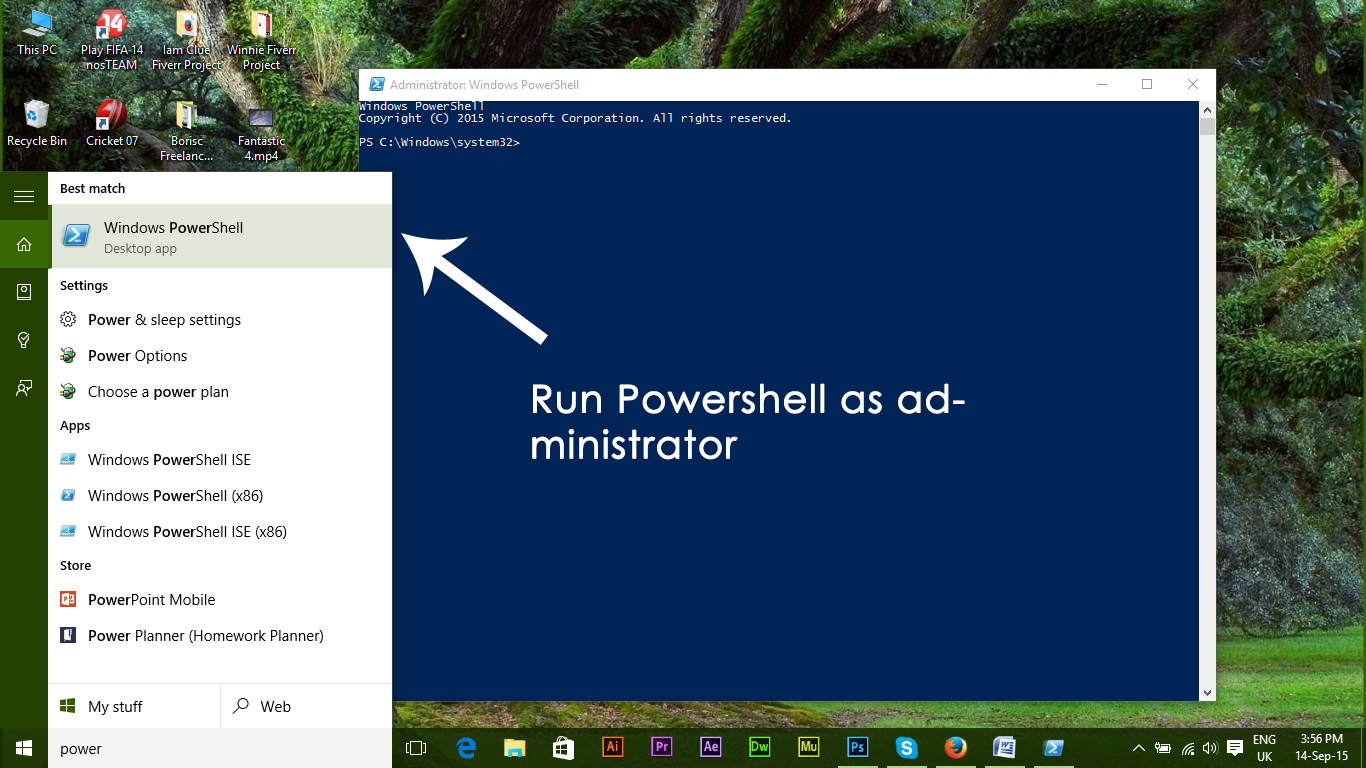
Method # 3: Through an Elevated PowerShell
The last method which usually proves to be the last resort is using the Windows PowerShell.
- Open the Command Prompt by hitting the Win + X shortcut key.
- Type powershell (case-sensitive) inside CMD and press enter. It will load the powershell inside Command Prompt. You can also load Windows 10 own powershell application by searching for powershell through Cortana. Run the powershell with administrator rights.
- Type the following code inside the powershell and hit Enter key afterwards.
- After hitting enter key, wait for it execute the command. Ignore any errors you get during this process. At the end, you would surely get a working Start Menu.
You should also check out the Start Menu & Cortana guide for related fixes that may help if the methods above does not works; and if it works please let us know in the comments section below so we can improve the quality of our solutions/guides.
The post BEST FIX: Windows 10 Start Menu not Working appeared first on Appuals.com.