The Error 0x80246019 appears when users are downloading applications from Microsoft Store or while updating their systems. Windows 10 has a built-in application called MS Store where you can download and install different applications into your system which is pretty cool. To get the latest features released by Microsoft for their OS, one has to keep updating his/her system. However, these updates can sometimes be a bad choice as you might encounter an error.

Many users have been facing issues recently in regard to their MS store i.e whenever they try to download an application, instead of the app they’re prompted with an error. There are a number of solutions for this error and a number of reasons that can cause it. Hence, without further due, let’s take a look at the causes of this error.

What causes Windows 10 Error 0x80246019?
Well, this error could be caused due to a number of reasons and while doing two different tasks i.e downloading an app from MS Store or updating your Windows. It can potentially be caused due to –
- $WINDOWS.~BT directory. This directory is responsible for storing files temporarily while you are updating your system. Albeit, it can be easily corrupted and can cause a number of issues including this one.
- Windows firewall. Sometimes, when your firewall isn’t allowing certain outgoing or incoming requests, the error can pop up in which case you’ll have to disable your firewall.
Now, let us get into the solutions.
Solution 1: Resetting MS Store
Windows 10 comes along with a built-in utility that lets you reset MS Store should you encounter any issues. This potentially solves many errors so we’re going to start off with this. To reset your MS Store, do the following:
- Press Winkey + R to open Run.
- Type in ‘wsreset’.
- Wait for the process to complete and then try downloading your application.
Solution 2: Deleting the $WINDOWS.~BT directory
Well, if you are receiving the error while updating your Windows 10, deleting the $WINDOWS.~BT directory is what you should start off with. Most of the users have reported that doing this solved their problem so it should be your top priority as well. Here’s how to do it:
- Go to Start Menu, type in ‘Disk Cleanup’ and open it up.
- Select your System drive i.e where your Windows is installed.
- Wait for it complete calculating.
![Wait for it complete]()
Wait for it complete - Select ‘Clean up system files’.
![Click 'Clean up system files']()
Click ‘Clean up system files’ - There, from the list, check the ‘Previous Windows Installation’ or ‘Temporary’ box.
![Check the 'Previous Windows Installation' box]()
Check the ‘Previous Windows Installation’ box - Hit ‘OK’.
- Once prompted, click ‘Delete files’.
- Wait for it to complete.
After that’s done, try to update your Windows again.
Solution 3: Running Windows Troubleshooter
Making use of the Windows Troubleshooter is essential while solving an issue. This is likely to solve the generic errors on its own. To run Windows Troubleshooter, do the following:
- Press Winkey + I to open Settings.
- Go to Update and Security.
- On the left-hand panel, click ‘Troubleshoot’.
- Execute Windows Update troubleshooter if your error appears while updating.
![]()
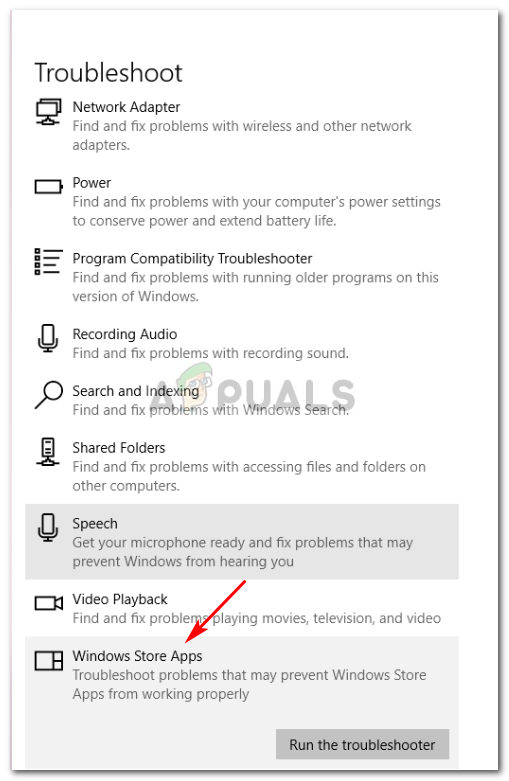
Execute Windows Update Troubleshooter - Run Windows Store Apps troubleshooter if it pops up while downloading an app from the MS Store.
![]()
Run Windows Store Apps troubleshooter - Once done, try updating your system or downloading apps from the Store.
Solution 3: Unplug any External Hardware
The error can also be caused by any external hardware that is connected to your device such as USB or printer etc. For some users, the issue has been resolved by unplugging their USB, webcam or printer before downloading an application from the MS Store. Therefore, if there’s anything connected to your PC, unplug it and see if it solves the issue.
Solution 4: Changing Insider Program Settings
If your Windows update error still persists after deleting the $WINDOWS.~BT directory, then it is probably caused by your Insider program settings. In such a case, you’ll have to change your settings. To do this, follow the instructions:
- Press Winkey + X and select ‘Settings’.
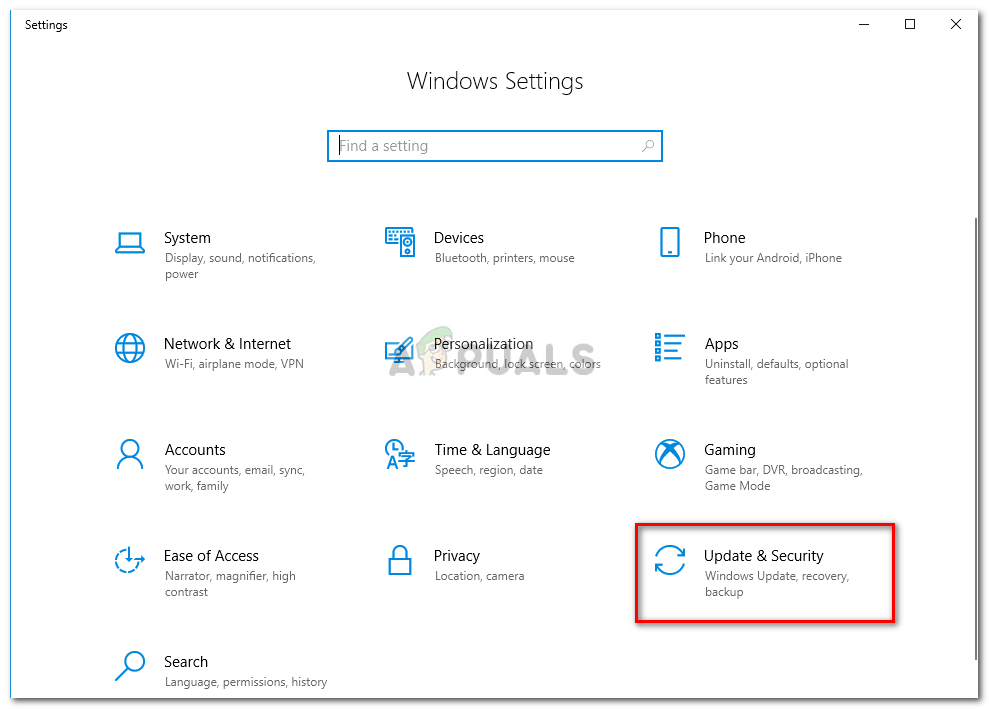
- Once the Settings window open, click on ‘Update and Security’.
![]()
Click Update and Security - On the panel located to the left side, click ‘Windows Insider Program’.
- There, click ‘Stop Insider Preview builds’.
![]()
Click ‘Stop Insider Preview Builds’ - Click the ‘Cancel’ to confirm.
- Try updating your system now.
Solution 5: Running SFC and DISM
If your issue hasn’t been resolved by now, this could be due to corrupted system files. If your system files are corrupted, your PC won’t function normally and you’ll probably encounter errors such as this. Hence, we recommend running SFC and DISM to check and verify your system files and to repair the files that are corrupted using a backup stored in your PC.
To run SFC and DISM, please refer to SFC and DISM articles written quite thoroughly by our experts.
The post Fix: Windows 10 Error 0x80246019 appeared first on Appuals.com.


