Quantcast
Channel: Kevin Arrows | Network Engineer | Appuals.com
Viewing all 4495 articles
Browse latest View live

Fix: Roblox Error Code 610

$
0
0

A lot of Roblox players have been reporting getting the Error Code: 610 when trying to start a game in Roblox.  Most affected users report that the error will occur regardless of the Roblox game that they try to start. Out of all the most popular errors in Roblox, this one is among the newest error code (it only started occurring in December 2018).

Roblox Error Code: 610

What is causing the Error Code: 610 in Roblox?

We investigated this particular error message by looking at various user reports and the repair strategies that they used to pinpoint and resolve the source of the problem. Most of the information that we’ve been able to gather for this error comes from the official DevForums and a few other credible sources.

Based on what we gathered, there are several common scenarios that will trigger the 610 error code in Roblox:

  • Roblox servers are down – This issue might occur if Roblox is currently conducting scheduled maintenance or there are some unplanned problems with their servers.  This can be verified quite easily by using a down detector service. If this is the case of the issue, the only viable fix is to just wait for the developers to get their servers back online.
  • Account glitch – At the end of 2018, a lot of accounts have been hacked with a pop-up that broke the game for a lot of users. In this case, some solutions that have worked for some people is to either sign out & into the account again or to simply create a new account.
  • The web version is under maintenance – As a lot of affected users have discovered, it turns out that the web version of Roblox is much more unstable than the desktop version. If you’re unable to launch any Roblox games from your browser, downloading the desktop version (Windows 10 only) might resolve the issue automatically
  • Bad cached DNS – Since some users have managed to resolve the issue by flushing their DNS, we can safely assume that this issue might also occur if your network configuration holds some expired DNS. Using Command prompt to refresh them should resolve the issue in this case.

If you’re currently struggling to resolve this particular error code in Roblox, this article will provide you with a collection of troubleshooting steps. Scroll down below and you’ll find several methods that other users in a similar situation have used to either resolve or at least identify the cause of the error.

If you want to be as efficient as possible, we encourage you to follow the methods below in the order that they are presented in. You should eventually stumble upon a fix that sheds some light on the error code that you’re encountering in Roblox.

Method 1: Verifying if servers are down

One of the first things you should do when you encountering the Error Code: 610 is to verify if the cause of the issue is beyond your control. Based on our investigations, this particular error can also occur if the Roblox servers are down.

This has happened before at the end of 2018 when some hackers managed to make a GUI into some accounts that forced a popup causing the game to crash. The developers behind Roblox has since managed to resolve the issue, but it’s not impossible that some variation of this issue might return.

With this in mind, we encourage you to start troubleshooting this particular error by verifying the status of Roblox’s servers. To do this, access one of the following down detector services and see if other players are having issues with the servers:

Verifying the status of Roblox servers

In the event that you discover that the source of the problem is a server problem, wait a couple of hours before trying to launch a Roblox game again.

If you find no evidence that the Roblox servers are down but you are still encountering the 610 error code, move down to the next method below.

Method 2:  Sign out & in of the account

Most Roblox players that have been struggling to resolve this particular error have finally managed to do it by signing out of their account & from all other sessions before logging in again. Although there’s no official explanation why this method is effective, some affected users speculate that it’s probably because some components get refreshed when the users sign out & back in.

Here’s a quick guide on how to do this:

  1.  Inside Roblox, click the gear icon (Settings) in the top-right corner and click on Logout.
    Logging out of Roblox
  2. Refresh the browser page and Log in again with the same account.
    Log In with the same account
  3. Go to the Game tab and launch a game again to see if the issue is still occurring.
    Launching a Game in Roblox

    If you’re still encountering the 610 error code, move down to the next method below.

Method 3: Downloading Roblox onto your computer (Windows 10 only)

Several Roblox players that have been encountering this particular error message have managed to find a way to bypass the error code. Unfortunately, this procedure is only possible on Windows 10, since it’s the only OS includes a Roblox app that will physically install on your computer.

Most affected users that ended up trying this workaround have reported that the  Error Code: 610 was completely eliminated after installing Roblox on their computer. Here’s what you need to do:

  1. Visit this link (here) and hit the Get button to download Roblox on your computer. Alternatively, open Windows Store and search for “Roblox” to get to a similar window.
    Downloading Roblox
  2. Once the download has been completed, you will be taken to a Microsoft Store window. Once you get there, press Play to launch the desktop version of the game.
    Launching Roblox
  3. Sign up with your user credentials to log in.
    Login with the desktop app
  4. Make your way to the Game tab and launch any mode to see if the issue has been resolved.
    Launching a mode inside the desktop app

    If you’re still encountering the same error code, move down to the next method below.

Method 4: Creating a new account

A couple of affected users have reported that what worked for them is creating a new Roblox account and using that one to launch game modes.  We managed to find over a dozen occurrences where affected users have reported that the issue was no longer occurring when they launched the same game mode from a newly created account.

Sure, this is not ideal if you have an old account with a lot of XP and friends, but it can serve as a temporary fix until the issue is resolved entirely by Roblox devs.

Here’s what you need to do:

  1. Visit this link (here) and click Sign Up.
    Sign Up to Roblox

    Note: If you’re already logged in, click the gear icon and choose Log Out.

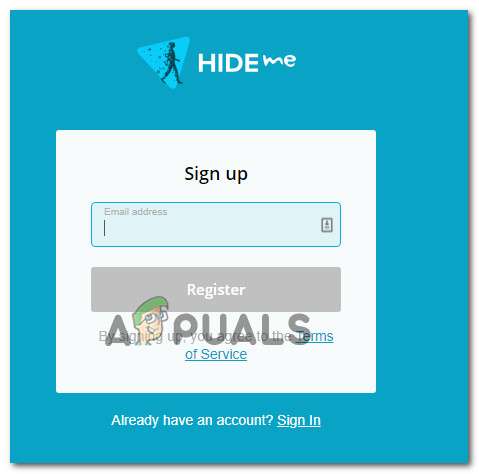
  2. Fill up the Signup form with the necessary information and click on Sign Up to register your new account.
  3. Log in with your newly created account and launch a game mode to see if the issue is still occurring.

If you’re still encountering this error message, move down to the next method below.

Method 5: Refreshing IP & DNS Configuration

A couple of affected users have reported that they were finally able to play again after using an elevated Command Prompt window to flush any saved DNS addresses. Upon doing this and restarting the web browser, the error 610 was no longer occurring.

Here’s what you need to do:

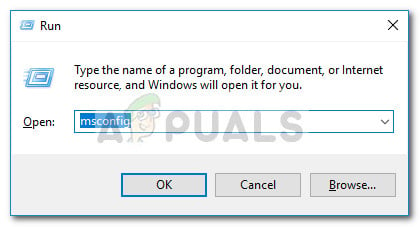
  1. Press Windows key + R to open up a Run dialog box. Next, type “cmd” inside the Run box and press Ctrl + Shift + Enter to open up an elevated Command Prompt.
    Opening Command Prompt via Run dialog box
  2. Inside the elevated Command Prompt, type the following command and press Enter to remove any saved DNS addresses and refresh the Internet connection:
    ipconfig /flushdns
  3. Once the connection has been restored, close the elevated Command Prompt and restart your web browser. Then, open Roblox again and see if the issue has been resolved.

The post Fix: Roblox Error Code 610 appeared first on Appuals.com.


Fix: Blue Snowball Not Working on Windows 10

$
0
0

Blue is a respected name in the world of microphones, it offers range from entry-level to Professional microphones. The snowball model is a great microphone for entry-level streamers, YouTubers and content creators for a somewhat affordable range.utubers and content creators for a somewhat affordable range. However, a lot of users are reporting numerous issues occurring while using the microphone with Windows 10.

BLUE SNOWBALL MICROPHONE

There can be several different reasons why the microphone fails to work properly in Windows 10 ranging from some configuration settings to some issues with the drivers themselves in this article we will try to solve all those issues without much hassle.

What causes the issue with the BLUE SNOWBALL microphone?

The issue has been persistent with many users after an update on Windows 10 although there are many causes to the problem itself, some of them are

  • Corrupt Drivers: This issue was reported to be caused by the new update that seemingly corrupted the microphone’s drivers.
  • Privacy Settings: The Privacy settings were automatically changed by after the windows update and that might be causing the microphone from working properly.

Solution 1: Reinstalling the Device Drivers

Before we start configuring the settings, you can try the basic troubleshooting techniques. This step will make sure you don’t have any issues with the drivers or the plugging in of your device.

  1. Click on the Start Menu
    Start Menu Windows 10
  2. Search For Device Manager
    Searching For Device Manager
  3. Now that you are in the device manager Click on Audio Inputs & Outputs.
    Navigating to Audio, inputs, and outputs in Device Manager
  4. Then Right Click ON the Microphone(Blue Snowball) and Select Uninstall Device
    Uninstalling Microphone Drivers
  5. Similarly, Navigate to Sound, Video and Games Controller.
    Navigating to Sound, video and game Controllers
  6. Now Uninstall the Blue Snowball Drivers from here as well.
    Uninstalling other Microphone Drivers
  7. Now simply unplug and replug the microphone into your computer and the windows will reinstall these drivers If you had an issue with the drivers it should now be fixed.

Solution 2: Changing Windows Privacy Settings

After an update on Windows 10, the Privacy settings were automatically changed and some apps were not allowed to use the microphone, while in some cases the microphone was disabled entirely. We will be changing those settings in the following process

  1. Click ON the Start Menu and Click on the Settings icon
    Opening Windows Settings
  2. From there Click on Privacy Settings.
    Opening Privacy Settings
  3. From There Click on Microphone and then click on Change.
    Changing Microphone Privacy Settings
  4. Then Make Sure it is Enabled
    Making Sure Microphone is Enabled
  5. Also, Make Sure the Apps that you use have the Permissions enabled too from below
    Making Sure apps are allowed to use the microphone

If the issue was due to the privacy settings it should be solved by now.

The post Fix: Blue Snowball Not Working on Windows 10 appeared first on Appuals.com.

Fix: The Remote Connection was not Made Because the Name of the Remote Access Server did not Resolve

$
0
0

If you get the ‘The remote connection was not made because the name of the remote access server did not resolve’ error message while connecting to a VPN, it can be either due to the VPN server issue or an issue with your PC’s connection. Back in the days of Windows 7, this error was given a special error code which was 868, however, on Windows 10, the error code has been removed.

The Remote Connection was not Made Because the Name of the Remote Access Server did not Resolve

VPNs are being used almost everywhere these days and some of us use them as our primary connection. However, if you are caught in the midst of such VPN related errors, things can be really frustrating. Nonetheless, you do not have to worry anymore as this article will walk you through the possible solutions that you can implement.

What causes the ‘The Remote Connection was not Made Because the Name of the Remote Access Server did not Resolve’ Error on Windows 10?

Well, there are not many factors which can cause the issue, however, whenever it occurs, it is usually due to the following reasons —

  • VPN Server: In some cases, the error can be due to a server issue with the network that you are trying to connect to.
  • System’s connection: Another cause of the error can be your system’s network connections. Sometimes, it can be due to your DNS cache etc.
  • Third-party antivirus: The third-party antivirus that you have installed on your system can also trigger the error. Your antivirus might be imposing restrictions due to which the error emerges.

You can isolate your issue by following the solutions provided down below. We urge you to follow them in the same order as provided down below to get yourself a quick resolution.

Solution 1: Flushing DNS and Resetting Winsock

As we mentioned above, the error can sometimes be triggered due to your DNS cache. Additionally, your network connections can also play a role in creating the error. Hence, to circumvent the issue, you will have to flush your DNS cache and reset Winsock. Here’s how to do this:

  1. Press Windows Key + X and select Command Prompt (Admin) from the list to open an elevated command prompt.
  2. Once the command prompt opens up, type in the following command:
    ipconfig /flushdns
    Flushing DNS Cache
    ipconfig /registerdns
  3. Afterward, enter the following commands:
    ipconfig /release
    ipconfig /renew
    Renewing IP
  4. Then, to reset Winsock, type in the following command and press Enter:
    Netsh winsock reset
    Resetting Winsock
  5. Restart your system and then check if it fixes the issue.

Solution 2: Disable Third-party Antivirus

You can also try to deal with the issue by disabling your third-party antivirus. Antiviruses, once installed, impose certain restrictions on your system’s activity which include network connections. Therefore, to eliminate the possibility of your third-party antivirus causing the issue, you will have to disable it. Once disabled, try to connect to your VPN again.

Disabling Third-party Antivirus

Solution 3: Turn off Windows Defender Firewall

The Windows Defender Firewall is responsible for managing the incoming and outgoing connection requests. In some cases, you are not able to connect to your VPN because the Windows Defender Firewall is blocking the request. In such a case, you will have to disable it for a while and see if it resolves the issue. To disable Windows Firewall, do the following:

  1. Go to the Start Menu and open up the Control Panel.
  2. Set the View by to Large icons and then click Windows Defender Firewall.
  3. On the left-hand side, click ‘Turn Windows Defender Firewall on or off’.
  4. Make sure ‘Turn off Windows Defender Firewall’ is selected under both the settings and then click OK.
    Turning off Windows Defender Firewall
  5. Check if it resolves the issue.

If this still doesn’t fix your issue, you will have to contact your VPN Provider and submit your queries there.

The post Fix: The Remote Connection was not Made Because the Name of the Remote Access Server did not Resolve appeared first on Appuals.com.

The Best PingPlotter Alternatives for Network Diagnostics

$
0
0

Any System admin has probably used or heard of PingPlotter at some point in their career. It is a software designed on the principle of ping and trace routing and therefore detects problems in your network by measuring the network latency and determining the packet loss percentage. Its major strength and perhaps the reason it is so popular is its ability to represent the Network Performance data collected as easy to understand graphical visualizations. As a result, one can pinpoint the exact issue in a network much quicker.

The software can also collect historical data from the devices and applications in your network which therefore gives you a baseline from which to make your conclusions. Moreover, this software allows you to capture a screenshot of your analysis and provides sharing methods that will be useful in reporting the network problem either to your supervisor or to your ISP in case the fault lies in their end. These are just some of the features of ping plotter and you can already tell it’s a great software. But, is it the best?

Absolutely not. There are numerous software that have come up that will be great alternatives for PingPlotter. While most of them are largely similar to PingPlotter some like SolarWinds TraceRoute NG capitalize on PingPlotters shortcomings or simply include more features to give you a better alternative. So, to give you the freedom of choice I will be highlighting 5 software that you can use instead of PingPlotter. I am sure you will have no problem finding one that best fits you from the list.

#NameOSTCP/ICMPIPv4/IPv6LicenseAutomatic AlertsDownload
1SolarWinds TraceRoute NG ' numberWindowsTCP & ICMPIPv4 & IPv6FreeDownload
2SmokePingWindows | LinuxTCP & ICMPIPv4 & IPv6FreeDownload
3MTRWindows | Linux | MacOSTCP & ICMPIPv4 & IPv6FreeDownload
4Open Visual TracerouteWindows | Linux | MacOSTCP & ICMPIPv4 & IPv6FreeDownload
5MultiPingWindowsTCP & ICMPIPv4 & IPv630-day Free trialDownload
Best PingPlotter Alternatives for Network Diagnostics
#1
NameSolarWinds TraceRoute NG ' number
OSWindows
TCP/ICMPTCP & ICMP
IPv4/IPv6IPv4 & IPv6
LicenseFree
Automatic Alerts
DownloadDownload
#2
NameSmokePing
OSWindows | Linux
TCP/ICMPTCP & ICMP
IPv4/IPv6IPv4 & IPv6
LicenseFree
Automatic Alerts
DownloadDownload
#3
NameMTR
OSWindows | Linux | MacOS
TCP/ICMPTCP & ICMP
IPv4/IPv6IPv4 & IPv6
LicenseFree
Automatic Alerts
DownloadDownload
#4
NameOpen Visual Traceroute
OSWindows | Linux | MacOS
TCP/ICMPTCP & ICMP
IPv4/IPv6IPv4 & IPv6
LicenseFree
Automatic Alerts
DownloadDownload
#5
NameMultiPing
OSWindows
TCP/ICMPTCP & ICMP
IPv4/IPv6IPv4 & IPv6
License30-day Free trial
Automatic Alerts
DownloadDownload
#1
of 5

SolarWinds Traceroute NG is our best PingPlotter alternative for troubleshooting connectivity issues. Which should not really come as a surprise considering SolarWinds is one of the most trusted developers of Network Management Tools. Not only is this software great in performing accurate Path analysis but it’s also able to return results in the shortest time possible. Sometimes even seconds.

SolarWinds TraceRoute NG

SolarWinds TraceRoute NG uses both TCP and ICMP echo to perform Netpath analysis and also supports both IPv4 and IPv6. It uses SolarWinds excellent NetPath technology to collect crucial Network Performance data like the packet loss percentage, network latency, probe run time and also to display the IP Address and Fully Qualified Domain Name (FQDN). Since the analysis is conducted hop by hop it becomes much easier to establish the root problem in your network using this software.

Another highlight feature of TraceRoute NG is the creation of a text file in which all the performance data is stored. This data can then be used for reference during future analysis. The text file also provides an easy way of reporting network issues to other people in your network.

In case there is a change in the data path, TraceRoute NG immediately detects them and alerts you. It also supports continuous probing which means you will continue receiving real-time statistics on a problem while further troubleshooting takes place. TraceRoute NG is completely free.

#2
of 5

SmokePing is an open source software and hence comes at no cost. Much like PingPlotter, this software also boasts of excellent visualizations. It comes with an interactive graph explorer that represents your Network latency as charts and graphs to ease the process of network troubleshooting and repair.

SmokePing

For further analysis of your network latency, SmokePing has a bunch of plugins that you can integrate. It also allows distributed measurement through a master/slave communication and unlike most similar software SmokePing also has an alert system which you can customize to suit you.

#3
of 5

My TraceRoute, abbreviated as MTR, is another open-source software that constitutes of seamless integration of ping and TraceRoute functionalities. It uses ICMP Echo requests to measure the performance of your network and can monitor performance for every hop.

MTR

Since this tool uses autoconfig, it will be compatible with almost all operating systems including MacOS. Immediately it is launched, this software sends ICMP echo requests to measure the performance of the network connection between its host and the specified destination host. It will then continue sending real-time statistics on the performance while the analysis continues.

This software is quite easy to install and uses a command line interface much like the original TraceRoute tool. However, it brings the added feature of IPv6 support.

#4
of 5

As the name suggests, this software really puts emphasis on giving you a truly visual experience. It features a 3D map of the world that highlights the path taken by data from your computer to the target server.

Open Visual Traceroute

Low-end computers or Operating systems that might have compatibility issues with the OpenGL drivers used to render the 3D graphics will have to do with the 2D map. The packet sniffer is another useful tool integrated into this software that allows you to see the data being sent back and forth from the local system to the internet. Additionally, the ‘Whois’ feature can be used to get all the public information about a domain. This software is open source and is compatible with most OS including MacOS.

#5
of 5

MultiPing is a lightweight software that allows you to monitor either a single or multiple hosts. This software collects the performance data like network latency and packet loss percentage and presents it as graphical visualizations to aid in analysis. An added advantage is automatic alerts for when things are not right in the network.

MultiPing

This software also supports integration with PingPlotter for advanced troubleshooting so if we are being thorough it’s as much a complementary software as it is an alternative software. Since MultiPing is a full-featured Network Monitoring Software, you get to enjoy several other features that may not be available in other similar software. These include a customizable interface, automatic detection of devices and continuous monitoring even when using Dynamic DNS. But this also means the software does not come for free. What you get is a free trial.

The post The Best PingPlotter Alternatives for Network Diagnostics appeared first on Appuals.com.

SolarWinds IP Address Tracker: Free IP Address Tracking Software Review

$
0
0

IP addresses are a means of identifying and locating network hosts and monitoring them forms an integral part in the job of a system/network administrator. Every device or application that connects to a network must be assigned an IP address. Keeping track of these addresses, therefore, helps you know who is connected to your network, when they connected, their location, how long they have been connected. This is invaluable information that can help you identify network abuse and trace network breaches in the event they occur. IP address tracking is also critical in preventing network conflicts that may occur when more than one device uses the same IP address. This is more common than you might imagine.

IP Address Tracking Options

So how exactly do you ensure effective IPAT in your network? You could adopt the use of excel spreadsheets but this is an outdated approach that may not be very practical to execute on a medium to large network that utilizes a dynamic IP address system. Also, when you factor in the increased need for IP addresses brought about by VoIP, RFID and other technologies like mobile networks then you begin to see why it will be hard keeping up with the tracking process. But even on a small network, why go into the trouble of tracking the addresses manually when there are tools that could automate the process.

And thus forms the basis of our article. The best software to track IP addresses in your network. The reason many organizations opt for excel spreadsheets is that it does not require any investment in form of hardware or software. But the good news is that our selected product, SolarWinds IP Address tracking software, is completely free. Which is more than I can say for other similar products.

Oh, another reason you might want to consider IP address tracking is for compliance purpose. Some regulations may require that you produce logs outlining the devices and applications that were assigned a certain IP address over a certain period. A proper tracking software will make it easy to retrieve this kind of information.

SolarWinds IP Address Tracker

SolarWinds IP Address tracker is a derivative of their IP Management Software (IPAM) with some features scrapped off to make it a dedicated IP Address Tracker. The reduced functionality is a good thing because now you have an excellent free product from arguably the best developer of Network Management Tools to track your IP addresses.

SolarWinds IP Address Tracker

The software allows you to manage up to 254 IP addresses which is quite impressive for a free software. It performs automatic scans of your network and can easily detect IP address conflicts after which it notifies you. Also by keeping tabs on the available addresses, you will be able to tell when you have exhausted IP addresses.

Since this software keeps a history of all IP addresses and event logs it makes it easy for you to go through past records to better understand a present problem. It will also help in complying with certain regulations that require log data on the allocation of IP addresses in your network.

Subnet IP Address Tracking

Also worth noting is this software’s ability to track IP addresses in subnets. Its installation process is also quite easy and features a help wizard to guide you through various configuration processes like adding a subnet. For better tracking, this IP address tracker allows you to add comments to any selected address.

SolarWinds IP Address Tracker

With that said, this software is ideal for you if you are monitoring a scale-able network and should the network expand, you can switch to the SolarWinds IP Management Software which can monitor up to 2 million IP addresses and comes with numerous other functionalities like management of DNS and DHCP servers.

The post SolarWinds IP Address Tracker: Free IP Address Tracking Software Review appeared first on Appuals.com.

Fix: Error Code 15 ‘This Request Was Blocked by the Security Rules’

$
0
0

Some users are reporting being unable to visit certain websites from their web browser. Most often, the error that comes up is “Error Code 15:  This request was blocked by the security rules“. This error means that the request browser is trying to initiate (i.e accessing the site) is denied by the security rules in place. The issue is not browser specific (it occurs with all the popular browsers including Chrome, Edge, Firefox and Opera) and is confirmed to occur on all the latest Windows versions (Windows 7, Windows 8.1 and Windows 10.

Error code 15 – This request was blocked by the security rules

What causes the ‘Error code 15 – This request was blocked by the security rules’ error?

We looked into this particular issue by looking at various user reports and the repair strategies that they have successfully used to get the issue resolved. From what we were able to gather, there are several fairly common scenarios that are known to trigger this particular issue:

  • Date & time is incorrect – This issue can be encountered if the webs server conditions the access to correct time & date settings. Several affected users have reported that the issue was no longer occurring after they modified to the correct date via Control panel.
  • Your IP range is geo-blocked – Is also possible that the particular web server that you’re trying to access has some predefined rules regarding the location of the visitor IP. In this case, using a VPN solution should allow you to circumvent the issue.
  • 3rd party AV/firewall is preventing you from accessing the website – As several users have reported, this particular issue can also be caused by an overprotective security suite. Some users have reported that the site became accessible again after they disabled or uninstalled the 3rd party security suite.

If you’re currently looking for a way to get around the “Error Code 15:  This request was blocked by the security rules” error, this article will provide you with a collection of verified troubleshooting steps. Down below, you’ll discover several repair strategies that other users in a similar situation have successfully used to get to the bottom of the issue.

If you want to be as efficient as possible, follow the methods below in the order that they are presented. You will eventually encounter a fix that is effective in your particular scenario. Let’s begin!

Method 1: Set the Correct time and date

There aren’t a lot of conditions that you (as a visitor) need to meet in order to be allowed access to most websites. Of course, this rules change from server to server, but one of the most common causes why users are prevented to access certain websites by the “Error Code 15:  This request was blocked by the security rules” is because their date and time settings are incorrect.

This is most often reported to occur with Microsoft Edge, but we have managed to find several reports with visitors using a different browser that managed to resolve the issue after setting the correct time and date. This is effective in those situations where the web server is programmed to condition the entrance by date & time. Most of the time, this is done in order to bots from accessing that particular website

Here’s a quick guide on how to ensure that you’re using the correct time and date:

  1. Press Windows key + R to open up a Run dialog box. Then, type “timedate.cpl” and press Enter to open up the Date and Time panel.
    Accessing the Time & Date panel via a Run box
  2. Inside the Date and Time window, go over to the Internet Time tab and click on Change settings.
    Changing the settings of Date & Time
  3. Inside the Internet Time settings, check the box associated with Synchronize with an Internet time server, set the Server to time.windows.com and click on Update now.
    Updating the time from the Internet Time Settings window
  4. Move over to the Date and Time tab, click on Change time zone and make sure you’re using the correct one. Then, click on Change date and time and ensure that the date is selected properly.
    Setting the correct date & time
  5. Restart your computer and see if the issue has been resolved and you are now able to access the website at the next startup.

If you’re still encountering the “Error Code 15:  This request was blocked by the security rules” error, move down to the next method below.

Method 2: Using a VPN solution

In most cases, this particular error is encountered because the website administrator is using some kind of security application that actively blocks your IP range. This is most commonly done with Incapsula or a similar service. Several users that have been struggling with the same scenario have managed to circumvent the issue by using a VPN solution to conceal their real IP.

This can be done with a number of different services (premium or free), but for the sake of keeping this guide accessible for everyone, we’re going to show you how to do this with a free VPN service. However, if you have the means, feel free to use any premium VPN service that you want.

Here’s a quick guide on avoiding the “Error Code 15:  This request was blocked by the security rules” error aby using a VPN solution (Hide.me):

  1. Visit this link (here) and click the Download Now button, then click on Register (under Free) to download the free version of Hide.me.
    Downloading the VPN solution
  2. Enter your email address in the next box to register. Make sure it’s a valid one because you will recieve a verification email.
    Registering for the service
  3. Navigate to the verification email and click on Activate my account to get started.
  4. From the next screen, choose a Username and a Password for your account and press Create account.
    Creating an account with Hide.me
  5. Once you are signed into your account, go to Pricing > Free and click on Apply now.
    Apply for the free account
  6. Next, move over to the Download clients tab and click on the Download button associated with your operating system.
    Downloading the Windows client
  7. Once the download is complete, open the installation executable and install the Hide.me application. Then, follow the on-screen prompts to complete the installation.
    Installing the Hide.Me VPN application
  8. Once the installation is complete, sign in to your account and press Start your free trial.
  9. Click the Change button (bottom-right) corner to set the location that works for you. Then, simply click on Enable VPN to change your IP.
    Enabling the VPN solution
  10. Visit the site that was previously displaying the “Error Code 15:  This request was blocked by the security rules” and see if the issue is now resolved.

Method 3: Deactivate security solution

As some users have confirmed, this particular issue can also occur if you’re using an overprotective AV or firewall solution. Most of these 3-rd party security suites are now featuring a self-maintained list of blacklisted websites. But as you can imagine, some are more accurate than others.

If the site you are trying to access was blacklisted by your external security solution, you might find yourself suddenly losing the ability to access the website. In this particular case, disabling your 3rd party security solution should help you determine whether your AV/firewall is causing the problem.

However, with most firewalls, the same rules will remain firmly in place even if you end up disabling the client. In this case, uninstalling the client completely will help you figure out if the problem is caused internally or externally. You can follow this guide (here) to ensure that you remove your security solution completely.

The post Fix: Error Code 15 ‘This Request Was Blocked by the Security Rules’ appeared first on Appuals.com.

Fix: Our Systems have Detected Unusual Traffic from your Computer Network

$
0
0

If you come across the error message ‘Our systems have detected unusual traffic from your computer network’ while searching something on Google, you have been using it too rapidly. Well, this happens when the Google systems think that the requests being sent are done automatically by a robot or a virus. Basically, when you search something on Google, what you are doing is sending requests to the servers which then respond to your respective query. However, when the requests are being sent too fast, you will be stopped by the said error message.

Our Systems have Detected Unusual Traffic from your Computer Network

The error message can be due to a number of factors that we’ll discuss in detail down below but just to give you the basic insight, it can be due to your VPN connection, browser configuration etc. It is important to note that the error message doesn’t mean Google is tracking your activity or keeping records of your network, but rather it is just an assumption made by the Google systems.

In case you do not already know, automated traffic means the requests being sent over to the Google systems are done using automated tools etc. Such requests are considered automated by Google due to which the error message pops up to prevent such traffic.

Note: If you are using Google Search in high frequency, this error message is normal and you should use the recaptcha to verify your identity. If you are performing no such searches and still getting the error message, proceed down below.

What causes the ‘Our Systems have Detected Unusual Traffic from your Computer Network’ Error Message?

Well, as we have mentioned above, this error can be due to a number of factors. These factors include —

  • VPN Connection: Most of the people usually get to see the error message when they are using a VPN connection. Such a case is quite common and you will just have to disconnect your VPN to resolve the issue.
  • Malicious Content on your System: In some cases, the error message can be due to some malicious content on your system. The chances of such a case are quite plain, albeit, it’s a possibility still.
  • Browser Configuration: The browser that you are using to access the site and perform your searches also plays a vital role in triggering the error message. In some cases, the third-party extensions that you have added onto your browser can be the responsible party.
  • Network Connection: Your network connection can also, at times, trigger the error message. If you are using a public network, the error message might have been generated on the grounds of the traffic from other devices.

Now that you are aware of the possible causes of the error message and what it means, we will get into the solutions. You can implement the following fixes to isolate the issue.

Solution 1: Disconnect VPN

If you were using a VPN connection while the error message surfaced, you should try to disconnect your VPN and then see if it fixes the issue. Virtual Private Networks often cause such problems while you are conducting a search on Google, therefore, if you wish the error message to be gone, you will have to stop using the VPN connection.

Disconnecting VPN

Solution 2: Reset Browser

Your browser settings can also trigger such issues due to the third-party add-ons installed etc. In such a case, you will have to reset your browser to get the default configuration.

Here’s how to reset Mozilla Firefox:

  1. Press the Alt button to enable the Menu bar.
  2. Click on Help and then select Troubleshooting Information.
  3. Click the ‘Refresh Firefox’ option to reset Firefox.
    Refreshing Firefox

If you are using Google Chrome, you can reset it by doing the following:

  1. Click the Menu button (3 dots) on the top-right corner of Google Chrome.
  2. Go to Settings and then click ‘Show advanced settings’ at the bottom.
  3. Click the ‘Reset settings’ button to reset your browser.
    Resetting Chrome

Solution 3: Restart your System and Router

If the above solutions do not solve the error message for you, then you can try to isolate the issue by first restarting your system. If the issue persists even after a reboot, head to restarting your router. Restarting your router will most likely circumvent the issue.

Solution 4: Perform a Malware Scan

As we have mentioned, the error message can, rarely, be due to some malicious content on your system. In such a case, you should perform a scan using the Windows Defender or any third-party antivirus that you have installed on your system. If there’s any virus found, the Windows Defender or your third-party antivirus will take care of it and your issue should be fixed. To perform a scan using Windows Defender, do the following:

  1. Press Windows Key + I to open Settings.
  2. Type in ‘Virus and Threat’ in the search bar and then hit Enter.
  3. Once there, just click Quick scan to search for any malicious content quickly.
    Performing a Virus Scan
  4. You can also perform a full scan by clicking Scan options and selecting Full scan there.

The post Fix: Our Systems have Detected Unusual Traffic from your Computer Network appeared first on Appuals.com.

Fix: A System Error Has Occurred. Please Try Again Later (Error 2024/1903)

$
0
0

Error “A system error has occurred. Please try again later (error 2024/1903)” occurs when trying to create an account with Nexon – a popular video game publisher specialized in online games for PC and mobile. The issue is not specific to a certain Windows version and it’s confirmed to occur with multiple web browsers. Based on our investigations, there are a couple of error code variations of this issue:

  • Error 2024/1901
  • Error 2024/1902
  • Error 2024/1903
A system error has occurred. Please try again later (error 2024/1903).

What is causing the “A system error has occurred. Please try again later (error 2024/1903)”  error?

We investigated this particular issue by looking at various user reports and the strategies that they used to either repair or circumvent the issue. Based on what we discovered, there are several common scenarios in which this particular error is reported to occur:

  • Nexon system has flagged you for multiple accounts – As some users have reported, this issue might occur if your IP has a history of shady practices (hacking, scamming, etc) on Nexon servers. Some affected users have reported that they were able to circumvent this problem by opening an incognito window (in Chrome).
  • VPN/Proxy service is interfering with the registration process – Nexon also mentions this in their official documentation, but a lot of affected users have managed to resolved this and complete the registration process after disabling their VPN/Proxy service.
  • Host file contains a blocked advertisement used by Nexon – This particular issue might occur if you have the habit of maintaining a hosts file with blocked advertisements and tracking URLs. Other users in a similar situation have only managed to resolve the problem after deleting the hosts file or forcing the os to create a new one.

If you’re currently struggling to get around the “A system error has occurred. Please try again later (error 2024/1903)” issue, this article will provide you with several troubleshooting guides. Down below, you’ll find a collection of methods that other users in a similar situation have used to get the issue resolved.

The methods below are ordered by efficiency and severity, so the best approach is to follow them in the order that they are presented.

Method 1: Using Incognito Mode

Several users that have been encountering this issue on Google Chrome have reported that the “A system error has occurred. Please try again later (error 2024/1903)” error message was no longer occurring while in Incognito mode. Some affected users have managed to create and update their Nexon account after opening the registration Window from an Incognito window. To open an Incognito Mode in Google Chrome, click the action button (three dot icon) and choose New Incognito window.

Opening an Incognito window in Google Chrome

If you can create and update your Nexon account from an Incognito window, it usually means that there’s a problem with your browser (3rd party interference or a browser extension)

If this method was not effective or you’re looking to get to the bottom of this issue, move down to the next method below.

Method 2: Disabling Adblock (if applicable)

If you have an Adblock client currently installed of your system, you might want to try and disable it to see if the issue is still occurring. As several users have reported, the  “A system error has occurred. Please try again later (error 2024/1903)” might occur if your adblocking solutions end up blocking the tracking cookies of Nexon.

If you’re using an Adblock extension, navigate to your extension tab (this depends on your browser) and disable Adblock.  On Chrome, you can do this by typing “chrome://extensions/” in the navigation bar and then disabling the toggle associated with Adblock.

Removing or disabling Adblock

If you have a different browser, search online for specific steps.

In case this method is not applicable or you’re looking for a different approach, move down to the next method below.

Method 3: Disabling Proxy or VPN service (if applicable)

Another potential cause that will trigger the  “A system error has occurred. Please try again later (error 2024/1903)” error is a VPN or Proxy service. This is also mentioned in the official Nexon documentation, but several users have also reported that they managed to resolve the issue after disabling their VPN/Proxy service.

Now, these things come in many shapes and sizes, so the steps of disabling a client will be particular to the service you’re using. But chances are if you managed to get a VPN or Proxy service set up, you will be able to disable it even more easily.

After you disable your VPN/Proxy server, visit the same Nexon registration page and see if the issue is still occurring. If you still have the same problem, move down to the next method below.

Method 4: Using a different browser

Several users have reported that they successfully managed to circumvent the issue by using a different browser. Since the issue mostly occurs on Google Chrome, trying to access the same registration page from a different browser might prove to be the quickest method out of the bunch.

Try using Firefox, Edge or even Internet Explorer and see if the issue is still occurring.

If you’re still encountering the “A system error has occurred. Please try again later (error 2024/1903)” error, move down to the next method below.

Method 5: Renaming hosts file in System 32

As several users have reported, this issue might also occur if you’re maintaining a host file with blocked advertisements and tracking URLs. Nexon (as to any of their competitors) will use Iovation (or a similar service) to protect against cyber fraud.  If you’re actively maintaining a host file with blocked URL, your machine might be flagged for suspected fraudulent activity.

Users in a similar situation have reported that they managed to resolve the issue by navigating to C:\Windows\System32\drivers\etc and renaming the hosts file. This procedure will force your OS to create a new one and forget all the blocked URLs from the old one.

To do this, simply right-click on the hosts’ file and choose Rename. After you provide administrative privileges, name the file to something different.

Renaming the hosts file

Once the hosts file has been renamed, restart your computer and see if the issue is resolved at the next startup.

The post Fix: A System Error Has Occurred. Please Try Again Later (Error 2024/1903) appeared first on Appuals.com.


Fix: Fallout 76 Power Armor Glitch

$
0
0

Fallout 76 players may experience a glitch that renders them stuck inside their power armor, unable to exit it no matter what. On top of this, the character becomes naked and distorted. Even more, the affected users have no way of exiting the armor normally. This is not a platform exclusive bug as it’s reported to occur on PC, Xbox One and PS4.

Power Armor Glitch in Fallout 76

What is causing the “Fallout 76 power armor glitch” issue?

One of the biggest reasons why Fallout 76 undersold as severely as it did is because of the plethora of glitches & bugs that make the game feel unfinished and untested. Bethesda already released several major bug-fix patches but so far this particular glitch remains unattended.

The worrying thing about this one is that it’s actually a recurring problem from Fallout 4. Under heavy pressure from the players, Bethesda acknowledged the problem and even wrote some guidelines on how to get around it (we’ll get to them & a few other approaches down below)

If you’re suffering from the same glitch and you’re desperately struggling to get out of your power armor, this article will help you do it. Below you have a collection of methods (recommended by Bethesda & discovered by other users) that a lot of Fallout 76 players have used to get around this glitch.

In the event that you rage quit Fallout 76 cause of this, follow one of the methods below to resolve the issue and get back into the game.

Method 1: Exiting  & logging back into your Character

Some users have reported that in their case, the issue was as simple as exiting the game and then logging back into your character. As a lot of users have reported, this has a high chance to work, but only if your Power Armor Frame is not equipped from your character’s inventory.

Power armor frame is missing from inventory

If you have the power armor rame equipped, go over to the Apparel tab in your Pip-boy and unequip all the pieces of your Power Armour (Shoulder, Helm, Body, etc.). Next, log out of your character and close the game. After 2-3 minutes, log back in and see if the error has been resolved.

In the event that you’re still encountering the same glitch, move down to the next method below.

Method 2: Getting out of the power armor permanently

The following method is a user-discovered permanent fix that will allow you to get your character out of the power armor glitch. It involves equipping at least one piece of the power weapon (other than the chassis), removing all but one of your fusion cores and draining the battery on your fusion core until it’s completely empty.

This particular method is confirmed to work by a lot of users that were actually suffering from the same glitch. All affected users have reported that they haven’t had any issues getting in & out of the power armor after following the steps below.

Here’s a quick guide through the whole thing :

  1. Start by removing all Excess Fusion Cores from your Inventory. Put them in a stash box, trade them to a friend or simply drop them if you don’t care. So, by the end of this process, you should only be left with one Power Core (the one that you’re actively using on your Power Armour).
    Trading all fusion cores
  2. Remove all your Power Armour pieces from your Power Armour chassis. To do this, open up your Pip-boy, go to the Apparel tab and deselect all armor pieces items from the chassis.
    Deselecting all Armour Pieces
  3. The next step and the most time-consuming one is to completely drain the last power core that is used by your Power Armor.  You can get this done by moving around and doing attacks with a melee weapon.  You can speed up the process considerably by walking around and doing power attacks with a two-handed weapon.
  4. After you’ve completely drained your fusion core, the next crucial step is to die. Feel free to get creative here – ask a friend to kill you or find some enemies that will do the job for you.
  5. Now to the most important part. When you finally manage to die, do not (under any circumstances) click the Respawn button. Instead, close the application entirely – Exit to your dashboard and close the application from the console or close the Game’s executable via Task Manager on PC.
    Closing the Fallout 76 application
  6. Once the game is completely closed out, go ahead and re-open the Fallout 76 application. Once you are logged in with your character, you will be able to exit your power armor normally and equip other sets whenever necessary.

The post Fix: Fallout 76 Power Armor Glitch appeared first on Appuals.com.

Fix: Windows Resource Protection Found Corrupt Files but was Unable to Fix

$
0
0

Running an SFC (System File Checker) scan is pretty straightforward for the most part, but what do you do if you encounter the following error message at the end of it: “Windows Resource Protection found corrupt files but was unable to fix some of them“? Several Windows users have been unsure of what to do next after the System File Checker utility has been unable to resolve the issue for them.

Windows Resource Protection found corrupt files but was unable to fix some of them.

What is System File Checker?

System File Checker is a well-regarded Microsoft Windows utility that allows users to identify and repair Windows system files. This utility has been around since Windows 98 and is still being shipped to all the latest Windows versions.

In Windows Vista, Windows 7 and Windows 10, the SFC (System File Checker) utility is integrated with Windows Resource Protection (WRP). This provides enhanced protection for registry keys, folders, and critical system files.

What causes the “Windows Resource Protection found corrupt files but was unable to fix some of them” error?

We investigated this particular error message by looking at various user reports and the repair strategies that they followed through with in order to resolve the error message. Based on our findings, there are several  common scenarios that are known to force the System File Checker to throw this particular error message:

  • False positive – There are a lot of reasons why the System File Checker scan will report a false positive.  A common false positive is Nvidia’s opendll.dll file which the SFC might flag even in those instances where the file is not corrupt. In this case, a DISM scan will determine whether the flagged file is indeed corrupted or not.
  • 3rd party interference – This particular error can also occur if an installed application is interfering with the SFC (System File Checker) scan. Most that have been through this particular scenario reported that the SFC scan concluded without errors when they ran it during a clean boot.
  • Irregular system file corruption – There are cases where this error occurs due to a degree of corruption that cannot be recovered using the default  Windows utilities (SFC and DISM). In this case, the only solution is to install/reinstall the os files.

If you’re currently looking for some ways to resolve the corrupted files that have been fixed/replaced by System File Checker, this article will provide you with several verified repair strategies. Down below, you’ll discover a suite of methods that other users in a similar situation have used to eliminate corrupted system files.

To keep the whole ordeal as efficient as possible, we advise you to follow the methods below in the order that they are presented. You should eventually stumble upon a fix that will resolve the issue in your particular scenario.

Method 1: Using DISM to fix corrupt files

Chances are you already know that the next step when the SFC utility is unable to resolve the problem is to use the DISM (Deployment Image Servicing and Management) utility to repair the Windows image. DISM has been around since Windows Vista and is generally considered the superior utility when it comes to finding & resolving system file corruption conflicts.

While the SFC scan replaces corrupted files with locally stored copies (which can also become corrupted), DISM uses the Windows Update component to get the job done. Of course, this means that you’ll need to ensure that you have a steady internet connection before running a scan.

There are multiple scan parameters that can be used with DISM. But for the sake of keeping things simple, we will use RestoreHealth – a command which will automatically scan the Windows Image for any corruption and perform any necessary repair automatically. Here’s what you need to do:

  1. Press Windows key + R to open up a Run dialog box. Then, type “cmd” and press Ctrl + Shift + Esc to open up an elevated Command Prompt. When prompted by the UAC (User Account Control), click Yes to grant administrative privileges.
    Opening Command Prompt via Run dialog box
  2. Inside the elevated Command prompt,  type the following command and press Enter to initiate a DISM scan with the Restore Health option:
    DISM /Online /Cleanup-Image /RestoreHealth
  3. Wait for the process to complete. Depending on your PC configuration, it might take less or more than one hour.
    Note: Do not close this window before the procedure is complete. Keep in mind that the DISM scan has a tendency of getting stuck when it gets around 30%. But do not close the window as it’s normal behavior – the progression will resume after a couple of minutes.
  4. If the process completes and you get a message saying that the file corruption was resolved, restart your computer and run an SFC scan at the next startup to see if the issue has been resolved.

If you’re still encountering the “Windows Resource Protection found corrupt files but was unable to fix some of them” error when running the SFC scan, move down to the next method below.

Method 2: Removing remnants of a 3rd party Antivirus software (if applicable)

As a couple of users have suggested, the  SFC error could also occur as a result of a false positive. Most commonly, remnants from a poorly uninstalled antivirus/security solution will set the grounds for an occurence of this kind. Most of the time, affected users point toward Avast and McAfee as being responsible for this particular issue.

Keep in mind that the steps of removing remnant from a manually deleted AV are not that simple. Most AV solutions will have a dedicated uninstaller – finding the one applicable to your version is not always easy.

Fortunately,  we have created a detailed article that will help you completely uninstall your security program regardless of your 3-rd party AV – follow this article (here) to identify the remnant files and remove them from your system.

Once the remnant antivirus files have been removed, restart your computer and run the SFC scan again at the next startup. If you’re still seeing the “Windows Resource Protection found corrupt files but was unable to fix some of them” error at the end of the scan, move over to the next method below.

Method 3: Perform an SFC/DISM scan in a clean boot state

If the two methods above didn’t eliminate the SFC error, it’s very likely that the issue is caused by one of the following factors – It’s either an issue caused by an interfering 3rd party application or you’re dealing with an unrecoverable system file error that SFC and DISM couldn’t make sense of.

In this method, we are going to cover the scenario where the error is caused by an interfering 3-rd party application that is roadblocking the System File Checker utility. We are going to ensure that there’s no 3-rd party interference by performing a clean boot and running the two utilities above once again.

Note: If you’re in a hurry and can’t afford to spend a couple of hours repeating the methods above in a clean boot state, move directly to Method 4.  But keep in mind that the next method is a little more intrusive and will make you lose some user preferences at the least (depending on which operation you choose).

A clean boot will start your computer with a minimal set of drivers and startup programs. This will help us figure out if a background program, driver, service or 3rd party program is interfering with the SFC scan.

Here’s a quick guide on how to perform a clean boot and check if any third party applications are causing the issue:

  1. Press Windows key + R to open up a Run dialog box. Then, type “msconfig” and press Enter to open up the System Configuration screen. If you’re prompted by UAC ( User Account Control), choose Yes to grant administrative privileges.
    Run dialog: msconfig
    Run dialog: msconfig
  2. Inside the System Configuration window, go to the General tab and choose Selective startup. Under Selective startup, make sure that you uncheck the box associated with Load Startup items.
    Preventing Startup Items from loading
  3. Next, move over to the Services tab and check the box associated with Hide all Microsoft services. Then, click on the Disable all button to ensure that any 3rd party services are prevented from running at the next startup.
    Disabling all non-Microsoft startup items
  4.  Click Apply to save the current boot configuration and comply if you’re prompted to restart your machine. If not, do it manually.
  5. Once your computer restarts in a clean boot state, press Windows key + R to open up another Run dialog box. Then, type “cmd” and press Ctrl + Shift + Enter to open up an elevated Command Prompt.
    Opening Command Prompt via Run dialog box
  6. Inside the elevated Command Prompt, type the following command and press Enter to initiate another DISM scan:
    DISM.exe /Online /Cleanup-image /Restorehealth

    Note: This command uses Windows Update to provide the files required to fix the corrupted data. Because of this, you need to ensure that you have a stable internet connection.

  7. Once the process is complete, don’t close the elevated Command Prompt. Instead, type the following command and press Enter to trigger an SFC scan and see if the error is no longer occurring:
    sfc /scannow

In the event that the two scans (SFC and DISM) where hindered by a 3rd application service, the  “Windows Resource Protection found corrupt files but was unable to fix some of them” error will no longer occur.

However, if the error is still occurring, it’s clear that your system is suffering from a kind of system file corruption that can’t be fixed conventionally. In this case, move over to the final method below to replace all Windows components and resolve the issue.

Method 4: Performing a repair install

If you’ve come this far without a result, there are two procedures that will most likely get the issue resolved:

  • Clean install – This procedure will essentially override all the other content on your Windows installation driver.  On top of removing all the data related to your operating system, you will also lose any personal files & personal preferences (photos, images, music, applications, user preferences, etc.)
  • Repair install – This is a different kind of installation process in which the setup will essentially reinstall the same build over the existing operating system installation. This approach is way less destructive since it will allow you to preserve all your personal files, user settings, and any installed application.

Regardless of which way you end up choosing, we’ve got you covered. If you want to keep your personal files and limit the damage as much as possible, follow this article (here) to perform a repair install. In case you want to start fresh, follow this article (here) to perform a clean install.

The post Fix: Windows Resource Protection Found Corrupt Files but was Unable to Fix appeared first on Appuals.com.

Fix: Spotify Error Code 7

$
0
0

Spotify is a digital music service which allows users to access millions of songs; new and old alike. It has cross-platform compatibility i.e. Android, Windows, and Mac OS. When trying to login to Spotify, users may be directed to Error Code 7 “SERVICIO ESTA TEMPORALMENTE NO DISPONIBLE, POR FAVOR INTÉNTALO DE NUEVO MAS TARDE”  which simply means Service is Temporarily Not Available.

Spotify Error Code 7

The error code 7 in Spotify occurs in almost all the platforms and is usually an indication that there is a problem with your network settings or there are some misconfigurations with your network in Windows. In this article, we will go through all the possible workarounds to fix this problem starting from the easiest fixes.

What causes Spotify Error Code 7 ‘Service Not Available’?

Spotify keeps into account the copyrights of the songs it allows you to stream. So because of it this, like Netflix, its applications also make use of extensive mechanisms in your device and if even one of them is in an error state or in a conflict, you will receive the error. Here are some of the culprits which might be involved:

  • Browser data and cookies: If you are accessing Spotify using your browser (whether in Mac or Windows) and there is bad data stored, you can receive the error code.
  • Account problems: We also came across cases where the login module was in a bug state and a simple re-login fixed the issue instantly.
  • Proxy servers: Your network might involve proxy servers to work. This behavior is usually seen at organizations and it doesn’t seem to work well with Spotify.
  • VPNs: Virtual Private Networks work as tunnels in the network people use them to browser content which is otherwise not available in their country. VPNs can also cause issues with Spotify as the application doesn’t work until certain parameters are fulfilled.
  • Router: Since this error message is primarily related to the network, it is possible that your router is in an error state and not transmitting the network as it should.
  • Spotify is Down

Before we move on to the solutions, make sure that you are logged in as an administrator. Start from the first solution and work your way down accordingly.

Solution 1: Disabling Proxy Servers and VPN

VPNs and Proxy servers give flexibility to internet users. They can be used within an organization or for your personal use. After looking at several cases, we concluded that VPN and Proxy servers do indeed hinder Spotify. Some proxy servers are known to block several services by default (especially in organizations).

  1. Press Windows + R, type “inetcpl.cpl” in the dialogue box and press Enter.
  2. Now Internet Properties will be opened. Click on the tab Connections and then LAN settings.
    LAN Settings
  3. Now if you are using a proxy server, the field will be checked with the details inside. Uncheck any proxy servers if enabled. Now restart the application/webpage and check if the issue is resolved.
    Disabling Proxy Servers

If you are using a proxy server on your mobile when opening the Spotify application, make sure that you disable it. Same goes for VPNs. Disable every VPN from your computer and make sure that you connected to an open network. Internet connections in hospitals and organizations are not considered open as they always have some domains which are not accessible by the users.

Disabling VPNs

Solution 2: Restarting your Router

Routers are known to get into error configurations and don’t broadcast the network properly. These error states might occur independently or may occur due to some external event in the network. A simple restart of your router instantly reinitializes your temporary configurations and force the device to fetch new ones.

  1. Take out the main power cable of the router from the socket.
  2. Now, wait for around 3-5 minutes to make sure all the power has been drained completely.
  3. After the time has elapsed, re-plug everything back and then wait a few minutes so the network is broadcasting again properly.
  4. Now check the application in your computer/mobile and see if you can load the songs properly.

Solution 3: Relogging into your Account

Accounts problems are very common and can occur every now and then. Account mechanisms are somewhat complex as they need to keep track of your active activity as well as make sure that it knows the number of devices from which the account is logged in from. Further synchronization is needed as well. If any of these modules stop working properly, Spotify might get in an error state and display a network error message.

If you are using the mobile application, navigate to Your library tab present at the bottom left and then click Log Out when prompted.

Logging out from Spotify for Android

Similar steps go for the Desktop application. Click on the downward arrow present on the taskbar towards the right and select Logout.

Logging out from Desktop Application

After you have logged out properly, re-enter your credentials and check if you are able to stream Spotify properly.

Note: You can also try signing out from all devices and see if this works.

Solution 4: Checking Spotify Services Status

Spotify might be one of the world’s largest online audio platforms but it doesn’t mean that it is doesn’t experience a little downtime every now and then. Downtimes are times when you cannot connect to some specific services or servers because either maintenance is underway or some issue has occurred at the server side.

Spotify Server Status

You can check several third-party websites and see if Spotify is down indeed. If you see a spike in the number of reports, it probably means that there is some issue. This will usually get fixed within a short period of time. If the platform is down, come back later after a while and try again.

Solution 5: Clearing Browsing Data

If you are using Spotify website for streaming, it is possible that the browser has some bad data stored in your computer. This happens with browsers all the time and is perfectly normal. You need to clear your entire browsing data and see if this brings any improvement to the situation.

  1. Press Ctrl + Shift + Del from your keyboard while Chrome is opened.
  2. Select the tab of Advanced, select the time range as All time. Check all the items and click Clear data.
    Clearing Browsing Data – Chrome
  1. Restart your computer properly and open Chrome. Try accessing the website and check if the issue is fixed completely.

The method above is of Google Chrome in Windows OS. You perform similar steps for Mac OS as well.

You can also open a terminal in Mac or Ubuntu and type the following command after clearing your browsers.

sudo dscacheutil –flushcache

Note: You can also try another workaround where the custom DNS server is removed from the computer so it can choose its own DNS server based solely on the network architecture.

The post Fix: Spotify Error Code 7 appeared first on Appuals.com.

Fix: Windows Update Error 0x80070663

$
0
0

The error code 0x80070663 often appears when your Windows 10 fails to install the released updates for your Microsoft Office 2013 or 2016. This can be due to the corrupt installation of Microsoft Office, while at times, the Windows update service can also be held accountable. As we all know, Windows updates usually offer better security and stability along with updates for the Microsoft related software on your system, for example, Microsoft Office.

Windows Update Error 0x80070663

Unfortunately, you will have to go through some ordeals in order to get the update installed on your system. Although update related issues are generic, they can be dealt with pretty easily. Same is the case here, you will just have to implement a few simple solutions to get around the issue.

What causes the Windows Update Error 0x80070663 on Windows 10?

The factors responsible for the emergence of Window update error 0x80070663 are mentioned down below —

  • Corrupt Office Installation: The error code can sometimes be triggered due to the corruption of your Microsoft Office installation. In such scenarios, you will have to repair it from Windows apps and features panel.
  • Windows Update Service: The Windows Update service is responsible for updating your system. In case it is not running, you will be facing many update related issues such as this one.

To annihilate the issue, you can implement the solutions given down below.

Solution 1: Repair Office Installation

As we have mentioned above, the major cause of the error code is the corruption of your Microsoft Office installation. Such a problem can be easily be dealt with and there’s nothing to worry about. You will just have to repair the installation using the steps given down below:

  1. Press Windows Key + X and click Apps and Features at the top of the list.
  2. Once the window pops up, search for Microsoft Office by either typing in the search bar or going through the list.
  3. Once you have located it, highlight it and then click Modify.
  4. Go for a Quick Repair first and see if it isolates the issue. If it doesn’t, attempt an Online Repair next. Online Repair will take a bit longer so make sure to have the patience.
    Repairing Office
  5. Run the update again.

Solution 2: Check Windows Update Service

Another potential factor of the error code is the Window Update service. Like we mentioned, this service needs to be running in order to install the updates on your system. In case it is stopped, you will face an update error either during the installation or downloading process. Thus, make sure the service is running by doing the following:

  1. Press Windows Key + R to open the Run dialog box.
  2. Type in ‘services.msc’ and press Enter.
  3. From the list of services, locate the Windows Update service.
  4. Double-click it to open Properties.
  5. If the service status says stopped, click Start to initiate the service.
    Starting Windows Update Service
  6. Try running the update again.

Solution 3: Installing the Update Manually

In some cases, if your Windows update fails with an error code, you can isolate the issue by downloading and installing the update manually. To do this, you will need the KB code of the update that you are trying to install. This can be found in the Windows update error message. Once you have the KB code, do the following to install the update manually:

  1. Open up your browser and head to Microsoft Update Catalog website.
  2. There, search for the update you want to install by typing in the KB code.
  3. Download the update for your system’s architecture (x86 or x64).
    Microsoft Update Catalog Search Results
  4. Once you have it, just run the file to install the update.

The post Fix: Windows Update Error 0x80070663 appeared first on Appuals.com.

Fix: Windows 10 Activation Error 0xc03f6506

$
0
0

The error 0xc03f6506 appears when you are trying to upgrade Windows 10 Professional from your Windows 10 Home. To upgrade your system to Windows 10 Professional, you have to enter a valid license key that will upgrade your system to Windows 10 Pro after a restart. However, sometimes, Windows might not accept the license key you are trying to enter and put forth an error code like 0xc03f6506. This can be due to various reasons such as the key has already been used on another computer, your network connection etc.

Activation Error 0xc03f6506

You can easily circumvent the issue by implementing a few solutions given below. Also, it is important to note that the error code doesn’t mean that your key is lost as long as it is valid. You will just have to activate your Windows using ‘not so generic’ methods.

What causes the Windows 10 Activation Error 0xc03f6506?

The factors that cause this error code can vary, however, usually, they are due to the following reasons —

  • Used License Key: Well, according to Windows license terms, you are allowed to use a valid key on only one computer. Thus, if you already used the license key on another system, you won’t be able to use it on another unless removed from the other.
  • Windows Activation Servers: In some cases, the Windows Activation Servers are overloaded or not operating properly due to which you are not able to use the license key. In such a case, you can use alternate methods to use your key.

Now to get you back on the road, you can try the solutions given down below to isolate the issue.

Solution 1: Upgrade using the Command Prompt

If you are not able to use the license key to upgrade to Windows 10 Pro, you can try to do it using the Command Prompt. To do this, you will need a Windows bootable media. Once you have that, follow the steps given down below:

  1. Insert the Windows bootable media.
  2. Press Windows Key + X and select Command Prompt (Admin) from the list to open an elevated command prompt.
  3. Once the command prompt enters, type in the volume alphabet (for example E:) of the removable device to switch to it.
  4. Afterward, type in the following command and hit Enter:
    setup.exe /auto upgrade /pkey xxxxx-xxxxx-xxxxx-xxxxx-xxxxx
    Upgrading Using Installation Media
  5. If your license key doesn’t work, try using the generic key (VK7JG-NPHTM-C97JM-9MPGT-3V66T) to upgrade to Windows 10 Pro.
  6. Once it upgrades to Windows 10 Pro, activate it using your key.

Solution 2: Using the Windows Registry

You can also try to tackle the issue by modifying a few entries in the Windows Registry. These modifications will help you to upgrade to Windows 10 Pro. We will change the entries of CurrentVersion and change the EditionID. Here’s how to do it:

  1. Press Windows Key + R to open up Run.
  2. Type in ‘regedit’ and then press Enter.
  3. Navigate to the following directory by pasting the path in the address bar:
    HKEY_LOCAL_MACHINE\SOFTWARE\Microsoft\Windows NT\CurrentVersion
  4. On the right-hand side, locate EditionID and double-click it. Change the value to Windows 10 Professional.
    Changing EditionID Value
  5. Change the value of ProductName to Windows 10 Professional as well.
    Changing ProductName Value
  6. Afterward, navigate to the following directory:
    HKEY_LOCAL_MACHINE\SOFTWARE\WOW6432Node\Microsoft\Windows NT\CurrentVersion
  7. Change the value of the same keys mentioned in step 5 and 6 there as well.
  8. Close Windows Registry.
  9. Press Windows Key + I to open Settings.
  10. Go to Update and security.
    Windows Settings
  11. Change the product key to the generic key VK7JG-NPHTM-C97JM-9MPGT-3V66T.
  12. It will upgrade to Windows 10 Professional after reboot.
  13. If the generic key doesn’t work, try entering your own valid key.

Solution 3: Disabling Network Adapter

Finally, you can also try to use the license key by disabling your network adapter. In some cases, using license keys while disconnected from the internet can isolate many issues. Here’s how to do it:

  1. Press Windows Key + I to open Settings.
  2. Go to Network & Internet and click ‘Change adapter options’.
    Network & Internet Settings
  3. Right-click on your network adapter and click Disable.
  4. Once disabled, try using the key again.

The post Fix: Windows 10 Activation Error 0xc03f6506 appeared first on Appuals.com.

Fix: iTunes Error 13014

$
0
0

Lately, we’ve seen many reports with Windows users encountering the Error 13014 when trying to open iTunes or when trying to perform a specific action. This particular error message seems to occur with multiple iTunes builds and on all the latest Windows versions (Windows 7, Windows 8.1 and particularly on Windows 10).

iTunes error 13014

What is causing iTunes error 13014?

We investigated this particular issue by looking at various user reports and the repair strategies that some affected users deployed to get the issue resolved. Based on our findings, there are several common scenarios  that will trigger this particular error code:

  • Corrupted iTunes files – As it turns out, some files from the iTunes installation might become corrupted and trigger the 13014 error. Apple has already addressed most of the bugs with hotfixes, but they won’t do much good if your installation is corrupted. In this case, the viable fix is to uninstall all iTunes components from your computer and reinstall the latest iTunes version.
  • 3rd party security interference – It’s a well-known fact that a lot of 3rd party security suites will hinder iTunes from some functionality. Several users struggling to resolve the same error message have reported that the issue was no longer occurring after they installed their 3rd party security solution.
  • Genius feature is triggering the error – Although the idea of using collective intelligence Playlists is great, there are a lot of signs that point towards Genius as being responsible for a lot of 13014 errors. Users struggling to resolve this particular issue have reported that they managed to fix the problem by either disabling Genius or deleting a collection of library files belonging to it,

If you’re currently struggling to resolve this particular error code, this article will provide you with several troubleshooting steps that other users in a similar situation have used successfully. Follow the methods down below in the order that they are presented. One of them is bound to resolve the 13014 error and allow you to use iTunes normally.

Method 1: Installing the latest iTunes version

One of the first things that you should try when encountering this particular issue is to make sure the latest version is installed. But don’t be contempt with using the built-in update function to check if you have the latest version. Some of iTunes files might have become corrupted, so an update might not be enough to resolve the issue.

In this case, it’s preferable that you take the time to remove all iTunes components completely from your computer and install the latest version from scratch. Here’s how to do this:

  1. Press Windows key + R to open up a Run dialog box. Then, type “appwiz.cpl” and press Enter to open Programs and Features.
    Type appwiz.cpl and Press Enter to Open Installed Programs List
  2. Inside the Programs and Features window, scroll down to the list of applications and locate iTunes. Then, right-click on it and choose Uninstall to get rid of every file belonging to the suite.
    Uninstalling iTunes
  3. Restart your computer once the uninstallation is complete.
  4. At the next startup, visit this link (here) and hit the Download button to install the latest version of iTunes. Then, press Get to let the Windows Store take care of the installation.
    Downloading the latest version of iTunes

    Note: Download this version instead (here) if you’re not on Windows 10.

  5. When the installation is complete, open the Itunes application and see if the issue is still occurring.
    Launching iTunes

If you’re still encountering the Error 13014, move down to the next method below.

Method 2: Removing Antivirus or firewall (if applicable)

If you’re relying on a 3rd party security suite to protect against malware, uninstall it might be the only fix you need to apply. There are a lot of reports with users signaling that the issue was resolved after they uninstalled the external antivirus or firewall and switched back to Windows Defender.

As it turns out, your AV/firewall might end up some outgoing connections with Apple servers, which ends up breaking the iTunes app.  And keep in mind that disabling real-time protection is not enough to resolve the issue since the same security rules will still remain in place. You’ll need to remove the 3rd party security suite and ensure that there is no remnant file that will recreate the old behavior.

To make the whole process easier for you, we have created a guide that will help you remove your AV + any remnant files from your system. Follow the instructions (here).

If you’re still encountering this issue or this method was not applicable to your particular scenario, move down to the next method below.

Method 3: Getting rid of Genius

Genius is one of the highlights of the iTunes app, but it turns out that it has the potential of breaking a lot of things.  We have managed to find some irrefutable evidence that the Genius feature will sometimes trigger the 13014 error (in the event that Genius is enabled).

If you’re encountering the 13014 error when performing a different action than starting iTunes, try disabling Genius from iTunes directly. To do this, go to File > Library and click on Turn Off Genius.

Disabling Genius from the iTunes app

If you’re encountering the error when trying to start iTunes, open your iTunes library folder and delete the following two files:

  • iTunes Library Genius.itdb
  • iTunes Library Genius.itdb-journal

Once the two files have been deleted, restart iTunes and see if the issue has been resolved.

The post Fix: iTunes Error 13014 appeared first on Appuals.com.

Fix: Fallout 76 Friends List Not Working Glitch

$
0
0

There’s an annoying Fallout 76 bug that prevents affected users from adding friends to their sessions. This has the potential to be super game-breaking for some, considering the fact that the game was marketed around the ability to play it co-op from start to finish. As it turns out, players that are suffering from this problem will appear offline inside the game when their friends are trying to send them an invite.

Friends List not Working in Fallout 76

What is causing the Fallout 76 Friends List Not Working Glitch?

Bethesda had to deal with a lot of game-breaking glitches in the first month following the launch, so you can imagine why this one wasn’t actually a priority.

We investigated this particular issue by looking at various user reports and the repair strategies that they used to get the issue resolved.  As it turns out, there are multiple common scenarios that might trigger this particular problem (some of them are issues that are well within your control):

  • In game menu joining is broken – There are a lot of reports with this problem occurring on a consistent matter when a player tries to invite another player from the in-game menu. A successful workaround to avoid this issue is to invite from the Main Menu (before the game session is created).
  • Connection to your friend is glitched – If you have the same issue even when trying to invite or join an existing session from the Main menu screen, it’s likely that you’ll need to enlist 3rd party help in order to play with your friend.
  • Glitched Gamertag / PSN ID – A couple of users have managed to resolve this issue by power cycling their console. Some speculate that this method is effective because any cached data related to your PSN / Xbox Live account will get cleared in this process.
  •  Your friend is not added to Favorites / Custom List – Although this shoudn’t be a requirement, several users have reported that the issue was no longer occurring after they added their co-op partner on the Favorites list (Xbox One) or to a Custom List (PlayStation 4).
  • NAT is not opened – Another fairly common reason that will trigger this particular issue is an instance while one (or both) of the involved parties have a closed NAT. In this case, the solution is to open the required ports manually or to simply enable UPnP.
  • You / Your friend is blocked from the Friend List – This might happen accidentally or you might be the victim of yet another notorious Fallout 76 bug that ends up randomly blocking people in your Friend List. If you can’t unblock them from Fallout 76, you’ll need to install a different game on Steam (with multiplayer components) and remove him from the blocking list.

If you are prevented from playing Fallout 76 with your friends, this article will provide you with some methods that will help you get around this major inconvenience. Down below, you’ll discover several workarounds that other users in a similar situation have used to get the issue resolved.

For the best results, follow the methods below in the order that they are presented as we ordered them by efficiency and severity. You should eventually encounter a fix that resolves the problem in your particular scenario.

Method 1: Joining/Inviting from the main menu

If you’re looking for a quick fix that will allow you to jump into your friend’s games, one solution would be to try and join the session from the Social tab in the Main menu of the game. This approach has been effective for a lot of PC users that have been unable to join any sessions from the In-game menu.

So, to utilize this fix, simply exit your game session and return to the Main Menu. Once you get there, go to the Social tab, then move over to the Friend list (right corner) and join the existing session.

Joining an existing Fallout 76 session from the Social tab (Main menu)

Use the Friends or Team tab to find the session that you’re trying to join, then double-click on the session to join.

If this method isn’t applicable to your particular scenario, move over to the next method below.

Method 2: The random guy method

One awkward but effective fixed that has been used successfully by a lot of users is to convince a third party player to add you and your friend to their friend list and then add the both of you to a group. After that, you will be able to add your friend to your friend list.

Asking random people to help you on Fallout 76

This might sound a little complicated, but it’s really simple if you can get past the awkwardness. Here’s what you need to do:

  1. Walk around the map and find a random guy that hasn’t added either you and your friend to his friend list yet.
    Note: It’s very important that he didn’t add you to their friend list before. Otherwise, his friend list might glitch out also.
  2. Explain your situation and ask him to add both of you to his friend list and then to his team.
  3. Once both of you are on the same team, you will be able to add each other again (to the Friend List).
  4. Create a session and invite your friend (or vice versa).

Note: This method is also effective in those cases where you accidentally blocked your friend or he ended up blocking you.

If you’re still having problems with your Friend’s List in Fallout 76, move down to the next method below.

Method 3: Power cycling your console (PlayStation 4 & Xbox One)

Several affected users have reported that the issue was resolved after they power cycled their consoles.  This step is a little different depending on your console of choice, but we created two separate guides. Follow the guidelines applicable to that console on which you’re encountering the issue on:

Power Cycling on Xbox One

  1. Press and hold the Xbox button on the front of the console for 10 seconds.
  2. Once the lights go off, unplug the console’s power cable from your power supply and wait for 10 seconds or more.
  3. Plug the power cable back in and start the console again by pressing the Xbox button again.
  4. Start Fallout 76 and see if the issue has been resolved.

Power Cycling on PlayStation

  1. Press the PS button on your controller to bring up the available Power options.
  2. Select the Turn Off the PS4 option. Do NOT enter into Rest Mode.
  3. Wait until the light goes out completely, then unplug the power cable and wait 10 seconds or more.
  4. Plug the power cable back on and press the PS button again to start it up.
  5. Run Fallout 76 again and see if the Friend List issue has been resolved.

If you’re still encountering an issue with your Friend’s List, move over to the next method below.

Method 4: Adding your friend to Favorites or Custom List (Playstation & Xbox One Only)

Another fairly popular fix for console players is to add their friends to a Custom List (PS4) or to Favorites (Xbox One).  Naturally, this workaround is only applicable to console players and the steps will be different depending on the platform on which you’re encountering the issue on.

With this in mind, follow the guidelines applicable to your console:

Adding your friend’s Gamertag to the Favorites List (Xbox One)

  1. Press the Xbox button on your controller.
  2. Make your way to the Profile section (left of the application tile).
  3. Select your friend’s profile, then choose to Add to Favorites.
  4. Restart Fallout 76 and see if the issue has been resolved.
Adding your Friend to the Favorites List on Xbox One

Adding your friend to a Custom List (PlayStation 4)

  1. On your Dashboard, select the Friends section from the function screen.
  2. Choose Custom List, then select Create List.
  3. Enter a name for your custom list, then select the friend that you’re trying to add.
  4. Choose to Create list, then restart Fallout 76 and see if your friend has become visible.
Creating a custom List with your Friend on PS4

Method 5: Ensuring that NAT is opened 

Most network connectivity issues are somehow related to your Network Address Translation (NAT). This is essentially a metric that will determine how easy it is for you to connect with other players. As you can imagine, the status of your NAT can also affect the ability to join and invite friends in Fallout 76.

There are a lot of ways to ensure that that the NAT is opened on your PC/console. But most of these require some manual work. Because of this, we are going to focus on a universal fix that will ensure that your NAT is open regardless of your platform or ISP – enabling Universal Plug and Play (UPnP).

When you enable UPnP, you’re essentially allowing your applications and games to forward ports automatically, so you don’t have to create them manually. Even better, UPnP is enabled at the router level, so the instructions below can be followed regardless of the platform that you’re encountering the issue on:

Note: Keep in mind that both you and the friends that you’re trying to play with need to ensure that they have UPnP enabled.

  1. Make sure your computer/console is connected to your router. Then, open your Internet web browser, type 192.168.0.1 or 192.168.1.1 and press Enter to open the settings page of your router/modem.
    Note: If these generic router addresses don’t work, search online for specific steps on how to access your router settings.
  2. Once you get to the login page, insert your credentials to move forward. With most manufacturers, the default username is “admin” and the default password is either “admin” or “1234”.
    Accessing your router settings

    Note: If the default credentials are different in your case, search for specific steps accord to your router model.

  3. Inside your router settings, look for the Advanced settings.  Then, go to the NAT Forwarding tab and look for a UPnP submenu. once you find it, make sure that it’s enabled.
    Enabling UPnP from your Router settings

    Note: These instructions were performed from a TP-Link router, so your screens might look different depending on your router/modem manufacturer. However, you should be able to enable the UPnP feature from the NAT Forwarding menu.

  4. Once you’ve enabled UPnP, restart both your router and the console/PC to force open the necessary ports.
  5. Open Fallout 76 and see if you’re still experiencing the Friend List glitch.

If the same problem is still occurring or UPnP is not supported by your router, move over to the next method below.

Method 6: Forwarding the required ports manually

If you’re working with an old router/modem that doesn’t know how to do UPnP, you’ll need to open some ports manually. Keep in mind that this method should only be followed if Method 2 was not applicable. It will end up accomplishing the same thing (opening NAT) but the steps will be done manually.

Here’s what you need to do:

  1. Open your browser and insert your router/modem IP address. Try the two defaults: 192.168.0.1 and 192.168.1.1.
    Note: 
    If the default IP addresses don’t work, press Windows key + R, type “cmd” and press Enter.  Inside the Command Prompt window, type “ipconfig” and press Enter to get an overview of your network connection. Then, scroll down to Default Gateway. That’s the address of your router/modem.
    Discovering the IP address of your router/modem
  2. At the login page of your router, use the default values to log in:
    Username: admin
    Password: admin or 1234
    Note: These are applicable with most router/modem manufacturers, but in case they don’t work for you, search online for the default login credentials of your networking device.
  3. Once you’re inside your router/modem settings, go to the advanced menu and look for an option called NAT Forwarding or Forwarding.
    Accessing the Forwarding tab
  4. Next, you need to open the ports required by Fallout 76 manually:
    TCP: 80
    TCP: 443
    UDP: 3000-3010
    Forwarding the required ports manually
  5. Once the required ports have been opened, restart both your router and your Console/Pc and see if the issue has been resolved by opening Fallout 76 and inviting/getting invited by a friend.

If the issue is still occurring, move down to the next method below.

Method 7: Unblocking your friend from your List (PC only)

We’ve noticed quite a few of occurrences where the reason why a player would not appear in another Friend List is that one of them was actually blocked by the other. This might have happened by accident or the result of a bug (yes, there was a bug that will end up blocking some of your friends in Fallout 76)

However, there is a Reddit thread full of people that have successfully managed to get around this issue by installing a different Game on Steam and removed your friend from the Block list. Most affected users have done this with Legends – a small game that will install in a matter of minutes.

Here’s what you need to do:

  1. Open your Steam client and download Legends (or a different game that is lightweight and has a multiplayer component).
  2. Launch the game and go to your friend list. You don’t have to start a New Game or anything.
  3. Go to the Blocked section and unblock your friend.
  4. Exit the game and open Fallout 76. Your blocked friend should become available inside the Friend List again.

The post Fix: Fallout 76 Friends List Not Working Glitch appeared first on Appuals.com.


Fix: Error 910 on Google Play ‘Cant install app’

$
0
0

The ‘Error Code 910‘ is typically encountered when the user tries to install, update or uninstall an app from Google Play Store on an Android device. This is typically known to occur if the user previously uninstalled preinstalled updates for the same app. The issue is mainly reported to occur on Lollipop (5.x), Marshmallow (6.x), Nougat and Oreo.

“Application” can’t be installed. ty again and if the problem continues, get help troubleshooting. (Error code: 910)

What is causing the ‘Error Code 910’ issue?

We managed to discover some of the most common causes that will trigger this particular issue. We’ve done this by looking at various user reports and the repair strategies that they used to get the issue resolved. Here’s a shortlist with common scenarios that have the chance of triggering this particular error message:

  • Corrupted data stuck in the Cache folder – It is confirmed that the issue can occur due to some badly cached data in the installation folder. Several users encountering this particular error code have managed to get it sorted by clearing the cache & application data of the Google Play Store app.
  • Glitched Google Account – This particular error can pop up if you’re dealing with a corrupted Google account. These things are known to happen with no apparent trigger. But luckily, you can rectify most issues related to your Google account by signing out & in of it.
  • Data present on the SD card is inaccessible – The frequency of this error code is much higher on Android devices that are using an SD card for extra memory. There’s no official explanation why this occurs, but some users speculate that it’s probably related to the fact that the SD card is formatted with a different file system. In this case, you will be able to resolve the issue by moving the app to the internal storage and update it while it’s there.
  • Corrupted Data on the SD card – There is a scenario where the error code is encountered because of corruption present on the SD card. Several affected users have managed to get this resolved by physically or virtually ejecting the SD card before trying to update the app.
  • Google Play Store is preventing the update to complete – Another possible reason that would trigger this error code is an incompatibility between your device model and the application. The Google Play Store is responsible for determining that, so you can probably get around this inconvenience by sideloading the app from an external APK website.
  • Blackberry Launcher doesn’t have admin privileges – This scenario is exclusive to Blackberry Priv devices running Android 6.0+. As it turns out, a system bug might cut the privileges of Blackberry Launcher whenever Google Pay is enabled on the device. In this case, you can resolve the issue by disabling the admin access of Google Pay and enabling the admin access of the Blackberry Launcher.
  • Severe App corruption – This scenario won’t occur unless you sideload the app, try to debugg it or interfeer with it’s files. But if you’ve done this and you are unable to update or install the application, the only way forward is to use the ADB utility to remove the application package manually.

If you’re struggling to find some troubleshooting steps that will resolve the ‘Error Code 910‘, this article will be of help. Down below, you’ll discover several verified methods that other users in a similar situation have successfully used to get the issue resolved.

We’ve arranged the potential fixes below by efficiency and severity. So if you’re looking for the most efficient approach, follow the methods below in the order that they are presented.

Method 1: Clearing the Cache of the Google Play Store

The following method is one of the most popular ways to resolve the ‘Error Code 910‘ on Android devices. If the issue occurs due to some badly cached data that ends up preventing the application to update, clearing the cached data of the Google Play Store application will fix the issue permanently.  The steps below were confirmed to be effective by a lot of users struggling to resolve the same error code:

Here’s how to clear the cached data of the Google Play Store application on an Android device:

Note: The Android realm encompasses is a highly fragmented market. Older Android versions look and behave differently, not to mention that you might be dealing with a customized ROM, depending on the manufacturer. Because of this, some steps might be slightly different than what you see on our screens. But you should have no problem replicating them on your device.

  1. On the home screen of your Android device, tap on the Settings menu. Inside the Settings menu, tap on Apps & notifications.
    Apps & notifications

    Note: If you’re not taken directly to the list of apps, also click on Apps or App List.

  2. Scroll through the list of apps and locate Google Play Store. Once you see it, tap on it open.
    Accessing the Google Play Store setting menu
  3. From the Info menu of Google Play Store, tap on Storage to reach the option about clearing data.
  4. Inside the Storage option, click on Clear Cache. Once the process is complete, follow through by clicking on Clear Data.
    Clearing the cached data of the Google Play Store app

    After you’ve cleared the data of Google Play Store, restart your computer and try to update or download the app that was causing the issue again.

If you’re still encountering the same error message (‘Error Code 910’), move down to the next method below.

Method 2:  Re-link your Google account

This procedure is one of the first ones mentioned by the official Google documentation when it comes to this particular error code. Even more, a lot of affected users have confirmed that signing in and out of their Google account resolved the issue and allowed them to install or update the application that was previously failing with the ‘Error Code 910’.

Here are the steps to remove your Google account from your device and re-add it in order to resolve the Error Code 910:

  1. On your Android phone, open your Settings app and access the Accounts menu.
    Accessing the Accounts menu
  2. Inside the User & accounts screen (Accounts), find your Google account and tap on it. Once you’re inside your Google account settings, scroll down to the bottom of the screen and tap on Remove.
    Accessing your Google account
  3. Once the Google account has been removed, return to the User & accounts screen (Accounts) screen, scroll down to the bottom of the screen and tap on Add account.
  4. Then, from the Add an account window, tap on Google and follow the on-screen instructions to re-add your Google account.
    Re-adding the same Google account
  5. Once you re-link your Google account by reinserting your credentials, restart your computer and try to update or download the app at the next startup.

If you’re still encountering the same error message, move over to the next method below.

Method 3: Moving the app from SD to Internal

Another popular fix to get around Error 910 when trying to update an already installed application is to move the app from your external SD storage to internal storage.  Chances are the app will update normally after being moved on internal storage. After the update is complete, you can move it back to its initial place (external SD card). Several users that struggling to resolve this error have confirmed that the steps below served as a permanent fix for them.

Here’s what you need to do:

  1. Open your Settings menu and go to Apps & Notifications. Then, tap on Apps (Application List) to see all your installed applications.
    Apps & notifications
  2. Inside the list of installed applications, locate the app that is refusing to install and tap on it to expand its menu.
  3. Tap on Storage, then tap on Change storage location and move the app to Internal Storage.
    Moving the App to internal storage
  4. Once the app has been moved to internal storage, update the application again and see if the procedure completes without issues.
    Note: If you’re still getting the same error code (‘Error Code 910’), jump straight to Method 4.
  5. If you manage to update the app while it’s moved to the Internal Storage, you can move it back to the SD card once the procedure is complete.

If this method didn’t resolve the error in your particular scenario, move down to the next method below.

Method 4: Ejecting the SD card from the Settings menu

Early on into the investigation stage, we observed that most of the users that we’re encountering this particular error used an SD card.  Even more, some affected users have managed to resolve this issue by simply ‘ejecting’ the SD card via the Android Settings menu.

This procedure won’t require you to physically take your SD card out of your phone – Android has a built-in function that will virtualize this scenario. Here’s what you need to do in order to virtually eject your SD card and resolve the ‘Error Code 910’:

  1. On your Android device, open the Settings menu and tap on Storage.
    Accessing the Storage option
  2. Inside the Storage screen, tap on Unmount SD card and confirm to force your Android into pretending that the SD card has been physically removed.
    Unmounting SD card
  3. Open Google Play Store again and redownload/update the app that was previously showing the error message.

If the issue is still not resolved, move over to the next method below.

Method 5: Downloading & install the APK from a third party website

If none of the potential fixes above worked for you, you might want to start considering the possibility of using a third party service to install or update the application that is failing with the ‘Error Code 910’. This procedure will be effective in those scenarios where the issue is caused by some kind of incompatibility or because your current Android version does not support the latest application update.

In this case, sideloading the app might bypass some restrictions that are enforced by Google Play Store. Here’s how to download & install the application’s APK from a third party website:

  1. Visit a 3rd party website with APKs. There are a lot of sketchy websites that are known to contain a lot of adware, so stay away from obscure places. We recommend APK pure (here).
  2. Use the search function to find the latest version of the application that you’re struggling to install and tap on it.
    Searching for the right APK
  3. Hit the Download APK button and wait for the download to complete.  Hit Ok at the security prompt to start the download.
    Downloading the required APK

    Note:  If you haven’t installed APKs before, you will be notified that your device is blocking the installation of apps from unknown sources. In this case, you’ll need to go to Settings > Security & Privacy and modify the default Install unknown apps behavior to be Allowed under your browser.

    Allowing the installation of unknown apps
  4. Once the APK is downloaded, open it and follow the on-screen prompts to install the application or update. If you’re trying to install an update, you will be prompted to confirm whether you want to install an update over your existing app. If so, tap Install to start the process.

Using this process, you should no longer be encountering the ‘Error Code 910’. But in case you still do, move down to the next method below.

Method 6: Disabling Google Pay admin & enable Blackberry Launcher admin (Blackberry Priv only)

If you’re encountering this particular issue on a Blackberry Priv device, the fix is a little more exotic. A couple of users struggling to resolve this problem on a Blackberry device have managed to eliminate the ‘Error Code 910’ by disabling the admin access of Google Pay and enabling the admin access of the Blackberry Launcher. After logging out & in of their account, the issue was resolved and they were able to complete the installation/update.

Note: If you’re not using a Blackberry Priv device, move over to the next method below.

Here’s what you need to do:

  1. On your Blackberry Priv device, go to Settings > Personal > Security > Device administrators. Once you get there, disable the admin access of Google Pay. Next, make sure the administrator access is enabled for Blackberry Launcher.
    Ensuring that BlackBerry Launcher is enabled and Google Pay is disabled
  2. Next, go to Settings > Device > Users and select Guest to log out of your account. Wait a couple of seconds, then select Myself and follow the instructions to log back in.
  3. Return to Google Play > My apps and games and continue with the update/installation. You should now be able to complete it without issues.

If this method wasn’t applicable to your particular scenario, move over to the next method below.

Method 7: Using ADB to uninstall the app

If you’re finding yourself in a situation where the app can’t be updated, reinstalled or uninstalled, your last choice (aside from doing a factory reset) is to use ADB to forcefully remove the application package. This procedure is a little advanced and will require you to do some initial setup on both your Android and computer, but it will get the job done.

If you didn’t know about it ADB (Android Debug Bridge) is a very versatile command-line tool that will let you perform various operations on your Android device. It facilitates a lot of device actions including installing and debugging apps, which is exactly what we need in this case.

Here’s a quick guide on using the ADB to uninstall the app forcefully and resolve the ‘Error Code 910’:

  1. First things first, we need to install the ADB environment. You will already have this installed if you previously installed Android Studio. If not, download the latest version of Minimal ADB Fastboot from this link (here).
    Downloading the latest version of Minimal ADB Fastboot
  2. Once the download is complete, use a utility like Winzip or 7Zip to extract the contents of the minimal_adb_fastboot.
  3. Simply run the executable file and follow the on-screen prompts to install Minimal ADB and Fastboot on your computer.
    Installing Minimal ADB & Fastboot
  4. Once the installation is complete, move over to your Android phone and go to Settings > System > About phone. When you get there, start pressing on Build Number. After you press it for the 7th time, you’ll get a success message telling you that you are now a developer.
    Pressing the Build Number seven times

    Note: Depending on your security method, you might be prompted to insert the password or the pin in order to complete the procedure.

  5. What we essentially did above was enable the Developers Options tab. Next, we are going to allow the ADB to access the contents of the phone. to do this, go to Settings > Developer Options and enable USB debugging (under Debugging).
    Enabling USB debugging from the Developer Options tab
  6. Connect your Android phone to the PC via a USB cable and wait until the connection is established. You might need to allow it again from your Android phone.
  7. Once the Android is connected to your PC via the USB cable, open Minimal ADB and Fastboot. First, type “adb devices” and press Enter to see if your device is connected properly.
    Attached Android device
  8. Move over to your phone and tap Yes on the Authorisation prompt that appeared on your screen.
  9. In the same Minimal ADB window, type the following command to uninstall the broken app:
    adb uninstall <Package Name>

    Note: Replace Package Name with the package name belonging to the application you wish to install. If you don’t know the package name of the application, execute “pm list packages -f” in the Minimal ADB window and you’ll get a full list of installed applications.

  10.  Disconnect your Android from the USB cable and restart your mobile device. Then, once the next boot sequence is complete, reinstall the application again. You should have no problems doing so.

The post Fix: Error 910 on Google Play ‘Cant install app’ appeared first on Appuals.com.

Fix: The Driver Required for this iPhone is not Installed on Windows 10

$
0
0

There’s a dedicated application for Apple devices that you can use to backup your iPhone’s data on Windows if you do not have a Macbook. However, for the application to work, you will need to make sure that you have the required drivers. In case you do not have the drivers installed on your system, you won’t be able to launch the application as the following error message will pop up every time you try to execute the application.

The Driver Required for this iPhone is not Installed

Normally, when you plug in your iPhone to your system, Windows automatically install the drivers. If you have the desktop version of iTunes, it will install the drivers if Windows doesn’t do it for you. However, some users use the UWP version of the iTunes app to make a backup of their data on their system. The drawback is, you will have to uninstall the desktop version of iTunes. When you launch the UWP app, it uninstalls the desktop version along with the drivers due to which you face the error.

What is UWP Version of iTunes and How is it Different?

Well, UWP or Universal Windows Platform is an open-source application programming interface created by Microsoft. The idea behind the creation of such a platform is to enable developers to create a universal application, meaning it would run on Windows 10, Windows 10 Mobile etc without the need of re-writing it again for a different platform. Apple released the UWP version of iTunes in the early 2018 and they have been trying to make it better ever since.

The difference between the normal iTunes and UWP version is quite clear — the normal version is for a specific platform while the UWP version can be used on different platforms. Running the UWP version will automatically uninstall the normal version of iTunes, as we have mentioned above, along with the required drivers due to which the error message is caused. UWP version doesn’t have the feature of installing the required drivers automatically. This results in the emergence of the error message.

To fix your issue, you will just have to install the iPhone driver again. You can do this by following the solutions down below:

Solution 1: Reconnect your Device

One of the ways to fix your issue would be to let Windows install the drivers automatically. To do this, you will have to disconnect your iPhone and then connect it again. This will make Windows search for drivers for the new device and then install it. Thus, your issue will be fixed without you having to go through any great hurdle. If this doesn’t work, you will just have to install the driver manually.

Reconnect iPhone

Solution 2: Installing Driver Manually

If Windows doesn’t install the driver automatically for you, you can do it manually. To install the driver manually, connect your device and then follow the steps given down below:

  1. Go to the Start Menu, type in Device Manager and open it up.
  2. Expand the Portable Devices list, right-click on your iPhone driver and select ‘Update driver’.
    Updating iPhone Driver
  3. Afterward, click on the ‘Search automatically for updated driver software’ option.
  4. Once the driver has been installed, close the Device Manager.

This will install the driver again and you should now be able to run the iTunes app.

The post Fix: The Driver Required for this iPhone is not Installed on Windows 10 appeared first on Appuals.com.

Fix: Error Adding Friend on Steam

$
0
0

Steam is a digital distribution platform which hosts different games and applications. Steam is known as a pioneer in the gaming industry where it revolutionized the online-gaming category. Users can add friends and play multiplayer games together as ‘parties’.

Error Adding Friend on Steam

However, there might be instances where you are unable to add a person as a friend. Instead, you either get an error message ‘Error adding Friend. Communication between you and this user has been blocked’ or nothing happens at all. This issue has been in the platform for quite some time and is officially acknowledged by Steam officials as well. This might either be a temporary glitch in the application or some discrepancy in your account. Follow the workarounds listed below starting with the first case and move your way down.

What causes the error ‘Error adding Friend’ on Steam?

This error message is associated with numerous different modules and rules laid down by Steam. Here are some of the reasons why you might experience this problem when adding a friend:

  • The user is blocked: If the user you are trying to add is blocked from your account, you will not be in any way add him as your friend.
  • Limited Account: Steam has introduced a Limited account which cannot add friends recently. A limited account is an account which hasn’t purchased any content from the game engine.
  • Friends cap: Steam also has in place a mechanism which limits the maximum number of friends (added and requested) you can have on your account. If your number exceeds, you will not be able to add anyone else.
  • Friend system glitch: Steam’s friend system has been under scrutiny in the past for being very buggy sometimes. This is still true today and a refresh of core Steam functionalities may help remedy the problem.

Solution 1: Checking Blocked List

Steam features a blocking mechanism which you can use to block several people from contacting you or seeing your activity. The opponent account either becomes invisible to you or there is no information about that account (only profile picture is displayed). If you are trying to add a friend who is on your block list, you will not be able to do so. Whoever is in your block list is barred from communicating with you (which includes adding friends). We will go navigate to your Steam’s block list and check.

  1. Launch the Steam Client on your Desktop.
  2. Now click your Username from the top navigation bar and select Friends.
Checking Blocked Users – Steam
  1. Using the left navigation pane, select the option of Blocked. Here all the users currently blocked from your account will be shown. Remove the blocked person to whom you cannot add as a friend (if they exist).
  2. Save changes and exit. Restart Steam properly and check if the error is resolved.

Solution 2: Checking Account Type

Steam recently implemented a new policy where users cannot add other people as a friend unless they have done at least one purchase (minimum of $10). The accounts which haven’t done any purchase yet are called limited accounts. These accounts do not give access to all features which are otherwise available in the full account.

You can easily check if your account is limited using an XML file which opens if you are logged in Steam on your computer.

  1. Navigate to (this) address and make sure that you are logged into your Steam account.
  2. An XLM file will open. Click Ctrl + F launch the Search dialogue and type “limited” in the dialogue box.
  3. Now the following line will be highlighted.
<isLimitedAccount>0</isLimitedAccount>
Checking Account XML File
  1. The following are the meanings of the number which is in-between the limited account tags.
0: Your account is not limited.

1: Your account is limited.

If you find out that your account is limited, you need to make a purchase from the Steam and try adding your friend again after that.

Solution 3: Checking the number of Friends Requests

Steam has a limit imposed on how many friend requests a person can receive. This is done to make the interface less jumbled up and help users reduce the number of friend requests they get after reaching a certain limit.

Here we will navigate to your friend’s list and see if there are any pending invites. If they are, either approve or reject them to make space for new ones.

  1. Open your Steam client like we did earlier and click on your profile name using the top navigation bar.
  2. Now select Friends underneath your profile and then click Your Friends.
Checking Number of friends
  1. Now check if you have pending invites and either approve or reject them. Restart your client after making changes and try adding your friend again.

Note: The cap for friends include both, the friends added and those pending acceptance.

Solution 4: Blocking and Unblocking your Friend

Another workaround which seemed to work for several users was blocking and then unblocking the person you are trying to add. This behavior signifies that maybe there is a bug in the Steam friend system associated between you and your friend. Blocking and unblocking resets the mechanism and allows you to add your friend again with the error message.

  1. Navigate to the user profile of the person you are trying to add as a friend.
  2. Click on More and from the drop-down box, select Block all communication.
Blocking the user – Steam
  1. Now restart Steam so all the changes can be loaded correctly. Now navigate to the blocked list as we did in Solution 1.
  2. Now you will see the person who you just blocked listed there. Click on their profile.
  3. Now select More > Unblock All Communication. Restart your Steam client again and try adding the person as a friend.
    Unblocking the user – Steam

Solution 5: Using Steam://flushconfig

If all the above methods don’t work and you are still unable to add a person as your friend, we will try to refresh all the core features of Steam. The command ‘steam://flushconfig’ does this job without affecting any of your installed games or accounts. This command is completely safe and will not in any way erase your data. We are just refreshing configurations for Steam, just like we do for numerous other applications.

Using Steam://flushconfig

You can head over to our article How to Use steam://flushconfig and follow the instructions there. It covers how to execute the command in different OS platforms out there. Make sure that you are logged in as an administrator when you perform this solution.

The post Fix: Error Adding Friend on Steam appeared first on Appuals.com.

Fix: There was an Error during Startup on Sims 3

$
0
0

Sims 3 is a life simulation game developed by The Sims Studio and published by Electronic Arts. As the name suggests, it is the third addition to the series and is a sequel to the second edition The Sims 2. It was released in June 2009 across all the platforms. The game is loved and played by many users due to which it sold 1.4 million copies.

Sims 3 there was an Error during Startup

Recently an Error with the message “There was an error during startup, please see the log for more information” was seen by users while starting the game with the launcher. In this article, we will discuss the causes of the error and solve it step by step.

What Causes The Sims 3 “Error During Startup” Error?

There isn’t one specific cause to this error as it can be due to a number of reasons depending upon the situation. Some possible reasons could be:

  • Permissions: It is possible that the game might not have administrative privileges which might be preventing some of its components from running correctly
  • Registry Issues: If you have removed the game or a part of your game, then there might be issues with the registry files of the game.
  • Mods: If you installed some Mods they might be conflicting with each other and hence cause an issue with the game script.
  • Cache: Games cache, if corrupt, can cause unexpected issues with the game which include the situation where you get an error during startup.
  • User Files: it is also possible something is your user files or saves is causing a conflict with the launcher preventing it from running the game

Now that you have a basic understanding of the problem, we will move towards the solutions.

Solution 1: Delete Cache Files

The Sims 3 Cache files are temporarily stored to load the game faster. If the files are corrupted, they could be causing issues with the game. In order to make sure the files are not causing the issue we will have to delete them. Since they are automatically regenerated, we don’t need to worry about any permanent damage to the game.

  1. Open  File-Explorer by pressing Windows + E
  2. In the top panel, click on View
    Clicking on View in the top panel
  3. From there Make sure that View Hidden Box is checked
    Checking the Hidden Items Box
  4. Now double click the partition in which your windows is installed
  5. Navigate to Users and Select your “username” Folder
    Opening User files
  6. Navigate to App Data folder which is normally hidden (but we will be able to see it since we enabled the display of hidden devices.
    Clicking on APP data
  7. Open the Local folder.
    Clicking on Local
  8. Now open The Sims 3 Folder and delete everything in it
    Opening the Sims 3 folder
  9. Now try Running your Game.

Solution 2: Reinstalling your Game.

Sometimes if you remove a portion of your game it might leave some residue in the Registry which in turn might cause conflicts and prevent from starting the game. In order to resolve this issue, we will first manually uninstall our game and then reinstall it.

  1. Open Origin and select Sims 3 game from the Library.
  2. Click on Settings Icon by the play Button
    clicking on the Settings Icon
  3. Click on Uninstall
    Clicking uninstall
  4. Click on Yes if you are prompted to confirm your actions
    Clicking on yes
  5. This will uninstall your game and remove all of its registry files.
  6. Now simply Reinstall your game after downloading it again from the website.

Solution 3: Giving Administrative Privileges

The Sims 3 needs Administrative Privileges in order to function correctly because the standard account permissions are not sufficient for certain components of the game to work correctly. For this reason, we will provide the game with Administrative Privileges

  1. Right Click on The Sims 3 Launcher and click on Properties
    Selecting Properties
  2. Now Click on Compatability, Make sure the Run as Administrator Box is checked and Apply Settings
    Checking Run as Administrator Box
  3. Now Try To run the Game

Solution 4: Removing Custom Content

Sometimes the custom Mods and content cause an issue with the game. To fix this issue, we will remove all of the custom content and make Sims 3 return back to default settings.

  1. Navigate to the following file directory:
    C:\Program Files (x86)\Electronic Arts\The Sims 3\Mods\Packages\
    

    The location might also be

    Documents\Electronic Arts\The Sims 3\Mods\Packages\
  2. Now delete everything in that folder
  3. Run the game and check if the error is resolved. If it works, the issue was with the custom content that you downloaded

NOTE: Make sure to temporarily Copy and Paste all the custom content in another folder to store it in case the issue was not with the custom content.

Solution 5: Renaming User Files

It is also possible that something in your User files or saves is causing a conflict which in turn is preventing the game from starting up. To solve this issue we will be renaming some files

  1. Navigate to the following directory:
    Documents\Electronic Arts\
  2. There will be a folder here called The Sims 3 – rename that folder to The Sims 3 Backup.
  3.  It may take a little longer to load than normal this time but if it works the issue was with the Save files
  4. If it still does not work make sure to undo this step and try another solution from above.

The post Fix: There was an Error during Startup on Sims 3 appeared first on Appuals.com.

Fix: State of Decay 2 Error Code 6

$
0
0

State of decay 2 is an action-adventure game which is published by Microsoft Studios itself. The franchise was initially launched in 2013 and has worked its way into launching more expansion versions. State of Decay is a direct competitor of other solo storyline games including Fallout 4 etc.

State of Decay 2

As with all other Microsoft games, State of Decay also has issues and one of them is Error Code 6. This error code is an indication from the game that proper connection cannot be established to the servers. This can be either due to your network or from local configurations stored on your computer. Make sure that you are logged in as an administrator before starting the solutions.

What causes Error Code 6 in State of Decay 2?

This error message prevents players from going online and connect with multiplayer systems to play the game together with friends. Since State of Decay 2 is famous for its co-op gameplay, this error message can become rather frustrating for the players. Here are some of the reasons why this might happen:

  • Firewall: Windows Firewall is known to block access of applications to the internet. It seems that in some cases, State of Decay is blocked by default. Getting it out of the block list fixes the issue.
  • Teredo Adapter: State of Decay 2 is known to use Teredo adapter for its communication with the host server. If this adapter doesn’t work, the game might fail to connect with the host.
  • Time and Date: Applications make use of the computer’s local time for their logging and other communications. If the time of your computer doesn’t match your location, the game may fail to establish a successful connection.
  • Network issues: This is probably the most common cause why State of Decay gives Error code 6. Network issues will also affect the connectivity of the game to the host server.

Make sure that you start the solutions from the top and work your way down.

Prerequisite: Checking Network Status and Windows Components

Before we start tweaking your computer’s settings, it is important that you make sure that your network is properly connected to the internet and there are no issues of connectivity. Furthermore, you should also make sure that components like Windows update are working properly. Here is a short checklist for you:

  • Try connecting to the internet from your computer’s browser. Make sure that every website is accessible and you are not using proxy servers.
  • If you have two GPU’s, make sure that you have the correct one selected.
  • Make sure that your Windows is updated to the latest version available.
  • All of your drivers should also be updated.
  • Avoid usage of VPNs when playing the game. They sometimes block the connection between the client and the host.
  • Power cycle your computer completely i.e. take out the power cord and hold the power button for a couple of seconds. Then wait a few minutes before plugging everything back in.
  • Restart your router. Sometimes error configurations of the router may be responsible for your game not connecting since the network is not being broadcasted correctly. Restarting the router reinitializes everything.

Solution 1: Adding Firewall Exception

Like mentioned before, Windows Firewall seems to block the internet connectivity of State of Decay. Here in this solution we will navigate to your Firewall settings and make sure that the game is added as an exception and is given open access to the internet.

  1. Press Windows + S, type Firewall in the dialogue box and open the application.
  2. Once in the firewall settings, click on Firewall & network protection from the left side and click Allow an app through firewall.
Firewall Settings – Windows
  1. Now click on Change and then check both Private and Public network access for State of Decay 2.
Allowing Private and Public Network Use
  1. Save all your changes and exit. Restart your computer properly and check if the error message is resolved.

If this doesn’t work, then we can try blocking inbound traffic and allow outbound. Open your command prompt as an administrator and execute the following line:

 netsh advfirewall set currentprofile firewallpolicy blockinbound,allowoutbound

Solution 2: Checking Time and Date

Local Time and Date on your computer play an important role in logging and communication of your system with the host computer. If your time is improperly set, there will be a mismatch in settings and a network connection will not be established. In this solution, we will navigate to the Time and Date settings and make sure that the time is set correctly.

  1. Press Windows + R, type “control” in the dialogue box and press Enter.
  2. Once in control panel, select “Date and Time” or “Clock and Region” according to the type of control panel selected (category or large icons).
Time settings – Control Panel
  1. Once the clock is opened, click “Change date and time”. Now set the correct time and also select the correct region.
Change Date and Time
  1. Save changes after correcting the time and date and restart your computer. Now launch State of Decay 2 and see if you can connect to multiplayer mode.

Solution 3: Checking Teredo Adapter

State of Decay seems to use the Teredo adapter for communication with the host server. If the Teredo client isn’t working on your computer, the game will not be able to establish a successful connection with the host server. In this solution, we will first check your Teredo status. If is offline, we will try initializing it again and check if the error gets solved.

  1. Press Windows + S, type “command prompt” in the dialogue box and press Enter.
  2. Once in elevated command prompt, execute the following instruction:
netsh interface teredo show state
Checking Toredo Adapter Status
  1. If it is offline, execute the following command:
netsh interface teredo set state enterpriseclient
Changing Toredo Adapter Status
  1. Now restart your computer properly and check if the error message is resolved and you are able to play multiplayer again.

The post Fix: State of Decay 2 Error Code 6 appeared first on Appuals.com.

Viewing all 4495 articles
Browse latest View live