Quantcast
Channel: Kevin Arrows | Network Engineer | Appuals.com
Viewing all 4495 articles
Browse latest View live

Fix: MSI Gaming App Not Opening

$
0
0

MSI Gaming App is a useful tool for MSI users which you can use to improve your gaming performance and quality by tweaking certain settings. However, various users have reported that a recent Windows 10 update or other similar cause has somehow broken the app as it now fails to launch properly at all.

Rezultat slika za MSI Gaming App not Opening

Several different methods have been suggested on various forums over the recent times but we have decided to include only the helpful methods here in our article. Make sure you follow the instructions carefully and hopefully you will resolve this issue!

What Causes the MSI Gaming App to Fail to Open?

Here is a list of possible causes for the MSI Gaming App which is refusing to launch properly:

  • A new version of the tool was launched which fixes the problem but the tool fails to update automatically and you will have to do it manually starting off by uninstalling the current version and locating the appropriate version for your setup.
  • You have updated your operating system and various incompatibility problems started to occur.
  • There are issues with permissions and you might want to provide administrator access.
  • The app might suggest a driver in need of update in an error message so make sure you listen to it!

Solution 1: Install the Latest Version of the App

After the problematic Windows 10 update was released, there were plenty of new versions of the tool available. Since the tool has malfunctioned and it won’t even launch properly, the best thing you can do is to actually install the latest version manually by uninstalling it from your computer and installing the latest version from the site!

  1. Click on the Start menu and open Control Panel by searching for it. Alternatively, you can click on the gear icon in order to open settings if you are using Windows 10.
  2. In Control Panel, select to View as: Category at the top right corner and click on Uninstall a Program under the Programs section.
Uninstall a program in Control Panel
  1. If you are using the Settings app, clicking on Apps should immediately open a list of all installed programs on your PC.
  2. Locate MSI Gaming Center tool in Control Panel or Settings and click on Uninstall.
  3. Its uninstall wizard should open so follow the instructions to uninstall it.
  4. Click Finish when the uninstaller completes the process and restart your computer in order to continue to install the latest version. Visit this link and navigate under the Select Your Product screen in order to search for your laptop or Desktop computer.
    Select Your Product on MSI’s official support site
  5. Enter all relevant information about your setup until you reach the support page for your device. Click the Download button at the left-side menu and navigate to the Utility Scroll down until you reach the MSI Gaming App entry.
Locate it under Utilities and download it
  1. Click the red download icon next to its name in order to initiate the downloading process. Locate the file in the Downloads folder, right-click on it, and choose to Extract Run the installer and follow the instructions on-screen. Check to see if the problem persists.

Solution 2: Run the Game as an Administrator

Some users have noticed that the app actually works whenever they logged in using their administrator account. This leads us to believe that the actual problem regarding the tool is the lack of proper permissions.

It’s not always the best idea to run random programs as an administrator, but MSI is a verified published and various users have reported that running MSI Gaming App as an administrator actually resolved the problem for them!

  1. Locate the MSI Gaming App and change its properties by right-clicking its entry either on the Desktop, the Start menu or the Search results window and choose Properties. Navigate to the Compatibility tab in the Properties window and check the box next to the Run this program as an administrator option before applying the changes.
Run this program as an administrator
  1. Make sure you confirm any dialogs which may appear for you to confirm with admin privileges and MSI Gaming App should launch with admin privileges from now on. Open it by double-clicking its icon and try to see if the error still appears.

Solution 3: Reinstall Microsoft Visual C++ Redistributable

Since we can often blame Windows update for this problem, it’s quite possible that the version of Microsoft Visual C++ Redistributable installed alongside the game is simply not valid and you may want to actually install it manually after uninstalling the MSI Gaming App. Perform the steps in Solution 1 in order to uninstall it and follow the instructions below!

  1. Click the Start menu button and open Control Panel by searching for right there. Also, you can click on the gear-shaped icon in order to open the Settings app if your OS is Windows 10
  2. In Control Panel, switch the View as option to Category at the top right corner and click on Uninstall a Program under the Programs section at the bottom of the Control panel window.
Uninstall a program in Control Panel
  1. If you are using the Settings app on Windows 10, just clicking on Apps should immediately open a list of all installed programs on your PC.
  2. Locate Microsoft Visual C++ Redistributable Package in Control Panel or Settings and click on Uninstall after clicking it once. You might notice that there are several different versions of the utility. You will need to make note of them and repeat the uninstalling process for each one of them.
  3. You may need to confirm some dialog boxes and follow the instructions which will appear along with the uninstallation wizard.
Uninstalling Microsoft Visual C++ Redistributable
  1. Click Finish when the uninstaller finishes with the process and repeat the uninstalling process for all versions of the Visual C++ Package. Now, you will need to reinstall Visual C++ by locating it here. Select the version you want to download and choose the download according to your processor (32-bit or 64-bit).
Downloading Microsoft Visual C++ Redistributable
  1. Locate the file you just downloaded in the Windows folder, run it, and follow the instructions on-screen in order to install the Microsoft Visual C++ Redistributable Package. Follow the instructions from Solution 1 to reinstall MSI Gaming App and check to see if the issue is resolved.

Solution 4: Install the Required Driver

This final method is super useful for people who encounter the “Please install or update _____ driver” message after trying to launch the app. Simply locate the device in Device Manager and update the driver!

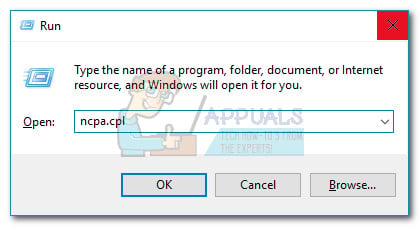
  1. Click Start and type Run. Select Run, A Run dialog box will appear.
  2. Type “devmgmt.msc” in the run dialog box and click the OK button. This opens Device Manager immediately.
Running Device Manager
  1. In Device Manager, expand the category where you think the driver or device that is causing the issue is located. Make sure you have noted down the name of the driver which is missing. There should be no doubt as you don’t want to end up uninstalling the wrong device.
  2. When you locate the device, right-click on it and choose the Uninstall device option from the context menu.
Uninstalling the required device driver
  1. You may be required to confirm the uninstallation process. Check the box next to “Delete the driver software for this device” option and click the OK button.
  2. Restart your computer for the change to take effect. After restarting, Windows will attempt to reinstall the driver and replacing it with the manufacturer’s driver.
  3. If Windows doesn’t replace the driver automatically, open Device Manager again, select the Action menu and click on the Scan for hardware changes. On newest versions of Windows 10, it will be the left-most blue button under the Menu bar. Check to see if the error message still appears.
Device Manager >> Scan for hardware changes

The post Fix: MSI Gaming App Not Opening appeared first on Appuals.com.


Fix: Windows Hello for Business Provisioning Will Not Be Launched

$
0
0

Some Windows users have been looking for ways to disable Windows Hello after seeing a warning message inside the Event Viewer saying that “Windows Hello for Business provisioning will not be launched“. Affected users are reporting that they see constant errors of this kind (regardless if Windows Hello is being used or not). The issue is not specific to a particular Windows version as it’s reported to occur on Windows 7, Windows 8.1 and Windows 10.

Windows Hello for Business Provisioning Will Not Be Launched

What is causing the “Windows Hello for Business provisioning will not be launched“?

We investigated this particular issue by looking at various user reports and the repair strategies that most affected users have used to resolve this particular error message in Event Viewer. Based on our investigations, there are several different scenarios that are known to trigger this particular issue:

  • Windows Hello for Business policy is Enabled – This Local Group Policy is known to cause constant Event Viewer errors related to Windows Hello. Most affected users have reported that the errors have stopped appearing once they used the Local Group Policy Editor or Registry Editor to disable it.
  • Log Provide is enabled for Windows Hello – Log Provider needs to be enabled in order for the error events to be generated. You can also get rid of the error messages related to Windows Hello by disabling Log provisioning. But doing this is the equivalent of masking the issue instead of treating it.

If you’re looking for a method that will prevent the “Windows Hello for Business provisioning will not be launched” error from filling up your Event Viewer, this article will provide you with several troubleshooting strategies. Down below, you’ll discover several different repair strategies that other users in a similar situation have used to get the issue resolved.

For the best results, follow the methods in the order that they are presented since they are ordered by efficiency and severity. One of them is bound to resolve the issue in your particular scenario.

Method 1: Modify the Windows Hello policy

As some users have reported, there is one method that will allow you to enforce a policy on your machine that will ensure that the “Windows Hello for Business provisioning will not be launched” error will no longer fill up your Event Viewer.

There are two different policies that you need to adjust in order to ensure that the issue is resolved. Here’s how to modify the WIndows Hello policy in order to prevent the Event Viewer message from appearing again:

  1. Press Windows key + R to open up a Run dialog box. Then, type “gpedit.msc” and press Enter to open up the Local Group Policy Editor.
    Type gpedit.msc and Press Enter To Open Group Policy Editor

    Note: If you get an error message while typing this command, it’s probably because your Windows version doesn’t include the Group Policy Editor. In this case, you can follow this article (here) to install the Local Group Policy Editor on Windows 10.

  2. Once you get inside the Local Group Policy Editor, use the left-hand pane to navigate to the following location:
    Computer Configuration > Administrative Templates > Windows Components > Microsoft Passport for Work (or Windows Hello for Business).  Then, mover over to the right pane and double click on Use Microsoft Passport for Work (or Use Windows Hello for Business) and set the policy to Disabled.
    Setting the Use Windows Hello for Business policy to Disabled

    Note: In order to ensure that the error is preventing from appearing again, disable it from the following location also: User Configuration > Administrative Templates > Windows Components > Microsoft Passport for Work (or Windows Hello for Business )

  3. Restart your computer and see if your Event Viewer has stopped showing errors about Windows Hello for Business.

If you’re still seeing new instances of the “Windows Hello for Business provisioning will not be launched” error or this method wasn’t applicable, move down to the next method below.

Method 2: Using Registry Editor to disable the PassportforWork policy

If the first method was not applicable or you didn’t want to the GPedit utility, you can replicate the same step from the Registry Editor.  This way, you’ll ensure that you’ll not see any new Event Viewer events with “Windows Hello for Business provisioning will not be launched” error.

But keep in mind that the change will only be applicable to one computer. If you’re experiencing the error on multiple computers from the same network, Method 1 is preferable.

Here’s what do to disable the PasswordforWork policy using the Registry Editor:

  1. Press Windows key + R to open up a Run dialog box. Then, type “regedit” and press Enter to open up the Registry Editor. When prompted by the UAC (User Account Control), click Yes to grant administrative privileges.
    Running the Registry Editor
  2. Once you get inside the Registry Editor, use the left-hand side to navigate to the following location:
    Computer\HKEY_LOCAL_MACHINE\SOFTWARE\Policies\Microsoft
  3. When you reach that location, move over to the right-hand pane, right-click on a free space and choose New > Dword (32-bit) value and name it PassportForWork.
    Creating the PassportForWork policy
  4. Double-click on PasswordForWork and set the value data to 0 to disable Windows Hello for Business and click Ok to confirm.
    Setting the value data of PassportForWork to 0
  5. Close Registry Editor and restart your computer to see if this procedure has been successful.

At the next startup, check your Event Viewer and see if there are new “Windows Hello for Business provisioning will not be launched” error. If you’re still seeing new error events, move down to the next method below.

Method 3: Disabling the Log Provider for Windows Hello

Another reason why you might see constant Event Viewer events with the message “Windows Hello for Business provisioning will not be launched” error is that your machine doesn’t have the necessary hardware to logging on with Hello.

In this case, the only applicable method is to follow the steps below to disable the Log Provider for Windows Hello. This will stop any associated events from being logged, which will spare you from receiving any new error messages in Event Viewer.

Note: Keep in mind that this method will only mask the problem, not fix it. So even if you’ll stop receiving  “Windows Hello for Business provisioning will not be launched” errors, it will be because the Log Provide will be disabled not because the issue was resolved.

Here’s a quick guide on disabling Log Provider for Windows Hello via Registry Editor:

  1. Press Windows key + R to open up a Run dialog box. Then, type “regedit” and press Enter to open up Registry Editor.
    Running the Registry Editor
  2. Inside the Registry Editor, use the navigation bar (left-hand side pane)  to paste the following location and get there instantly or navigate to it manually:
    Computer\HKEY_LOCAL_MACHINE\SYSTEM\CurrentControlSet\Control\WMI\Autologger\EventLog-Application\{23b8d46b-67dd-40a3-b636-d43e50552c6d}
  3. Once you get there, move over to the right-hand side and double-click on the Enable DWORD. Next, set the Enable DWORD to 0 in order to disable the log provider for Windows Hello.
    Set the Value data of Log Provider to 0
  4. Close the Registry Editor and restart your computer to force the changes to take effect.
  5. At the next startup, you should no longer see new Event Viewer errors related to Windows Hello.

The post Fix: Windows Hello for Business Provisioning Will Not Be Launched appeared first on Appuals.com.

Fix: This Device is Blocked by Access Control in the Router

$
0
0

Some users are reporting all computers and devices are being blocked by the Access Control of the router. The error message that comes up is “This device is blocked by access control in the router“. Most commonly, this is reported to occur with NetGear routers and modems. The issue is not exclusive to a certain Windows version since it’s reported to occur on Windows 7, Windows 8.1 and Windows 10.

“This device is blocked by access control in the router.”

What is causing the “This Device is Blocked by Access Control in the Router” error?

We investigated this particular issue by looking at various user reports and the repair strategies that most affected users have deployed in order to get the issue resolved.

  • The device is blocked by an ACL – ACL (Access Control List) are used to enforce network security. They work by limiting portions of your network devices or by limiting access to the internet. If this scenario is applicable, disabling the Access Control feature or resetting the router settings.
  • Access control is set to Whitelist mode – If Access Control is configured on Whitelist mode, all your devices might have been blocked from accessing the router/modem settings. In this case, the only viable solutions are to either change the MAC/IP addresses of one of your devices so you can connect or reset your router settings to the factory settings.

If you’re struggling to find a way of circumventing or resolving the “This device is blocked by access control in the router” issue, this article will provide you with several potential guides that other users in a similar situation have used to get around this problem.

Method 1: Disabling Access Control

An Access Control List will block devices based on their IP address. If you’ve enabled Access Control from your router and a request is being made from a device that was specifically blocked (or not mentioned in the allowed list).

If this scenario is applicable to you’re current situation, one way to resolve the “This device is blocked by access control in the router” error and allow your device to connect without restrictions is to access your router settings and disable Access Control.

But as you might imagine, different routers have uniques builds.  Because of this disabling/enabling Access Control will differ from model to model. Luckily, the concept is similar and the steps are roughly the same. Here’s a quick guide on accessing the Access Control menu and removing the restriction:

  1. On your default browser, visit the default address of your router to access its settings from a different computer (not the one that is being blocked). With the vast majority of routers/modems, the address is either http://192.168.0.1 or http://192.168.1.1.
  2. Once you reach the login screen, type your credentials to log in. If you haven’t set up a dedicated password, try using ‘admin’ for both the username and the password.
    Accessing your router settings
  3. Go to the Advanced menu and look for the Security tab.  Then go to the Access Control menu and either disable the Access Control feature entirely or remove the respective device from the Blacklist.
    Dealing with Access Control on your router/modem

    Note: if the Access Mode is set on the Whitelist mode, you’ll need to Allow the device in order to resolve the error message.

  4. Save the changes, then restart your router/modem and see if the “This device is blocked by access control in the router” issue.

If you’re still encountering the same error message, move down to the next method below.

Method 2: Resetting the router to the factory settings

One quick and painless method that will most likely resolve the “This device is blocked by access control in the router” issue is to simply reset the router to its factory settings.  After waiting a few minutes and logging back in, you should find that none of your connected devices are being blocked.

To reset your router to factory settings, simply push the physical reset button for 10 seconds or more (with most models, the LEDs will all blink at once to signal that the reset was complete.  Keep in mind that on some models, the Reset button is only reachable by a needle or a similar sharp object.

Resetting Router

Keep in mind that this procedure will also reset the default router/modem login credentials. In most case, they will be reverted back to the default: admin (for username and password).

Method 3: Bypassing the Router/Modem Acess Control

Different routers have different ways of preventing devices from accessing the network. In most cases, routers are either actively looking at the MAC address or at the IP when deciding whether a device should be blocked by Access Control or not.

Fortunately, you can change both quite easily and regain entry into your Router settings. This method is ideal in those cases where all devices are blocked from accessing the router/modem settings, so you have no apparent means of repairing the issue.

Follow the two methods below to bypass the Account Control feature of your networking device by changing your MAC address and IP.

Changing the MAC address:

  1. Press Windows key + R to open up a Run dialog box. Then, type ” devmgmt.msc” and press Enter to open up Device Manager.
    Running Device Manager
  2. Expand the Network adapters drop-down menu, right-click on your Network (Internet) Controller and choose Properties.
    Accessing the Properties screen of the Network Controller
  3. Inside the Properties screen of your Network Controller, go to the Advanced tab and look for a Property called Network Address or Locally Administered Address. Then, change the toggle from Not Present to Value and set a new MAC address for your computer.
    Changing the MAC address on Windows

    Note: Keep in mind that Windows accepts MACs addresses with no dashes or spaces. For example, 01-23-45-67-89-XY should be entered as 0123456789XY.

  4. Click Ok to save the changes, then restart your computer to allow the changes to take effect.

Changing the IP address:

  1. Press Windows key + R to open up a Run dialog box. Then, type “ncpa.cpl” and press Enter to open up the Network Connection menu.
    Run dialog box: ncpa.cpl
    Run dialog box: ncpa.cpl
  2. Inside the Network Connections menu, right-click on the network connection that is currently active and choose Properties.
    Accessing the Properties menu of the active network
  3. Inside the Properties screen of the active network, go to the Networking tab and double-click on Internet Protocol Version 4 (TCP/IPv4).
    Accessing the IPV4 settings
  4. Then, go to the General tab and change the first toggle from Obtain an IP address automatically to Use the following IP address. Then, type in your own IP address and click Ok to save the configuration.
    Setting a custom IP address
  5. Restart your computer and see if the issue has been resolved at the next startup.

The post Fix: This Device is Blocked by Access Control in the Router appeared first on Appuals.com.

Fix: DiskPart has Encountered an Error ‘Access is Denied’

$
0
0

Several Windows users are reporting receiving the “DiskPart has encountered an error: access is denied” error when trying to perform a DiskPart operation like resizing a partition or trying to format a drive. The issue is reported to occur on multiple Windows versions, so the problem is not tied to the operating system.

DiskPart has encountered an error: Access is denied.

What is causing the ‘DiskPart has encountered an error: Access is denied’ error?

We looked into the issue closely by analyzing various user reports and the repair strategies that most affected users have successfully deployed in order to get the issue resolved.  As it turns out, there are several different potential culprits that might end up triggering this particular error message:

  • Command Prompt doesn’t have administrative privileges – The most common reason why this issue occurs is that the Command Prompt is missing administrative privileges. In most case, the fix is to simply open the Command Prompt with admin access.
  • Write protection is enabled for the drive – Another popular culprit that will trigger this particular error when the drive is handled by DiskPart is write protection. If this scenario is applicable, you can get around it by disabling the security feature from DiskPart directly or via Registry Editor.

If you’re currently looking for potentials solutions that will allow you to bypass the ‘DiskPart has encountered an error: Access is denied’ error,  this article will provide you with several troubleshooting guides. Down below, you’ll find several different methods that other users in a similar situation have confirmed to be effective in resolving this issue.

For the best results, we advise you to follow the methods below in the order that they are presented. One of them is bound to fix the problem in your particular scenario.

Method 1: Running the Command Prompt with administrative privileges

The number one reason why this issue is occurring is that users forget that DiskPart requires administrative privileges in order to perform certain commands.  In other words, you’ll need to ensure that you open an elevated Command Prompt that you use with DiskPart as admin in order to bypass the  ‘DiskPart has encountered an error: Access is denied’ error.

Here’s the quickest way to do this:

  1. Press Windows key + R to open up a Run dialog box. Then, type “cmd” and press Ctrl + Shift + Enter to open up an elevated Command Prompt.
    Running CMD using the Run Dialog Box
  2. When prompted by the UAC (User Account Control) choose Yes to grant administrative privileges.
  3. In the Elevated Command Prompt that you’ve just opened, run the DiskPart utility again and see if you’re still experiencing the same behavior.

If you’re still seeing the ‘DiskPart has encountered an error: Access is denied’ error, move down to the next method below.

Method 2: Removing the Write Protection from the drive 

Another method that might just allow you to complete the DiskPart operation without seeing the ‘DiskPart has encountered an error: Access is denied’ error is to use remove the Write Protection. You can either do this directly via the DiskPart utility or by using the Registry Editor.

Follow whichever guide is more convenable to your current situation to remove write protection and resolve the issue:

Disabling write protection via Diskpart

  1. Press Windows key + R to open up a Run dialog box. Then, type “diskpart’ and press enter to open up the DiskPart utility.
    Run dialog: diskpart
    Run dialog: diskpart
  2. Type the following command and press Enter to get a list of all available disks:
    list disk
  3. Type the following command and press Enter to select a specific drive:
    Select Disk X
    Note: X is only a placeholder. Replace it with the number of the disk that you want to select.
  4. Once the disk is selected, type the following command to disable write protection for it:
    attribute disk clear readonly
  5. Restart your computer and see if the issue has been resolved and you can complete the DiskPart operation without seeing the  ‘DiskPart has encountered an error: Access is denied’ error.

Disabling write protection via Registry Editor

  1. Press Windows key + R  to open up a Run dialog box. Then, type “regedit” and press Enter to open up Registry Editor. When prompted by the UAC (User Account Control), click Yes to grand administrative privileges.
    Running the Registry Editor
  2. Inside Registry Editor, use the left-hand pane to navigate to the following path:
    HKEY_LOCAL_MACHINE\SYSTEM\CurrentControlSet\Control\StorageDevicePolicies

    Note: You can either navigate there manually or paste the address directly into the navigation bar.

  3. Move over to the right-hand pane, double-click on WriteProtect and change the value to 0 in order to disable write policy.
    Setting the WriteProject value to 0

If you’re still encountering the ‘DiskPart has encountered an error: Access is denied’ error, move down to the next method below.

Method 3: Using a 3-rd party tool to resize the partition (if applicable)

There are a few really good free 3-rd party tools that will allow you to resize partitions without using DiskPart. Several affected users have reported that going this route allowed them to complete the operation without encountering the ‘DiskPart has encountered an error: Access is denied’ error.

After tested different freeware tools capable of getting the job done, we have settled on Partition Manager Free as the best tool for our particular needs. Here’s a quick guide on installing and using Partition Manager Free to resize a partition:

Note: Partition editing has the potential of causing loss of data. Before you decide to go through with this, we advise you to back up your drive.

  1. Visit this link (here) and click the Download button to download the latest version of Partition Manager Free.
    Downloading Partition Manager Free
  2. Once the download is complete, open the installation executable and follow the on-screen prompts to Paragon Hard Disk Manager (the utility that holds Partition Manager Free).
  3. When the utility has been installed, open the Paragon Hard Disk Manager utility and create an account to log-in with your credentials to complete the online activation. Once the activation is complete, go to Tools and click on Partition Manager.
    Accessing the Partition Manager utility
  4. Next, use this utility the complete the same process that was previously failing inside DiskPart (merging, formatting, splitting, etc

The post Fix: DiskPart has Encountered an Error ‘Access is Denied’ appeared first on Appuals.com.

How to Set Up a VPN on a DD-WRT Router

$
0
0

One of the major reasons probably why you might be using a VPN is to keep your online identity safe and secure. Using a VPN is easy. All you need to do is download the VPN client on your laptop/computer, connect to the VPN server and you are good to go. If you are using the internet on your iPhone or Android, the process is pretty simple too.

Most VPN providers like NordVPN provide you with an app for each of these platforms. You need to establish a connection via these apps, and that’s it. To know more about the supported devices, you can read this review.

But the problem arises when you want to connect your additional devices like an Apple TV to a VPN, and cannot figure out a convenient way to do so.

Further, what if you have 8 devices at home, all of which need to be connected to a VPN?

The ideal solution here is to connect your home router to a VPN, and you can then access the internet securely on each of your devices.

If you are using a DD-WRT router, here is an ultimate guide on how you can configure up the VPN on this router. The process isn’t trivial, but it is not overly complex either.

Let’s have a look.

Install DD-WRT

We’re assuming that your router doesn’t have DD-WRT. If that’s not the case, you can freely skip this step.

For the ones who do not have DD-WRT, follow the following steps (here) or perform the steps below.

  1. Visit https://dd-wrt.com/support/router-database/ and enter the model number of your router. If your router supports DD-WRT, you will be provided with all the details regarding firmware requirements that you need to download.
  2. Update your firmware, and reboot your router.
  3. Next, visit http://192.168.1.1 to set up your router. In here, you will be asked to provide a username and password.
  4. You will be then redirected to the next page. Click on Setup and provide the username and password you just created.
  5. The next page will provide you with all the basic details of the router including its name, IP address and DHCP settings.
  6. In the next dropdown, choose Automatic Configuration – DHCP.
    Choose DHCP
  7. Do not touch the DHCP settings and leave them to default. Change the time settings according to your zone.
  8. Once this is done, click on the Wireless tab and configure your Wireless network.
Go to the Wireless Tab

Set Up Dynamic DNS

Now, you need to set up a DNS redirector for your dynamic WAN IP. The thing is that your ISP keeps on changing your IP address, until and unless you have paid it for a static IP.

This creates problems, as you will need to update your VPN settings every time your IP address gets changed.

Do not worry. There is a way out here. You can use a dynamic DNS service that creates a URL that reflects the updated IP provided by your ISP. Here are the steps you need to follow:

  1. Create a free account with afraid.org and go to subdomain menu.
    Go to Subdomains
  2. In the next field, create a subdomain of your liking and then choose a domain from the dropdown.
    Create the Subdomain
  3. Next, enter your router’s WAN IP in the destination field. You can get the WAN IP from the DD-WRT page.
    Enter your WAN IP
  4. Next, click Save and then click on DDNS.
    Saving DDNS
  5. Now copy the URL provided to you on the next page next to the subdomain entry.
  6. Now, go back to your router page, and below Setup, click on DDNS tab.
  7. From the dropdown menu, select freedns.afraid.org and provide the required username and password.
  8. Provide the URL copied above in the hostname field, and enable the external IP check as Yes.
  9. In the Force Update Interval field, enter 10.

PPTP Configuration

  1. On your router page, click on Services > VPN.
  2. Enable the PPTP Server. Disable the Broadcast Support, and enable the MPPE Encryption.
  3. Provide your DNS configuration.
  4. WINS servers can be skipped.
  5. MTU and MRU settings should be left as it is.
  6. Use your router’s IP as the server IP.

Device Configuration

Next, go ahead, and set up your VPN on the device, and you are done! Here is how you can configure a Windows laptop.

  1. Start > Settings > Network and Internet > VPN
  2. Click on Add a VPN connection
  3. Under the VPN Provider, write Windows. Enter afraid.org DNS address in the Server name field. Or, you can enter your router’s WAN IP. Select PPTP in the VPN type dropdown.
  4. Type of sign-in info should be Username and Password.
  5. Next, provide the username and password.
  6. Click connect.

Wrapping Up

This brings us to the end of this tutorial. If you have any questions, let us know in the comments below.

The post How to Set Up a VPN on a DD-WRT Router appeared first on Appuals.com.

Fix: Data Source References is Not Valid in Excel

$
0
0

Some users have been getting the “Data source reference is not valid” when trying to create a pivot table from a range in Excel. This particular error is reported to occur with multiple Excel and Windows version – so the issue is neither OS or Excel version specific.

Source Reference not Valid error

What is causing the “Data source reference is not valid” Error in Excel?

We investigated this particular error message by looking at various user reports and the repair steps that they followed in order to resolve the issue. As it turns out, there are several common culprits that will end up triggering this particular error message:

  • Excel file name contains square brackets – There are a set of forbidden characters that are not supported by Pivot tables. One popular reason why you might be seeing this particular error is if the excel file name contains ‘[‘ or ‘]’. In this case, the issue can be resolved by editing the file name and removing the square brackets.
  • Excel file is not saved on the local drive – You might be seeing this particular error message if you attempt to create a Pivot Table from an Excel file opened directly from a website or an email attachment. In this case, the file will be opened from a temporary folder, which doesn’t have the same permissions as a regular folder. If this scenario is applicable, you can resolve the issue by saving the .xlsx file on your local drive first.
  • The pivot table data refers to a non-existent range – A range that is not defined properly can also be causing this particular error. If you’re trying to create a Pivot table with a range that wasn’t defined, you’ll be by the same error message. In this case, you can resolve the issue by defining the rage before attempting to create the PivotTable.
  • The data source refers to a named range that contains invalid references – Another possible reason why this error occurs is when the range is defined but it references to invalid values. In this case, you can use the Name Manager to identify the values referenced and make the necessary modifications to resolve the issue.

If you’re currently struggling to resolve the Data source reference is not valid error, this article will provide you with several troubleshooting steps that will help you identify the problem that is triggering the error message. Below you’ll find a collection of methods that other users in a similar situation have used to get this resolved.

For the best results, follow the methods in the order that they are presented. You should eventually stumble upon a fix that will be effective in your particular scenario.

Let’s begin!

Method 1: Removing brackets from the file name

One of the most popular reasons that will end up triggering the Data source reference is not valid error is an incorrect Excel file name. If the reports are generated by a report automation system and the name contains forbidden characters like square brackets ‘[]‘, you’ll get this error message whenever you try to create a PivotTable.

If this scenario is applicable to your current situation, you will be able to resolve the issue by modifying the name of the .xlsx file to remove the forbidden characters. Here’s a quick guide on doing this:

  1. Close the Excel window that is currently using the file. If the file is in use, you won’t be able to rename it.
  2. Use File Explorer to navigate to the location of the Excel file. Once you get there, right-click on it and choose Rename.
  3. Next, go ahead and remove brackets from the name of the file since Pivots table is not configured to support them.
    Removing the brackets from the file name
  4. Attempt to recreate the Pivot table again and see if you’re still encountering the error.

If you’re still encountering the Data source reference is not valid error or this method wasn’t applicable to your particular scenario, move down to the next method below.

Method 2: Saving the file on the local disk

This issue might also occur if you are opening a file directly from a website or directly from an email attachment. In this case, the file will be opened from a temporary file, which will end up triggering the Data source reference is not valid error.

If this scenario is applicable to your current scenario, you will be able to resolve the issue by saving the Excel file to a local drive first. So, before attempting to create the Pivot table, go to File > Save as and save the file on a physical location (on your local drive).

Saving the Excel file on the local drive

Once the Excel file has been locally saved, recreate the steps that were previously triggering the Data source reference is not valid error and see if you can create the Pivots table without encountering the error.

If this method wasn’t applicable to your current situation, move down to the next method below.

Method 3: Ensuring that the range exists and it’s defined

Another reason why you might encounter the “Data source reference is not valid.” error when trying to insert a Pivot Table is a non-existing / not defined range.

To put this into perspective, let’s say that you’re trying to create PivotTable. Naturally, you go to Insert PivoTable, you select the toggle associated with Select a table or range and set the Table/Range to ‘test’. Now, if you’ve based the values on the ‘test’ range and it doesn’t exist, you will see the “Data source reference is not valid.” error as soon as you click Ok.

Seeing the error due to non-existing range

If this scenario is applicable, you will be able to work-around the issue by defining a range before attempting to create a pivot table. Here’s a quick guide on how to do this.

  1. Click the Formulas tab from the ribbon bar, then click on Name Manager from the list.
  2. Inside the Name Manager window, click on New and name the range that you’re going to create. Then, use the Refers to box to set the cells that you want to use for the range. You can either type it out yourself or use the built-in selector.
  3. Now that the range is defined, you can successfully create the pivot table without encountering the same error message.

If this scenario was not applicable or you’re still encountering the Data source reference is not valid error even after performing the steps above, move down to the next method below.

Method 4: Ensuring that the reference for the named range is valid

Even if you have successfully defined the range but you are still seeing the Data source reference is not valid error, chances are you’re seeing the message because the named range is referring to some cells whose values aren’t valid.

To rectify this, go to Formulaes > Name Manager and see if the range is referring to the cells that you want to analyse through the pivot table. If you see any inconsistencies, use the Refer to: box to make the switch to the correct value.

Ensuring that the references are valid

Once the modifications are made, attempt to create a Pivot Table again and see if you’re still seeing the same error message.

The post Fix: Data Source References is Not Valid in Excel appeared first on Appuals.com.

Fix: There is Insufficient Memory or Disk Space in Word

$
0
0

Several users are encountering the ‘There is Insufficient Memory or Disk Space’ error immediately after opening Word or Excel. Most affected users are reporting that the issue is occurring with any type of documents. The issue is confirmed to appear with Office 2010, Office 2013 and Office 2016.

There is insufficient memory or disk space

What is causing the ‘There is insufficient memory or disk space’ Error in Microsoft Word?

We looked into this particular error by investigating various user reports and the repair strategies that are commonly used to resolve this issue. Based on what we gathered, there are several common culprits that are known to trigger this particular error:

  • Corrupted Normal.dotm file – A corrupted Normal.dotm file is known to trigger this particular error message. This error will typically get thrown in Word in those cases where the default font styles can’t be loaded. In this case, you can resolve the issue by forcing Windows to create a new .dotm file.
  • Broken Office Installation – An incomplete or a crippled installation (as a result of an AV scan) can also trigger this particular error message. If this scenario is applicable, you should be able to resolve it by repairing the Office installation via Programs and Features.
  • Insufficient permissions on the font folder– Another popular scenario in which this error might appear is if the fonts folder doesn’t have the necessary permissions. In this case, you can either create a policy via Registry Editor or use a series of Powershell commands to grant the necessary permissions.
  • Corrupted font cache – Corruption among your font folder might trigger this particular error if some fonts used by the file you’re trying to open are affected.  In this case, you can resolve the issue by creating a .bat file capable of flushing your font cache.
  • An Add-in is triggering the error – There are several Word and Excel add-ins known to facilitate the apparition of this issue. If this scenario is applicable, you will be able to resolve the issue by identifying the culprit and remove it from your add-ins list.

If you’re currently struggling to resolve the ‘There is Insufficient Memory or Disk Space’ error, this article will provide you with several troubleshooting steps. Down below, you’ll find a collection of methods that other users in a similar situation have successfully deployed to get around this error message.

For the best results, we advise you to follow them in the order that they are presented in – the potential fixes are ordered by efficiency and severity. One of them is bound to resolve the issue in your particular scenario.

Method 1: Renaming the Normal.dotm file

Several users that we’re encountering this particular issue have reported that they were able to resolve the issue permanently by navigating to Microsoft Office Template folder inside the Roaming folder and renaming the Normal.dotm file with the .old extension.

This operation will force Microsoft Word / Excel to create a new Normal.dotm file the next time the program is launch, which will end up resolving the issue.

The Normal.dotm template will open whenever you Start Microsoft Word – it includes default styles and customizations that determine the basic look of a document. A corrupted Normal.dotm template is known to trigger the ‘There is Insufficient Memory or Disk Space’ error.

Here’s a quick guide on renaming the Normal.dotm file:

  1. Make sure you don’t have any program belonging to Microsoft Office opened.
  2. Open File Explorer and navigate to the following location:
    C:\Users\*YourUser*\AppData\Roaming\Microsoft\Templates
    

    Note: If the AppData folder is not visible, go over to the Ribbon menu at the top and click on View. Then, make sure that the box associated with Hidden Items is checked. Once, Hidden Items is enabled, your Appdata folder will become visible.

  3. Once you reach the Templates folder, access the View tab using the ribbon at the top and make sure that the box associated with File Name Extensions is checked.
  4. Then, right-click on Normal.dotm and choose Rename. Next, add .old after the file’s extension and save the change. This will signal that the file is obsolete, forcing the program to create a new version of the same file the next time it needs to use it.
    Note: Renaming a file with the .old extension is better than deleting it, mainly because you can always go back and delete the extension in order to make the file usable again if you need to.
  5. Open the program that was previously showing the error and see if the issue has been resolved.
Editing the Normal.dotm file

If you’re still encountering the “there is insufficient memory or disk space” error, move down to the next method below.

Method 2: Repairing the Office Installation

Based on what some affected users are saying, this particular issue can also occur if you’re dealing with a corrupted or broken installation. Before you try anything else, see if repairing the Office installation will resolve the issue and allow you to open Word / Excel files without encountering the “there is insufficient memory or disk space” error.

Here’s a quick guide on repairing your Microsoft Office installation:

  1. Press Windows key + R to open up a Run dialog box. Then type “appwiz.cpl” and press enter to open up the Programs and Features window.
    Type appwiz.cpl and Press Enter to Open Installed Programs List
  2. Inside the Programs and Features, locate your Microsoft Office installation, right-click on it and choose Change.
    Changing the Microsoft Office installation
  3. Select Quick Repair and hit the Repair button. At the confirmation window, click Repair again to to kickstart the installation.
    Repairing the Office Installation
  4. Once the process is complete, restart your computer and see if the issue has been resolved at the next startup.

If you’re still encountering the same error message, move down to the next method below.

Method 3: Creating SaveZoneInformation policy via RegistryEditor

Some users have reported that they were finally able to resolve the issue after creating a policy called SaveZoneInformation using Registry Editor. After this policy was enforced, they reported being able to open .doc attachments without encountering the “there is insufficient memory or disk space” error.

Here’s a quick guide on making this registry edit in order to create the SaveZoneInformation policy:

  1. Press Windows key + R to open up a Run dialog box. Then, type “regedit” and press Enter to open up Registry Editor. When prompted by the UAC (User Account Control), click Yes to grant administrative privileges.
  2. Once you get inside the Registry Editor utility, use the left-hand pane to navigate to the following location manually:
    HKEY_CURRENT_USER\Software\Microsoft\Windows\CurrentVersion\Policies

    Note: You can either navigate there manually or simply paste the location inside the navigation bar and hitting Enter.

  3. Once you get to that location, right-click on Policies and choose New > Key. Then, name the newly created key to Attachments.
    Note: Keep in mind that it’s very important that the Attachments key is a subkey of Policies.
  4. With the Attachments key selected, go over to the right-hand pane, right-click on an empty space and choose New > Dword (32-bit) value.
  5. Name the newly created Dword as SaveZoneInformation and press Enter to save the changes.
  6. Double-click on the newly created SaveZoneInformation and set it’s value to 1.
  7. Close Registry Editor and open program that was previously showing you the error to see if the issue has been resolved.
Creating the SaveZoneInformation Policy using Registry Editor

If you’re still encountering the  “there is insufficient memory or disk space” error, move down to the next method below.

Method 4: Removing Word / Excel Add-ins

As some several affected users have pointed out, this particular issue can also occur in those instances where a Word or Excel add-in is causing the “there is insufficient memory or disk space” error. If this scenario is applicable, you’ll only be able to resolve the issue by identifying the add-in responsible and dealing with it.

Note: On Word, the add-in that is mostly reported to cause this particular issue is Instant Messaging Contacts.

Keep in mind that the steps of disabling an add-in are exactly the same on both Word or Excel, so feel free to follow the guide below regardless of the program that you’re encountering the error with:

  1. Open the program that is showing the error (Word or Excel), but don’t try opening a file. Simply double-click on the main executable and go to File > Options.
  2. In Excel Options / Word Options, select Add-ins from the left-hand side. Then, move over to the right-hand side pane.
  3. Scroll down to the bottom of the Add-ins screen, select Excel / Word Add-ins (near Manage) and click the Go button.
  4. Inside the Add-ins screen, uncheck the box associated with every Add-in until each one is disabled. then hit the OK button.
  5. Repeat step 2 to return to the Add-ins menu.
  6. This time, select COM Add-ins from the Manage button and click the Go button again.
  7. Uncheck every box associated with an Add-in and click the Ok button again to ensure that every add-in is enabled.
  8. Restart the program (Word / Excel) and try opening a file that was previously triggering the error message.
  9. If you’re no longer encountering the error, systematically re-enable each disabled add-in (one by one) until you get the error again. You should eventually be able to pinpoint the issue that is causing the error message.
  10. Once you manage to identify the Add-in responsible for the error message, return to the Add-in menu, select it and click Remove to get rid of it.
Disabling Add-ins in Excel / Word

Method 5: Establishing the necessary permissions

As it turns out, this issue can also occur if the  C:\windows\fonts folder doesn’t have the necessary permissions to access and edit the fonts used by Microsoft programs such as Word and Excel. This is a known bug that is mainly reported to occur with Windows 10 Creators Update builds.

If this scenario is applicable to your current situation, you can resolve it by running a series of command in an elevated PowerShell window.

Here’s what you need to do:

  1. Press Windows key + R to open up a new Run dialog box. Then, type “powershell” and press Ctrl + Shift + Enter to open up an elevated Powershell Window. When prompted by the UAC (User Account Control), click Yes grant administrative privileges.
    Run dialog: powershell Then press Ctrl + Shift + Enter
    Run dialog: powershell Then press Ctrl + Shift + Enter
  2. Inside the elevated Powershell window, type/paste the following commands in order and press Enter after each one to resolve the issue:
    Get-acl C:\Windows\fonts\arial.ttf | Set-Acl -path c:\windows\fonts\*.*
    Get-acl C:\Windows\fonts\arial.ttf | Set-Acl -path c:\windows\fonts
  3. After the two commands have been successfully processed, restart your computer and see if the issue is resolved at the next startup.

If you’re still encountering the “there is insufficient memory or disk space” error, move down to the next method below.

Method 6: Rebuilding the Font Cache on Windows 10

Some users that have been encountering the with Word documents from a SharePoint site synched with Onedrive reported that the issue was only resolved after flushing the font cache and rebooting the machine.

The font cache is a set of files used by Windows to manage and display the fonts currently installed on the PC. Corruption might case some fonts to malfunction, which will end up triggering the “there is insufficient memory or disk space” error when a program like Word or Excel is trying to use them.

Fortunately, you can resolve this quite easily by creating and running a .bat file capable of rebuilding your font cache on Windows 10. Here’s what you need to do:

  1. Press Windows key + R to open up a Run dialog box. Then, type “notepad” and press Enter to open the built-in Text Editor.
    Opening Notepad via a Run dialog box
  2. Inside the Notepad window, paste the following code:
    @echo off
    
    :: Stop and disable "Windows Font Cache Service" service
    :FontCache
    sc stop "FontCache"
    sc config "FontCache" start=disabled
    sc query FontCache | findstr /I /C:"STOPPED" 
    if not %errorlevel%==0 (goto FontCache)
    
    
    :: Grant access rights to current user for "%WinDir%\ServiceProfiles\LocalService" folder and contents
    icacls "%WinDir%\ServiceProfiles\LocalService" /grant "%UserName%":F /C /T /Q
    
    
    :: Delete font cache
    del /A /F /Q "%WinDir%\ServiceProfiles\LocalService\AppData\Local\FontCache\*FontCache*"
    
    del /A /F /Q "%WinDir%\System32\FNTCACHE.DAT"
    
    
    :: Enable and start "Windows Font Cache Service" service
    sc config "FontCache" start=auto
    sc start "FontCache"
  3. Go to File > Save as and name it whatever you want, but make sure that you save it with the .bat extension.
    Creating the .bat file
  4. Right-click on the newly created .bat file and choose Run as administrator to run it.
    Rebuilding the font cache via .bat file
  5. Once the operation is complete, restart your computer and see if the issue has been resolved.

The post Fix: There is Insufficient Memory or Disk Space in Word appeared first on Appuals.com.

Fix: No Sound on Steam Games on Windows 10

$
0
0

Several Windows 10 users are reporting that they aren’t able to hear any sound when trying to play games via Steam. While some affected users are reporting that the issue started occurring after a Windows update, others report that they were encountering the issue immediately after they installed Steam. In all cases, users report that audio is functioning properly with non-games applications like VLC, Chrome, Spotify, etc.

No Sound with Steam Games on Windows 10

What is causing the No Sound Issues with Steam on Windows 10?

We investigated this particular issue by looking at various user reports and the repair strategies that most affected users have successfully deployed in order to resolve the issue.

Naturally, we started out by eliminating potential culprits from the list. As it turns out, the issue is not hardware-related because the issue is confirmed to occur on all kinds of specifications from high-end PCs to entry-level laptops. Also, the issue doesn’t seem to related to the general Audio driver because the sound is working normally with the rest of the applications.

Based on our investigations, we managed to identify a few potential culprits that might end up triggering this particular behavior:

  • 3rd party sound manager is conflicting with the built-in sound manager – Sonic Studio III, Nahimic and MSI AUdio are all sound managers that are known to trigger this particular issue. This happens with Windows 10 version newer than build 1803. If this scenario is applicable, you can resolve the issue by uninstalling the 3rd party sound manager.
  • Two users are logged in at the same time – As several users have reported, this issue is known to occur if two different Windows user accounts are logged in at the same time. This scenario might confuse the built-in sound manager to send the sound to the wrong user account. In this case, you can resolve the issue by logging out of the unnecessary user account.
  • Corrupted / Incomplete game cache folder – There are confirmed instances where the issue was actually occurring because the game folder was missing some files or some game files were touched by corruption. In this case, Steam will most likely be able to resolve the issue if you force the client to verify the file cache integrity of the game.
  • Realtek HD Audio driver is causing the issue – In the vast majority of cases, the driver used when this particular issue is encountered is Realtek HD Audio. Turns out that it might also be responsible for the no-sound problems with Steam since some affected users have reported that the problem was resolved after they made the switch to the Generic Audio driver.

If you’re looking to resolve this particular problem with the sound on Steam games, this article will provide you with several troubleshooting steps that other users in a similar situation successfully used to get the issue resolved.

But keep in mind that depending on your particular scenario, not every potential fix will be applicable to your scenario. With this in mind, we encourage you to follow the methods in the order that they are presented until you find a fix that is effective in your situation.

Method 1: Uninstalling Sonic Studio III /Nahimic / MSI Audio

As it turns out, this particular behavior often appears due to a conflict between Sonic Studio III (which comes bundled with a lot of ASUS products) and Windows 10 versions older than build 1803. This happens because Sonic Studio III includes some features capable of redirecting audio from applications to different audio outputs.

Update: We’ve been able to confirm that the conflict is also occurring Nahimic and MSI audio. It turns out that several different sound managers will trigger this particular conflict.

This is great functionality to have, but a Windows update introduced with version 1803 provides an almost identical feature. Obviously, the two will end up conflicting and this is reported to happen even when redirection is not active – just having Sonic Studio III installed is enough to cause the conflict.

If this scenario is applicable to your situation, you will be able to resolve the issue by removing Sonic Studio III from your computer. Here’s a quick guide on how to do this:

  1.  Press Windows key + R to open up a Run dialog box. Then, type “appwiz.cpl” and press Enter to open up Programs and Features.
    Type appwiz.cpl and Press Enter to Open Installed Programs List
  2. Inside Programs and Features, look through the list of applications and locate Asus Sonic Studio 3 / Nahimic or any other sound manager that you might be using. When you see it, right-click on it and choose Uninstall.
    Uninstalling Asus Studio 3

    Note: If you also have Asus Sonic Radar 3 installed, you might need to uninstall both in order to eliminate the conflict.

  3. Follow the on-screen prompts to complete the uninstallation, then restart your computer.
  4. Once the next startup is complete, launch the game (via STEAM) that you previously had no sound with and see if the error has been resolved.

If you’re still not able to hear any sound in the Steam game, move over to the next method below.

Method 2: Logging out any other users

Another popular scenario in which this particular error occurs is if the two different users are logged on at the same time. As it turns out, this might end up confusing the Steam client into redirecting the sound to the wrong user.

Let’s consider the following scenario – Person A  and Person B are both logged into the same Windows 10 computer at the same time. When the game is launched by Person B, audio is not working. But audio is working for person A.

If this scenario is applicable to your situation, you can resolve it by doing the following:

  1. While logged in as Person A, press the Windows key to bring up the Start menu, then click on the User icon and select Sign-Out.
    Logging out of the local account

    Note: Keep in mind that switching the users directly instead of logging out of the A account first will still produce the same error.

  2. From the Log-on menu, log in with user B and launch a Steam game.

If you’re still encountering the same problem with audio, move down to the next method below.

Method 3: Verifying the file cache integrity of the game

If you’re only encountering the issue with one specific game, it’s possible that a game update might have not installed completely or you’re dealing with some file corruption. Several users that found themselves in a similar scenario have reported that the issue was resolved after they verified the integrity of the file cache via Steam menus.

Here’s a quick guide on how to do this:

  1. Open your Steam client, go to the Library tab, right-click on the game that you’re having sound problems with and choose Properties.
    Opening Properties screen on Steam
  2. Inside the Properties screen of the game, go to the Local Files tab and click on Verify Integrity of the Game Cache.
    Clicking on the “verify the integrity of game cache button”
  3. Wait until the process is complete, then restart your Steam client once the integrity is verified and fixed.
  4. Open the game and see if you’re still having sound issues.

If you’re still unable to hear any sound with this game or this scenario wasn’t really applicable to what you’re encountering, move down to the next method below.

Method 4: Switching to the Generic Windows Audio driver

Several affected users have reported that in their case, the issue was resolved as soon as they changed their active sound driver from Realtek HD Audio to the Generic Windows Audio driver. Although there’s no official explanation of why this fix is effective, some users are speculating that using the genuine Windows driver eliminates the conflict with different sound managers.

Here’s a quick guide on making the switch to the Generic Windows Audio Driver:

  1. Press Windows key + R to open up a Run dialog box. Then, type “mmsys.cpl” and press Enter to open the Sound window.
  2. Inside the Sound window, go to the Playback tab, select the active Playback device that you’re having issues with and click the Properties button.
  3. In the Properties screen of your playback device, go to the General tab and click the Properties button associated with Controller Information.
  4. Inside the newly opened menu, go to the General tab and click on Change Settings.
  5. Inside the High Definition Audio Device properties, go to the Driver tab and click on Update Driver.
  6. When you get to the Update Drivers screen, click on Browse my computer for driver software.
  7. In the next screen, click on Let me pick from a list of available drivers on my computer.
  8. Next, make sure that box associated with Show compatible hardware is checked, then select High Definition Audio Device and click Next.
  9. When prompted by the Warning prompt, click Yes to confirm the installation.
  10.  Wait until the installation is complete, then restart your computer and see if the issue is resolved at the next startup.
Installing the Windows Sound Generic Driver

If you’re still unable to hear sound with Steam games even after making the switch to the Generic Windows Audio driver, move down to the next method below.

Method 5: Using a system restore point

If you noticed that the issue started to occur abruptly (not too long ago), you can probably resolve the issue by restoring your machine to a previous point in time. System Restore is a utility that will fix common errors and problems by restoring the entire Windows installation to a working state.

The utility will back your system up after certain actions inside a restore point – this contains a snapshot of Windows system files, program files, registry files, hardware drivers, etc.

If you’re lucky enough to have a restore point that was created right before the apparition of the issue, you will be able to resolve the issue by restoring your machine state to a healthy state.

Here’s a quick guide on how to do this:

  1. Press Windows key + R to open up a Run dialog box. Then, type “rstrui” and press Enter to open up the System Restore wizard.
    Opening the System Restore wizard via Run box
  2. At the initial screen of System Restore, click Next to advance to the next one.
    Using System Restore
  3. At the next screen, start by checking the box associated with Show more restore points. Once you’ve done that, select a restore point that is dated prior to the apparition of your audio issue. With the restore point selected, click Next.
    Restoring your system to a previous point in time
  4. All that’s left to do now is click Finish to commence the restoring process. At the end of this process, your computer will restart and the older state will be enforced.
    Starting the System Restore process

    Once the next startup is complete, open the Steam game that was previously producing no sound and see if the issue has been resolved.

If you’re still encountering the same error message, move down to the next method below.

Method 6: Performing a Repair Install / Clean Install

If you’ve come this far without a result, the only way to resolve the issue might be to reset your Windows components. Several affected users reported that the audio started working normally with Steam games after they performed one of these two operations:

  • Repair Install – A repair install is a damage-controller approach since it will only reset Windows components ( system files, built-in apps, drivers, etc.) without affecting any of your personal files and applications (apps, photos, music, games system files.
  • Clean install – A clean install will also reset the Windows components, but it will also wipe out any personal files, applications, and user preferences.

Follow one of the methods above (depending on how determined you are) and you should be able to resolve the sound problem with your Steam games.

The post Fix: No Sound on Steam Games on Windows 10 appeared first on Appuals.com.


Fix: Sec_Error_Cert_Signature_Algorithm_Disabled

$
0
0

Some users are seeing the Error Code: sec_error_cert_signature_algorithm_disabled when trying to visit certain websites from their FireFox browser. Most affected users report that the issue started occurring abruptly – prior to this, the web pages could be visited without issues.  The issue is reported to occur on both Windows and Mac computers.

Error Code: sec_error_cert_signature_algorithm_disabled

What is causing the ‘sec_error_cert_signature_algorithm_disabled’ error?

We investigated this particular issue by looking at various user reports and the repair strategies that most affected users have operated in order to resolve the issue. Based on what we gathered, there are several common culprits that are known  to trigger this particular error:

  • Intermediate certificate and exceptions are causing the error – Several affected users have managed to resolve the issue by editing the Firefox profile folder to disregard certificates and exceptions that might be causing the issue. The easiest way to do this is by deleting the cert_override.txt and editing the cert9.db or cert8.db file.
  • Adware app is causing the security prompt – E-rewards Notify App and a few other applications that serve as fronts for adware can also trigger this error message. Tracking them down and uninstalling them from your system will resolve the issue if this scenario is applicable.
  • Malware infection – As it turns out, browser hijackers are also confirmed to trigger this particular error message. In this case, using a specialized security scanner to remove the malware infection and reinstalling Firefox should resolve the issue.
  • HTTPS filtering is enabled on Avast – Avast has a long history of throwing false positives with Firefox because of its habit of sending out IIRC connection details. In this case, disabling HTTPS scanning should stop the false positives from appearing again.
  • Kaspersky Root Antivirus certificate is not installed on Firefox – If you’re using a 64-bit version of FireFox in conjunction with Kaspersky, chances are the issue is occurring because your Firefox installation is missing the antivirus root certificate. A quick trip to the Certificates menu should resolve the issue in this case.

If you’re currently struggling to resolve this Firefox issue, this article will provide you with several troubleshooting steps that other users in a similar position successfully used to get the issue fixed. The methods below are ordered by efficiency and severity, so please follow them in order until you stumble upon a fix that resolves the issue in your case.

Method 1: Renaming cert.db & deleting cert_override.txt

Several affected users have reported that the issue was resolved after they renamed the cert8.db or cert9.db file and deleting the cert_override.txt file from the Firefox profile folder. This operation will remove intermediate certificates and exceptions that Firefox currently stores, which should, in turn, resolve the sec_error_cert_signature_algorithm_disabled error.

Here’s a quick guide on how to do this:

  1. Open Firefox and click the Action button in the top-right corner of the screen. Then, click on Help, and choose Troubleshooting Information from the newly appeared menu.
  2. From the Troubleshooting Information screen, click the Open Folder button associated with the Profile folder.
  3. Once you’re inside you’re current Firefox Profile, go ahead and close the FireFox application so that we can operate the changes.
  4. Once Firefox is closed, right-click on cert9.db or cert8.db (depending on the Firefox version that you installed) and choose Rename. Next,  add a ‘.old‘ after the ‘.db’ extension and hit Enter to save your changes. This will instruct the browser to disregard the current Database file and create a new one at the next startup.
    Note: If you can’t see the extension of your files in File Explorer, go to the View tab (using the ribbon bar at the top) and make sure that the box associated with Hidden Items is checked.
  5. Then, right-click on the cert_override.txt and choose Delete to remove any intermediate certificates and exceptions that FireFox is currently storing.
  6. Once these two changes have been made, restart your Firefox browser and see if you’re still encountering the sec_error_cert_signature_algorithm_disabled error.
Renaming cert.db & deleting cert_override.txt

If you’re still seeing the same error message, move down to the next method below.

Method 2: Uninstalling the Adware app

There are several malware/adware products that are known to trigger this particular error message. While there are certainly other variations of this, the E-Rewards Notify App is by far the most commonly reported culprit when it comes to the sec_error_cert_signature_algorithm_disabled error.

Several affected users have reported that the issue was resolved after they used the Programs and Features window to uninstall the adware that is producing the error. Here’s a quick guide on how to do this:

  1. Press Windows key + R to open up a Run dialog box. Then, type “appwiz.cpl” and press Enter to open up the Programs and Features list.
    Type appwiz.cpl and Press Enter to Open Installed Programs List
  2. Once you get inside the Programs and Features window, skim through the list and see if you can find a suspicious program that might have been used as a front o install adware. Obviously, you should start looking for the E-Rewards Notify App since it’s the most popular adware variation known to produce this particular error.
    Note: It might help to via Installed On if you have a general idea when the issue started occurring.
  3. Once you see it, right-click on it and choose Uninstall. Then, follow the on-screen prompts to complete the uninstallation.
    Uninstalling the adware application
  4. Once the uninstallation is complete, restart your computer.
  5. At the next startup, see if the issue has been resolved by visiting the same webpages that we’re previously triggering the sec_error_cert_signature_algorithm_disabled error.

If you’re still seeing the same error message, move down to the next method below.

Method 3: Performing a malware scan

If you weren’t able to pinpoint and eliminate the adware/malware that was causing the issue, using a security scanner to identify the culprit is about your only choice by now. Several affected users have reported that a malware scan identified and eliminated a nasty browser hijacker.

Based on our personal experience, there are few better free security scanners capable of dealing with browser hijackers than Malwarebytes. To eliminate the possibility of a malware/adware causing the sec_error_cert_signature_algorithm_disabled error, follow this article (here) to initiate a deep scan with Malwarebytes.

Once the scan is complete, restart your computer and reinstall your Firefox browser at the next startup. This step is necessary because, in the event of a browser hijacker, some infected browser files will have been deleted in the cleaning process.

Method 4: Disabling HTTPS filtering  (Avast only)

As some users have reported, this particular issue can also occur if you’re using Avast! antivirus. Turns out that in some scenarios, Avast! might trigger a false positive thinking a MITM (man in the middle) is underway on your computer.

We investigated this possibility thoroughly and it turns out that AVAST! is notorious for sending out details of your connections (IIRC), which ends up triggering the sec_error_cert_signature_algorithm_disabled error in Firefox.

If this scenario is applicable to your current situation, you will be able to deal with the false positive by opening your Avast Settings, going to Main settings and ensuring that the checkbox associated with Enable HTTPS scanning is disabled.
Once the change has been operated, restart your computer and see if the issue has been resolved.

If this particular method wasn’t applicable, move down to the next method below.

Method 5: Manually Install Kaspersky’s antivirus root certificate in Firefox

If you’re using a 64-bit version of FireFox with Kaspersky, the  sec_error_cert_signature_algorithm_disabled error might occur because your Firefox installation is missing the antivirus root certificate.

Here’s a quick guide on fixing the issue if this scenario is applicable:

  1. Open Firefox, click the action button (top-right) corner, then click on Options.
  2. Inside the Options tab, click the Privacy & Security tab from the left-hand menu, then scroll down to Certificates and click on View Certificates.
    Viewing Certificates in Firefox
  3. Then, inside the Certificate Manager, click on the Authorities tab and click the Import menu.
    Importing the certificate
  4. Once you get to the import menu, paste the following location inside the address bar and press Enter. Then, select the Root Certificate from that folder and click Open.
    Importing the Personal Root Certificate
  5. At the confirmation window, make sure that all trust boxes are enabled before clicking Ok.
  6. Restart your browser and check if the issue has been resolved.

If you’re still encountering the sec_error_cert_signature_algorithm_disabled error, move down to the next method below.

Method 6: Adjusting the security.pki.sha1_enforcement_level value

Some affected users that had issues with accessing Facebook Workspace and a few other similar services have reported that the issue was resolved after they accessed the advanced settings of firefox and adjusted the Security Enforcement Level value.

This procedure will reconfigure your Firefox browser to accept SHA-1 certificates without any further checkups, which will end up eliminating the issue. However, going this route might leave your browsing sessions open to security attacks.

If you decide to go this route, here’s what you need to do:

  1. Open Firefox, type ‘about:config‘ in the navigation bar and press Enter to access the advanced settings.
  2. At the security prompt, click the I accept the risk! button.
  3. Once you’re inside the advanced settings of Firefox, type “security.pki.sha1” in the search box to locate the value that needs to be modified.
  4. Next, double click on security.pki.sha1_enforcement_level;3 and change it’s value to 4 before clicking Ok.
  5. Restart your browser and see if the issue has been resolved.
Adjusting the Security PKI SHA-1 value

The post Fix: Sec_Error_Cert_Signature_Algorithm_Disabled appeared first on Appuals.com.

Fix: TeamViewer Stuck on Initializing Display Parameters

$
0
0

Several users are reporting that their TeamViewer client is getting stuck and hangs when they attempt to connect to a device or partner. Some users report that the issue happens occasionally while others are complaining that they see the “Initiating display parameters” error at every connection attempt.

TeamViewer stuck on Initializing Display Parameters

What is causing hanging during “Initiating display parameters” phase in TeamViewer?

We investigating this particular issue by looking at various user reports and the repair strategies that most affected users have successfully deployed to get to the bottom of this issue. Based on what we gathered, there are several common scenarios that will trigger this particular error message:

  • TeamViewer version is outdated – One possible scenario is that the TeamViewer client version that you’re using is outdated. Versions older than TeamViewer 12 are equipped with a hotfix that resolves the glitch that was known to trigger the “Initiating display parameters”. If this scenario is applicable, updating the client to the latest version on both machines should resolve the issue.
  • Remote Wallpaper is enabled – This particular TW setting is known to facilitate the apparition of this error message. Several users have reported that the connection was initiating without errors once they disabled Remove Remote Wallpaper from the Options menu.
  • Display Quality is set to Optimize Quality – Several affected users have reported that the issue was resolved as soon as they changed the Display quality to Optimize Speed. This is typically reported to be effective in those cases where one of the machines is dealing with an unstable network connection.
  • Unnatended Remove Access is not configured – This error might also occur if the TeamViewer client is not configured to allow connections if someone is not logged in. If this scenario is applicable, you will be able to resolve it by reinstalling TeamViewer with Unattended Remote Access.
  • The PC is not configured for remote control – It’s also possible that TeamViewer doesn’t have the necessary permissions because your computer is not configured to allow remote control access. If this is applicable, you can revert this setting by taking a trip to the System Properties screen.
  • A process is conflicting with TeamViewer – BGInfo (a process belonging to SysInternals) is known to trigger the “Initiating Display Parameters” hang by conflicting with the TW app. As it turns out, this occurs because both applications will request access to some settings related to the wallpaper. In this case, disabling the conflicting process should resolve the issue.
  • Host PC is in standby mode – Another possible reason why this issue occurs is that the host pc is currently in standby mode with the screen turned off. This is known to produce this particular error with even the newest TW builds. In this case, adjusting the Power settings on the host PC to ensure that the screen doesn’t get turned off again should resolve the issue.

If you’re currently looking for a fix that will resolve the hanging during the “Initiating display parameters” phase, this article will provide you with several troubleshooting steps.

Down below, you’ll find a collection of methods that other users in a similar situation have sucesfully used to get the issue resolved and use TeamViewer normally.

Method 1: Update Teamviewer on both sides

Before you try anything else, it’s important to make sure that both involved machines have the same version and they are both updated to the latest build. The development team behind Teamviewer is known for pushing hotfixes when the glitch or bug is hindering the functionality of the platform, so chances are you will be able to resolve the issue just by updating the client on both the involved machines.

Here’s a quick guide on doing this:

  1. Open Teamviewer or cancel any active connection if the application is already opened.
  2. Use the ribbon bar at the top to access Help tab, then click on Check for New version.
    Checking for a new TeamViewer version
  3. If a new version is found, follow the on-screen instructions to download & install the newer build.
  4. Repeat the process on the second machine.
  5. Restart both computers and see if the issue is still occurring.

If you’re still getting stuck at the “Initiating display parameters” screen when trying to establish the connection, move down to the next method below.

Method 2: Adjusting Display Quality & removing Remove Wallpaper

Several affected users have reportedly been able to work around this issue by changing some settings on the machine that they tried to connect to. By ensuring that Remove wallpaper is active and setting the Display quality to Speed, most users have reported that they were able to get past the “Initiating display parameters” screen.

Here’s a quick guide on how to do this:

  1. Open Teamviewer on the machine that you try to connect to.
  2. Using the ribbon at the top, go to to the Extras tab and click on Options.
  3. Inside TeamViewer options, select the Remote control tab from the left-hand-side menu. Then, move over to the right pane and change the drop-down menu associated with Quality to Optimize Speed.
  4. Next, move down below and make sure that the box associated with Remove remote wallpaper is disabled.
  5. Restart your TeamViewer client on the machine that you’ve just operated the modifications and see if the issue has been resolved.
Disabling Remote Wallpaper & adjusting Display Quality

If you’re still encountering the “Initiating display parameters” error when trying to establish a connection between the to PCs, move down to the next method below.

Method 3: Reinstalling Teamviewer with Unattended Remote Access

One other possible reason why TeamViewer remains stuck with the “Initiating display parameters” error is that the client is only configured to allow connections when someone is logged in. If this scenario is applicable, you will be able to fix it by uninstalling TeamViewer and deleting one particular Registry Key. Then, after reinstalling the latest version of Teamviewer with Unattended Remote access, you should no longer encounter this particular issue.

Here’s a quick guide on how to do this:

  1. Press Windows key + R to open up a Run dialog box. Then, type “appwiz.cpl” and press Enter to open up Programs and Features.
    Type appwiz.cpl and Press Enter to Open Installed Programs List
  2. Inside the Programs and Features screen, scroll down through the list of applications and locate the TeamViewer version that you have installed. Once you see it, right-click on it and choose Uninstall to remove it from your system.
    Uninstalling the current version of TeamViewer
  3. With Teamviewer removed, you can close the Programs and Features window.
  4. Press Windows key + R to open up another Run dialog box. Then, type “regedit” and press Enter to open up the Registry Editor. When prompted by the UAC (User Account Control), click Yes to grant administrative privileges.
  5. Inside the Registry Editor, use the left panel to navigate to the following location:
    HKEY_Local_Machine > Software > Wow6432Node > TeamViewer
    
  6. Once you see the TeamViewer registry key, right-click on it and choose Delete to remove it entirely.
    Deleting the TeamViewer Registry key
  7. With the TeamViewer key deleted, restart your computer.
  8. At the next startup, Open TeamViewer and go to Connection > Open Management Console.
  9. If you don’t already have an account, click on Sign Up and complete the registration process. Else, simply input your login credentials and click on Sign In.
    TeamViewer Management Console
  10. Once you’re inside the TeamViewer Management Console, click on Add > Add computer (top-right corner).  Then, make sure that the Add new device tag is selected, select Default TeamViewer from the drop-down menu and click on Download now.
    Downloading the Unattended Remote Access of TeamViewer

    Note: This step should be done from the host PC. The one that you connect remotely too.

  11. Follow the on-screen prompts to complete the installation.
  12. Move over to the computer that you use to connect remotely and see if you are able to establish the connection without encountering the “Initiating display parameters” error.

If you’re still encountering the same error message, move down to the next method below.

Method 4: Making sure that the computer is configured for remote control

Some users have been able to resolve the issue after discovering that their computer was not configured to allow a remote connection. After configuring their Windows version to allow remote connections, they reported that the “Initiating display parameters” error is no longer occurring.

Here’s a quick guide on how to ensure that Remote Control is enabled on your machine:

  1. Press Windows key + R to open up a Run dialog box. Then, type “sysdm.cpl” and press Enter to open up the System Properties screen.
  2. Once you’re inside the System Properties screen, click the Remote tab and make sure that the checkbox associated with Allow Remote Assistance connections to this computer is checked.
  3. Next, click the Advanced button below and make sure that the box under Remote control (Allow this computer to be controlled remotely) is checked.
  4. Click Apply, then restart your computer to enforce the changes.
  5. Attempt to initiate the connection again and see if you’re still encountering the “Initiating display parameters” error.
Configuring the computer for remote control

If the same error message is still occurring, move down to the next method below.

Method 5: Disabling conflicting process

As it turns out, this particular issue can also be caused by a case of conflicting processes. While there might be other conflicting processes, BGInfo (belonging to SysInternals is known to trigger the “Initiating Display Parameters” error if a connection is initiated with TeamViewer while the process is active.

This is mostly reported to occur if the BGInfo process is tasked with updating a dynamic wallpaper each time the user logs in. Because TeamViewer will also attempt to modify the settings as well, a conflict will be created in which the remote access application will hang.

If this particular case is applicable, the only viable fix that is known to resolve the issue is to disable the BGInfo process.

To do this, press Ctrl + Shift + Esc to open up Task Manager. Once you’re inside Task Manager, go to the Processes tab, right-click on the BGInfo process and choose End Task.

Ending the task of the BGInfo process

With the process ended, reinitiate the TeamViewer connection and see if you’re still encountering the same error message. If you’re still encountering the same error message, move down to the next method below.

Method 6: Disabling Standby mode from Power Settings

Another possible reason why you’re seeing the “Initiating Display Parameters” error when trying to initiate a TeamViewer connection between two computers is that the application is unable to wake the host system from standby mode.

This is a long-standing issue with TeamViewer, as we were able to discover plenty of user reports where the remote service is unable to initialize the display in instances where the host system is in standby.

If this scenario is applicable, you will be able to resolve the issue by ensuring that you keep the host system awake at all times by preventing it to enter in standby mode (so the display never gets turned off).

Here’s a quick guide on how to do this:

  1. Press Windows key + R to open up a Run dialog box. Then, type “powercfg.cpl” and press Enter to open up the Power Options screen.
  2. Inside the Power Options screen, observe your active Power Plan and click the Change plan settings button associated with it.
  3. From the Edit Plan Settings screen, change the drop-down menus (for Turn Off the display and Put the computer to sleep)  to Never. Do this for both On battery and Plugged In.
  4. Once the changes have been operated, click on Save changes, then restart your computer.
  5. At the next startup, attempt to initiate the TeamViewer connection again and see if you’re still seeing the “Initiating Display Parameters”
Preventing the host display from turning off

If this method wasn’t applicable or you’re still encountering the “Initiating Display Parameters” error, move down to the next method below.

Method 7: Connecting via Server ID

There is one workaround that a lot of users encountering the “Initiating Display Parameters” error during a connection attempt have successfully used to avoid the issue. It involves using the TeamViewer server ID (instead of the TeamViewer user ID) to connect remotely.

This workaround is extremely simple as long as you know where to find the server ID. Here’s a quick guide on connecting via the Server ID:

  1. From the host machine, open TeamViewer and go to the Help tab using the ribbon at the top. Then, click on About TeamViewer.
    Accessing the About TeamViewer menu
  2. Inside the newly opened About TeamViewer menu, copy the TeamViewer server ID and send it over to the person operating the machine that is trying to connect remotely.
    Discovering the Server ID
  3. On the machine that is attempting to connect remotely, instead of using the default User ID, use the Server ID that you previously fetched at step 2.

You should now be able to connect successfully without encountering the “Initiating Display Parameters” error.

The post Fix: TeamViewer Stuck on Initializing Display Parameters appeared first on Appuals.com.

Fix: ePSXe has Stopped Working

$
0
0

ePSXe is a PS2 simulator available for Windows and it’s often mentioned as one of the best emulators available for Windows. However, some users (mostly Windows 10 users) have reported that the program started to crash each time a game was run displaying the “ePSXe.exe has stopped working” error message afterward.

ePSXe has Stopped Working

The problem wasn’t exactly resolved by later patches to the program and it’s still available in the latest version. There have been some fairly successful methods mentioned by users which have worked for them in their scenario. Try them out below and check out if this resolved your problem.

What Causes ePSXe to Stop Working?

ePSXe is crashing for several reasons which sometimes include quite basic fixes and sometimes include some more advanced troubleshooting. Check out the full list below:

  • The CPU overclock option is set to more than x1 for users who haven’t overclocked their CPUs. It’s weird that the program would automatically set this option to something other than x1 but it causes ePSXe to crash and it should be changed.
  • Graphics drivers are also a common cause of the problem which was to be expected. Sometimes the problem is caused by outdated drivers but more often it’s the case of the newly installed driver which don’t fully support the program.
  • Since the problem occurs almost exclusively to Windows 10 users, you should try running it in compatibility mode for Windows 7.
  • It’s quite possible that the problem required administrator permissions in order to run properly so make sure you grant them.

Solution 1: Setting CPU Overclock to x1

This is probably the best-known method for resolving this problem and it’s suggested in numerous forum posts and videos across the Internet. It can be used to easily resolve the problem triggered when the CPU overclocking option available from the in-app menu is set to a value larger than x1.

It’s not known just why this is set up as default and many users had their fair share of problems when troubleshooting this problem but the method is well-known know so make sure you try it out.

  1. Locate the ePSXe main executable and double-click it in order to run it. Alternatively, you can search for it in the Start menu.
  2. After the emulator window opens, click the Options button in the menu bar and navigate your mouse towards the CPU overclocking entry.
Setting CPU overclock to x1
  1. Make sure you check the x1 option by clicking on it. Check to see if the problem still appears!

Solution 2: Install the Latest Driver or Roll Back the most Recent one

Since Windows 10 sometimes automatically updates some of your drivers when a new version of the OS is installed, users have reported that the newest graphics card driver was the culprit to blame and they suggested that restoring an earlier version actually helped them troubleshoot. Also, if the drivers haven’t been updated recently, it’s good to look for an update!

  1. Click the Start menu button, type in “Device Manager” afterward, and select it from the list of available results by simply clicking the first one. You can also tap the Windows Key + R key combo in order to bring up the Run dialog box. Type in “devmgmt.msc” in the dialog box and click OK in order to run it.
Running Device Manager
  1. Since it’s the video card driver you want to update on your computer, expand the Display adapters section, right click on your graphics card and choose the Uninstall Device
Uninstalling the graphics card driver
  1. Confirm any dialogues or prompts which may ask you to confirm the uninstallation of the current graphics device driver and wait for the process to complete.
  2. Look for your graphics card driver on NVIDIA’s or AMD’s Input the required information about the card and your operating system and click on Search.
Searching for drivers on NVIDIA’s official site
  1. A list of all available drivers should appear. Make sure you scroll down until you reach the required entry, click on its name and the Download button afterward. Save it to your computer, open it, and follow the instructions on-screen in order to install it. Check to see if ePSXe keeps crashing!

Alternative: Rollback the Driver

For those who feel uncomfortable looking for the drivers themselves as it can be confusing for casual users since you need to input info about your computer and search through many different drivers and install them manually, there is an alternative. It involved rolling back the graphics card driver.

This process will look for backup files of the driver which was installed before the most recent updates and that driver will be installed instead. This option is not always available but this will definitely be easier as it works both for NVIDIA or AMD users:

  1. First of all, you will need to uninstall the driver you currently have installed on your machine.
  2. Type “Device Manager” into the search field next to the Start menu button to open the device manager window. You can also use the Windows Key + R key combination in order to open the Run dialog box. Type devmgmt.msc in the box and click OK or Enter key.
Running Device Manager
  1. Expand the “Display Adapters” section. This will display all network adapters that the machine has installed at the moment.
  2. Right click on the display adapter you want to rollback and select Properties. After the Properties window opens, navigate to the Driver tab and locate the Roll Back Driver
Rolling back the driver
  1. If the option is grayed out, it means that the device wasn’t updated recently or it has no backup files remembering the old driver.
  2. If the option is available to click on, do so and follow the instructions on-screen to proceed with the process. Restart the computer and check to see if the problem still occurs ePSXe!

Solution 3: Runing as Administrator and in Compatibility Mode

Finally, you may simply try to force it to run with administrator permissions as it worked out for some people. Also, since Windows 7 doesn’t usually complain about this problem at all, you should try and check whether running the executable in compatibility mode for Windows 7 resolved the problem!

  1. Locate the ePSXe.exe file and change its properties by right-clicking its entry either on the Desktop, the Start menu or the Search results window and choose Properties. Navigate to the Compatibility tab in the Properties window and check the box next to the Run this program as an administrator.
Running a program as an administrator
  1. Under the Compatibility mode section, check the box next to the Run this program in compatibility mode for option and choose Windows 7 from the drop-down list before accepting the changes.
  2. Make sure you confirm any dialogs which may appear for you to confirm with admin privileges and ePSXe should launch with admin privileges from now on. Open it by double-clicking its icon and try to see if the error still appears.

The post Fix: ePSXe has Stopped Working appeared first on Appuals.com.

Fix: Twitch Error 5000 Content not Available

$
0
0

Twitch is a live video streaming platform. It was introduced in June of 2011. The site mainly consists of video game streams, E-Sports streams, music broadcasts and quite recently a trend of “In Real Life” streams has started on the platform. The content on the site can either be viewed live or by video on demand.

Error message

However, quite recently a lot of reports have been coming in of users who are unable to access any live stream on the site and an error message that displays “5000: Content not available” shows up. In this article, we will discuss some of the reasons due to which this error can be triggered and provide you with viable solutions in order to ensure complete eradication of the problem.

What Causes the Error “Code 5000” in Twitch?

The cause of the error is not specific and it can be triggered due to a number of reasons:

  • Cache and Cookies: Cache is stored by applications in order to decrease the loading times however, over time this cache can be corrupted and cause problems with the application. Similarly, cookies are stored by websites on a browser to decrease loading times. These cookies can cause issues with loading certain websites.
  • Extension: Also, it is possible that a certain extension installed on your browser might be causing the issue,  the “Ghostery” extension, in particular, is known to cause issues with the site.
  • Browser: In some cases, the browser that you are using to connect to the site might be experiencing issues in doing so.
  • DNS issue: Also it is possible that your internet is experiencing DNS problems. DNS is like a phonebook for your internet it translates the name of a website into an IP address and uses that to connect to the website, it is possible that the DNS might be corrupted and is causing issues with the connection.

Now that you have a basic understanding of the nature of the issue we will be moving on towards the solutions.

Solution 1: Clearing Cookies and Cache.

Cache and Cookies are stored by the browser and the application in order to decrease loading times. However, sometimes this can cause issues with the loading of certain sites if the Cookies or Cache become corrupted. Therefore, in this step, we will be clearing the cookies and the cache of the browser.

  1. Click on the “Menu” button on the top right side of the browser.
    Clicking on the Menu Button.
  2. SelectSettings” from the dropdown.
    Clicking on “Settings” from the drop-down.
  3. Scroll down and click on “Advanced“.
    Clicking on “Advanced”
  4. At the end of the “Privacy & Security” heading, click on the “Clear Browsing Data” option.
    Clicking on “Clear Browsing Data”.
  5. In the time range, select “All time“.
  6. Make sure that both the “Cookies and other site data” and “Caches image and files” options are checked.
    Checking both the options.
  7. Now click on the “Clear data” option.
    Selecting the “Clear Data” option.
  8. This will now clear all the cookies and the cache, open the site and check to see if the problem persists.

Solution 2: Disabling Extensions.

In some cases, certain extensions on the browser were causing issues with loading the streams on the twitch website. Therefore, in this step, we are going to be disabling all the extensions on the browser in order to make sure that any extension is not interfering with the site.

  1. Click on the “Menu” button on the top right side of the browser and hover the cursor over “More Settings” option.
    Opening Extension Settings
  2. Select “Extensions” option to open up the list of extensions installed on the browser.
  3. Make sure to disable all the extensions and in particular the “Ghostery” one.
    Disabling Extensions.
  4. Now try to open the site and check to see if the issue persists.

Solution 3: Flushing the DNS.

DNS is used by the browser as a sort of phonebook for the internet. It translates the addresses of a site to an IP address and uses that to connect to the site. The internet connection that you use has certain DNS settings allocated that are elemental in the connection to the internet. Sometimes, this DNS can be corrupted therefore, in this step we will be flushing the DNS. For that:

  1. Click on the “Search bar” and type in “Command Prompt“.
  2. Rightclick on the “Command Prompt” icon and select “Run as Administrator“.
  3. This will open up the command prompt, type in “ipconfig/flushdns“.
  4. This will now completely reinitialize the DNS cache.
  5. Try to connect to the site and check to see if the issue persists.
    Flushing DNS.

Solution 4: Changing Browser.

In some cases, the browser that you are using to connect to the site might be experiencing issues in doing so. Therefore, it is recommended to change the browser that you are using to connect to the service as it might solve the issue if the problem is with the browser.

The post Fix: Twitch Error 5000 Content not Available appeared first on Appuals.com.

Fix: Error Retrieving Anthem Live Service Data

$
0
0

Anthem is an online multiplayer role-playing game that was developed by Bioware and published by Electronic Arts. The game was released in the May of 2019 for Windows, Xbox, and PlayStation. The game contains both single player and co-operative multiplayer mode. Players can team up in squads of 4 to explore the world while fighting off savage beasts and marauders.

Error message.

However, quite recently a lot of reports have been coming in of users who are unable to play the game and the error message “error retrieving anthem live service data” pops up on the screen while users try to login to the game. In this article, we will inform you about some of the reasons due to which this error can be triggered and provide you with viable solutions in order to ensure complete eradication of the problem.

What Prevents the game from Retrieving Live Service Data?

The cause of the problem is not specific and it can occur due to a number of reasons:

  • Firewall: If you are on a PC it is possible that the firewall on your computer might be blocking the game from making contact with its servers. If that is the case the game might be stuck in a loop on the loading screen or even trigger this error message.
  • Server Glitch: Upon the launch of the game this was a common issue with the servers of the game that was causing it to randomly prevent certain EA account from logging in to the server’s database.

Now that you have a basic understanding of the nature of the problem we will be moving on towards the solutions.

Solution 1: Granting Access in Firewall.

If you are trying to play the game on a PC it is possible that the Windows Firewall might be preventing it from making contact with the servers. This can cause the game to be stuck on the loading screen or trigger this error. In this step, we are going to be making sure that the game has access through the firewall. For that:

  1. Click on the Start Menu and select the Settings icon.
  2. Click on “Updates & Security“.
  3. Select “Windows Security” from the left pane.
  4. Click on the “Firewall and Network Protection” option.
  5. Select the “Allow an App through the Firewall” option.
  6. Click on “Change Settings” in order to provide Administrative  Privileges.
  7. Scroll Down and make sure that Anthem, Steam, and all its related services are allowed through the Firewall in both “Private” and “Public” Networks.
    Allowing an application through the firewall

Solution 2: Updating the Game.

In most cases, the error was reportedly caused due to a bug in the server database. EA tried to fix this issue in their latest updates. Therefore, it is advised to update the game to the latest version. This might fix this issue as in the updates the developers try to fix the issues that are reported by the community and this connection error was reported by many users.

Solution 3: Changing Language.

In some cases, the glitch was fixed by changing the game language. Once you change the game language it will begin to download an additional file of approximately 700 Mbs. After the file finishes to download the file will be installed to the game and the language will change. This might fix the issue and allow you to login to the server database.

  1. Login to the Origin Client.
  2. Click on the Origin menu and select Application Settings.
  3. Next, to the Language Heading, select the dropdown and select a different Language.
    Click on the drop down to select a different language
  4. Click on “Restart Now” to restart the client in the new language.
  5. Try to start the game after it finishes downloading the additional files for the game and check to see if the problem persists.

Note: If these steps do not solve the problem for you it is most likely a problem with the game’s servers. You can try to contact the customer care in order to have them fix it for you.

The post Fix: Error Retrieving Anthem Live Service Data appeared first on Appuals.com.

Fix: No Mapping Between Account Names and Security ID was Done

$
0
0

The error message “No Mapping between account names and Security ID was done” pops up when there’s a bad mapping between account names and security IDs in a domain. It occurs in the Microsoft Windows AD Group Policy (Active Directory Group Policy). If you look up this error message in the event viewer, it is labeled with the error code 1202.

No Mapping Between Account Names and Security ID was Done

To give you a brief insight into the error message, let us discuss what potentially causes it.

What causes the ‘No Mapping Between Account Names and Security ID was Done’ Error Message?

Well, the cause of the error is mentioned in the error message itself, however, to make more sense out of it, it is caused due to the following reasons:

  • Incorrect Username: In some cases, the error message can be due to an incorrect username, therefore, before you proceed, make sure that the username is entered correctly.
  • Group Policy Setting: Another possible cause of the error message is your Group Policy settings. To tell you in brief, it is caused by a GPOs setting which is used for a domain with orphaned accounts details due to which they can’t correctly resolve to SID.

Now there are two possible explanations for this, either the account name used in GPO has a typing error or the account used in GPO has been removed from the Active Directory. There are multiple ways using which you can solve this error but the important thing is that you should resolve the issue which is causing it.

Finding the Culprit Account and Tweaking the Group Policy Settings

In order to resolve the issue, first, you will have to locate the account which is causing the issue. That can be only done if you have the log file enabled. To do that, you will have to edit the ExtensionDebugLevel entry in the Windows Registry which will enable the log file. Here’s how to do it:

  1. Press Windows Key + R to open the Run dialog box.
  2. Type in regedit to open the Windows Registry.
  3. Afterward, search for the following entry by pasting the following path in the address bar:
    HKEY_LOCAL_MACHINE\SOFTWARE\Microsoft\Windows NT\CurrentVersion\Winlogon\GPExtensions\{827D319E-6EAC-11D2-A4EA-00C04F79F83A}
  4. Once done, double-click the ExtensionDebugLevel entry on the right-hand side and set its value to 2.
    Changing the Value of the Entry to 2
  5. This will enable the log file.
  6. Now to find the account(s) that has the problem, enter the following command in the Domain Account Controller with Domain Administrator privileges:
    FIND /I "Cannot find" %SYSTEMROOT%\Security\Logs\winlogon.log
  7. This will prompt you the account that is having the issue.
    Finding the Account with the Issue
  8. Once you have got the account name, you will have to check where the account is being used.
  9. For that, you will have to run the Resultant Set of Policy MMC. Open Run dialog box again as mentioned above, type in RsoP.msc and then hit Enter.
  10. In the Resultant Set of Policy window, navigate to the following directory:
    Computer Configuration > Windows Settings > Security Settings > Local Policies > User Rights Assignment
  11. On the right-hand side, you will see a red cross. Double click on it.
  12. You will see the account name in it from earlier which is causing the issue.
  13. Now, there are two possible things. Either the account name is incorrectly typed in which case you will just have to rectify it. If that’s not the case, then you will have to check whether the account exists in the Active Directory. If it doesn’t, you will just have to remove it which will fix your issue.
  14. Once done, open up the command prompt as an administrator and run the following command to update the policy settings:
    gpupdate /force
    Updating Group Policy
  15. Once the policy settings have been updated, you should be good to go.

The post Fix: No Mapping Between Account Names and Security ID was Done appeared first on Appuals.com.

Fix: MRT Blocked by System Administrator

$
0
0

Malicious Removal Tool (MRT) is a freely distributed malware removal tool developed by Microsoft and used on Windows operating systems. It doesn’t utilize real-time protection and it concentrates on scanning your computer for malware. Users have reported to receive the following error message when trying to launch MRT:

This app has been blocked by your System Administrator. Contact your System Administrator for more info.

This app has been blocked by your System Administrator. Contact your System Administrator for more info.

It’s unbelievable to see that software developed by Microsoft fails to run properly on their own operating system. There have been useful methods which can be used to resolve this problem which was quite well-accepted among users and we have gathered them in an article for you to check out!

What Causes MRT to be Blocked by System Administrator?

There are several distinct causes to this problem and we hope the list below will help you in order to realize what you may have been doing wrong and what to do in order to fix it:

  • The software may be listed in the Software Restriction Policy which automatically triggers the error message each time you run it.
  • Certain registry entries prevent the tool from launching and your best bet is to try and delete them.
  • The file may not be owned by the Administrator account and you should try changing the ownership to accommodate that.
  • The file sometimes needs administrator permissions in order to work properly.

Solution 1: Remove MRT from the List of Programs Restricted by Software Policy

The error message indicating that the app has been blocked by your System Administrator indicated that there exists a policy which is designating MRT as a program which should be prevented from running even though it’s a legit program designed by Microsoft.

The problem can be resolved by removing MRT from the problematic list. This can be done is several different ways but the most universal way to do so is by using the Registry Editor as Group Policy Editor is not available on Windows 10 Home.

  1. Since you are going to delete a registry key, we recommend you check out this article we have published for you to safely backup your registry to prevent other problems. Still, nothing wrong will occur if you follow the steps carefully and correctly.
  2. Open the Registry Editor window by typing “regedit” in either the search bar, the Start menu, or the Run dialog box which can be accessed with the Windows Key + R key combination.
Running the Registry Editor
  1. Navigate to the following key in your registry by navigating at the left pane:
HKEY_LOCAL_MACHINE\Policies\Microsoft\Windows\Safer
Navigating to the proper location in Registry Editor
  1. Click on this key and try to locate a key named MRT or Malicious Removal Tool. Right-click on it, and choose the Delete option from the context menu. Confirm any dialog boxed which may show up.
  2. Finally, navigate to the path in registry located below and look again for a key named something along the lines of MRT. Right-click on the found key and choose Delete. Exit Registry Editor, restart your computer, and check to see whether the problem still persists.
HKEY_CURRENT_USER\SOFTWARE\Policies\Microsoft\Window

Solution 2: Delete Certain Registry Entries

This method has appeared as the best solution for users who failed to benefit from the method displayed in Solution 1. Sometimes users’ computers don’t have MRT in the list of tools restricted by Software Restriction Policies but it still fails to launch. This method was successful to plenty of people and we recommend you check it out!

  1. Let’s start with the method by deleting the following registry entries using Command Prompt in order to avoid having to locate them all manually.
  2. Search for “Command Prompt” either right in the Start menu or by tapping the search button right next to it. Right-click on the first result which appears at the top and select the “Run as administrator” option.


Running Command Prompt as an administrator
  1. Users who are using an older version of Windows can use the Windows Logo Key + R key combination in order to bring up the Run dialog box. Type in “cmd” in the box and use the Ctrl + Shift + Enter key combination in order to run Command Prompt as an administrator.
  2. Copy and paste the command shown below and make sure you click the Enter key on your keyboard.
reg delete "HKCU\Software\Microsoft\Windows\CurrentVersion\Policies\Explorer\DisallowRun" /f
reg delete "HKLM\Software\Microsoft\Windows\CurrentVersion\Policies\Explorer\DisallowRun" /f
reg delete "HKU\S-1-5-18\Software\Microsoft\Windows\CurrentVersion\Policies\Explorer\DisallowRun" /f
reg delete "HKU\S-1-5-19\Software\Microsoft\Windows\CurrentVersion\Policies\Explorer\DisallowRun" /f
reg delete "HKU\S-1-5-20\Software\Microsoft\Windows\CurrentVersion\Policies\Explorer\DisallowRun" /f
  1. After this step, you will have to restart your computer in order to apply the changes. Check to see whether the MRT blocked by System Administrator error message still appears!

Solution 3: Add Permissions for the Administrator Account

Taking ownership of the file is sometimes vital if you want to add permissions to various user accounts to edit or copy the file. This time, we will be adding the Administrator account as the owner. Changing the owner is generally an easy process and it will grant you full access to security properties of the file if you follow the instructions we have prepared below with great care.

  1. Open your Libraries entry on your PC or open any folder on your computer and click on This PC option from the left side menu.
  2. Navigate to the location where the mrt.exe file is located.
Locating the MRT.exe file
  1. You will need to take ownership of the executable. Right-click the mrt.exe file, click Properties, and then click the Security Click the Advanced button. The “Advanced Security Settings” window will appear. Here you need to change the Owner of the key.
  2. Click the Change link next to the “Owner:” label The Select User or Group window will appear.
Changing the owner of the file
  1. Select the user account via the Advanced button or just type your user account in the area which says ‘Enter the object name to select’ and click OK. Add the Administrator account.
  2. Optionally, to change the owner of all subfolders and files inside the folder, select the check box “Replace owner on subcontainers and objects” in the “Advanced Security Settings” window. Click OK to change the ownership.
Completing the process
  1. Now that you have complete control over the folder, open it, select everything you find inside and access the files properly. Restart your computer and the problem should be resolved.

Solution 4: Run MRT as an Administrator

Finally, you may simply try to force it to run with administrator permissions as it worked out for some people. However, this is more of a workaround and you should definitely check out the methods above before trying out this one. This will force the MRT executable to run with administrator permissions and will hopefully be able to avoid the MRT blocked by System Administrator problem.

  1. Locate the mrt.exe file and change its properties by right-clicking its entry either on the Desktop, the Start menu or the Search results window and choose Properties. Navigate to the Compatibility tab in the Properties window and check the box next to the Run this program as an administrator option before applying the changes.
Running MRT with administrator permissions
  1. Make sure you confirm any dialogs which may appear for you to confirm with admin privileges and MSI Gaming App should launch with admin privileges from now on. Open it by double-clicking its icon and try to see if the error still appears.

The post Fix: MRT Blocked by System Administrator appeared first on Appuals.com.


Fix: Nexus Mod Manager is Not Set up to Work with Skyrim

$
0
0

The Nexus Mod Manager (NMM) is an open source software which allows users to install, download, and manage the files easily using an all-rounder interface. It is known to give users a hassle-free modding experience without much expertise required.

Nexus Mod Manager is Not Set up to Work with Skyrim

Like numerous other games, Nexus Mod Manager also supports modding in Skyrim. Even though the entire process of detected Skyrim is automatic and doesn’t need any input, users might experience the error message “Nexus mod manager is not set up to work with Skyrim”. This error message is very troublesome but not to worry; we got you covered.

What causes the Error Message “Nexus Mod Manager is not Set up to work with Skyrim” in NMM?

The error message under discussion mostly emerged after Skyrim Special Edition was launched. After extensive research and analyzing user cases, we came up with the following causes which might cause the error message under discussion:

  • Incorrect version of Mods: If you are downloading the mods of Skyrim and using them in Skyrim Special Edition, they will not work properly.
  • Bad path of NMM: If the path of Nexus Mod Manager is not set correctly or is not placed at the correct destination, it will give the error message.
  • Corrupt Installation files of NMM: Nexus Mod Manager might have corrupt installation files on your computer. The launcher will not launch properly and cause bizarre error messages.
  • Corrupt Installation files of Skyrim: Like NMM, Skyrim might also have corrupt or outdated modules. A quick refresh of the game usually solves the issue.
  • User Configuration: The temporary user configuration of Nexus Mod Manager might have incorrect data stored. So whenever NMM tries to launch, it gets fed bad data and hence causes the error.

Before we move on to different solutions, make sure that you have an active internet connection on your computer. Furthermore, you should be logged in as an administrator as we will be manipulating some system files.

Solution 1: Checking Version of Mods

The very first thing which we should make sure is that you are downloading the correct mods for your game. If you are trying to use mods of simple Skyrim in Skyrim Special Edition, you will experience the error message instantly.

These two versions of Skyrim are very different in terms of features and architecture. Their mods are independent as well. Usually, users do not differentiate between the two versions and try to install the normal mods into the opposite version. Navigate back to the website from where you were downloading the mods and make sure that you are using the correct version. Skyrim Special Edition will have separate mods from that of Skyrim. You can Google this for more clear information.

Solution 2: Deleting NMM User Configurations

Like all other applications, NMM also creates temporary user configurations for use in its running process. These user configuration files can get corrupt easily and feed bad data to the application whenever it runs. Think of these user configurations as the main data sources which the application loads up before it fires up all of its modules. In this solution, we will navigate to the application data in your Windows and delete the user configurations of NMM. Then when we run the application, NMM will realize that there are no configurations present and will create newer ones from scratch.

  1. Press Windows + R, type “%appdata%” in the dialogue box and press Enter.
  2. Once the Window pops up, you will notice that you are in the Roaming Navigate one step back and go into Local.
Local Directory – Windows Explorer
  1. Now navigate to the following directory:
C:\Users\username\appdata\local\black tree gaming\somefolder\modversionnumber

Now delete the file present and restart your computer. After restarting, check if the issue is resolved.

There might be only one modversionnumber but if there are multiple, continue to delete all of them one by one until the issue is resolved.

Solution 3: Changing Directory of NMM

If both the above methods don’t work, we can try changing the directory of Nexus Mod Manager manually. This will force the program to reinitialize its running operations and create fresh config and user data files on your computer. Make sure that you are logged in as an administrator on your computer before proceeding. If this doesn’t work out, you can always revert the changes at any time.

  1. Navigate to the directory where you have installed NMM. Press Windows + E to launch the File Explorer and navigate to the location. This is the default directory:
C:\Program Files (x86)\Nexus Mod Manager

or

C:\Program Files\Nexus Mod Manager
  1. After locating the folder, copy the folder to another location (move the folder). Here another location specifies the directory other than where it was previously present.

If your NMM is present at some other location rather than the default one, move it to the directory present above.

So in essence, we are changing the location of the NMM manually.

  1. After you are done with the moving, right-click on the application and select Run as administrator. Be patient and wait until the application is initialized. Now check if the issue is resolved.

Solution 4: Uninstalling Nexus Mod Manager

If all the above methods don’t work, it probably means that the Nexus Mod Manage has corrupt installation files and you have to completely uninstall the application in order to refresh it completely. Make sure that you create a backup of the application to some external drive so you always have a copy in case something goes wrong. Also make sure that you are logged in as an administrator and have internet so you can download a fresh copy.

  1. Press Windows + R, type “appwiz.cpl” in the dialogue box and press Enter.
  2. Once in the application manager, search for Nexus Mod Manager. Right-click on it and select Uninstall.
    Uninstalling Nexus Mod Manager
  3. Now, wait for the uninstall process to complete. After it has, restart your computer and navigate to Nexus Mod Manager Official Website to download the installation package.

If you cannot see NMM in your application manager, navigate to NMM directory. Locate the executable ‘uninstall.exe’. Right-click on it and select Run as administrator.

Note: Also perform Solution 3 before installing a fresh copy of the software on your computer.

Solution 5: Refreshing Skyrim

If all the above methods don’t work, we can try refreshing the game files of Skyrim and then try again. Corrupt game files are nothing new and a simple manual refresh usually solves the problem. Make sure that your progress is saved and you have backed up your data beforehand online.

Note: If you are trying to launch Skyrim offline through Steam, it is recommended that you go online at once and update the game to the latest build.

First, we will try to delete the local configurations of the game. Then we will check if the issue still persists. If it doesn’t, it means that there was some issue with the temporary files. If you still receive the error message, you can move to the additional part of the solution and uninstall Skyrim completely.

  1. Close the game completely. Now navigate to the directory where Steam is installed and remove the folder “appcache”. Steam will automatically create this the next time it starts up.
  2. Now go to the directory of Skyrim. The default location is:
C:\Users\”User name”\Documents\MyGames
Navigating to Skyrim Directory
  1. Now delete the following two files:
Skyrim.ini

SkyrimPrefs.ini
Deleting Skyrim Config Files
  1. Shut down your computer completely. After it has been shut down for a couple of minutes, turn it back on and check if you can launch the game with mods enabled without any problems.

If the issue still persists, follow the steps mentioned below:

  1. Launch your Steam client. Click on the Library icon present at the top of the screen.
  2. Now on your left navigation pane, all the games present in your Steam will be available. Right-click on Skyrim and select Uninstall.
Uninstalling Skyrim
  1. Now follow Solution 2 and navigate to the Steam store to download the game again from scratch. Remember to restart your computer in between the steps.

Note: You will require your credentials to log into the Steam account (if you haven’t logged in yet).

Solution 6: Using Other Alternatives

If your Nexus Mod Manager still isn’t working as expected, you can try switching to other popular alternatives such as Vortex. These software usually perform the same tasks as of NMM and have very little difference. Of course, you would have to get to known the UI a little bit and relocate all the individual mod files before you can try using it.

Downloading Vortex

You can navigate to the official website of Vortex and download the executable to an accessible location. Install the package using an administrator and before starting, make sure you restart your computer.

Note: We also received complaints that errors arose if the Nexus Mod Manager was copied from an external hard drive and not installed properly using the conventional method. If this is the case, make sure you remove the existing files and reinstall the application entirely.

The post Fix: Nexus Mod Manager is Not Set up to Work with Skyrim appeared first on Appuals.com.

Fix: Bluetooth Not in Action Center Windows 10

$
0
0

Several users are reporting that they are unable to enable/disable Bluetooth from the Action Center, even tough their Bluetooth connection is working properly and they have correctly configured the driver/dongle for it. The majority of users are reporting that the Bluetooth icon has disappeared simultaneously along with the Action Center icon associated with it.

Bluetooth is missing from the Action center

What is causing the Bluetooth button to disappear from the Action Center?

We looked into this particular issue by analyzing various user reports and the fixes that they deployed in order to rectify the problem. Based on our investigations, there are several different culprits that are known to trigger this particular error message:

  • Bluetooth is not added to Quick Actions – A 3rd party tool might have removed Bluetooth from the Quick Actions menu or you might have done this yourself. If this scenario is applicable, you will be able to resolve the issue by using the Notifications & Actions menu to revert to the default behavior.
  • PC doesn’t have built-in Bluetooth technology – It’s also possible that the reason why you’re not seeing a Bluetooth entry is that your computer is simply not equipped to support it natively. In this case, you can establish a working Bluetooth connection by using a Bluetooth adapter.
  • Outdated / Corrupted Bluetooth drivers – If you’re Bluetooth connection just went AWOL without any warning, you could be a victim of file corruption among your Bluetooth drivers. If this scenario fits your description, then forcing an update on each Bluetooth driver via Device Manager should resolve the issue.
  • Bluetooth Support service is disabled – Several 3rd party apps or a manual user action can configure the Bluetooth Support service to remain disabled at all times. In this case, taking a trip to the Servies trip and re-enabling the Bluetooth Support service should make the Bluetooth icon visible again inside the Action Center.
  • Fast Startup is interfering with the Bluetooth drivers – There’s no official explanation why this happens, but we managed to find several reports where the Bluetooth feature was effectively broken while Fast Startup was enabled. This is only effective on certain configurations, but disabling the fast startup feature might just resolve the issue.

If you’re currently struggling to resolve this particular issue, this article will present you with several different repair strategies that might just fix the problem. Down below, you’ll find a collection of methods that other users in a similar situation have successfully deployed in order to make the Bluetooth button visible again inside the Action center.

Let’s begin!

Method 1: Adding Bluetooth to Quick Actions

A manual user action or a 3rd party utility might have removed Bluetooth from the list Quick Actions inside Action Centre. But luckily, there are some steps that you can follow to force the Bluetooth icon to return there swiftly.

But keep in mind that this method will only be effective as long as you the Bluetooth drivers are correctly configured and operating normally.

Here’s a quick guide on re-adding Bluetooth to the list of quick actions:

  1. Press Windows key + R to open up a Run dialog box. Then, type “ms-settings:notifications” and press Enter to open up the Notifications & actions menu of the Settings app.
  2. Once you get there, go to the Quick actions entry and click on Add or remove quick actions.
  3. From the Add or remove quick actions menu, make sure that the toggle associated with Bluetooth is set to On.
  4. Once the Bluetooth action is re-enabled,  open the Action Center and see if the Bluetooth button is visible again.
Enabling the Bluetooth Quick Action in the Action Center

If this method wasn’t applicable, try this procedure below:

  1. Press Windows key + R to open up a Run dialog box. Then, type “ms-settings:bluetooth” and press Enter to open up the Bluetooth tab of the Settings app.
  2. Once you get there, scroll all the way down to Related settings and click on More Bluetooth options.
  3. Inside Bluetooth Settings, go to the Options tab and check the box associated with Show the Bluetooth icon in the notification area.
  4. Click Apply to save the changes.
  5. Open the Action Center and see if the Bluetooth icon became visible.

If none of these methods allowed you to make the Bluetooth icon visible inside the Action Center, move down to the next method below.

Method 2: Verifying if Bluetooth is active

If you followed the method above but you had no option of adding Bluetooth to the list of quick actions inside the Action Center, chances are Bluetooth is missing some drivers or your machine doesn’t support this technology.

If you think this might be the case, there are a few checkups that you can perform in order to investigate whether Bluetooth is supported and correctly configured on your machine. Here’s what you need to do:

  1. Press Windows key + R to open up a Run dialog box. Then, type “ms-settings:bluetooth” and press enter to open up the Bluetooth & Other devices menu of the Settings app.
  2. If this menu is visible, chances are that your machine supports Bluetooth and the technology is configured correctly.
    Note: If you’re not able to see this menu, Windows isn’t aware that your machine is equipped with Bluetooth.
  3. If the menu was not visible, press Windows key + R to open up another Run dialog box. Then, type “devmgmt.msc” and press Enter to open up Device Manager.
  4. Inside the list of available devices inside Device Manager, see if you have a Bluetooth Menu. If you don’t, it means that your computer is either not equipped with a Bluetooth device natively (in which case you’ll need a Bluetooth adapter dongle in order to make it visible) or you’re missing some Bluetooth drivers.
Investigating if the machine is equipped with Bluetooth

If the investigations above revealed that your computer is indeed equipped to support Bluetooth, move down to the next method below for another potential repair strategy.

In the event that the investigation you’ve just performed revealed that your computer doesn’t support Bluetooth natively, equipping it with a USB Bluetooth adapter should make the Bluetooth visible inside the Action Menu.

Method 3: Running the Bluetooth troubleshooter

Fortunately, Windows 10 is equipped with a utility capable of resolving the most common issues that will break the functionality of the Bluetooth function. Several affected users have reported that the issue was resolved after they ran the Bluetooth troubleshooter.

Here’s a quick guide on how to do this:

  1. Press Windows key + R to open up a Run dialog box. Inside the Run box, type “ms-settings:troubleshoot” and press Enter to open up the Troubleshooting tab of the Settings app.
  2. Inside the Troubleshoot tab, scroll down to Find and fix other problems, choose Bluetooth, then click on Run the troubleshooter.
  3. Wait until the initial investigation phase is over.
  4. If some issues are discovered, the troubleshooter will automatically apply some repair strategies that should resolve the issue.
  5. Once the procedure is complete, restart your computer and see if the Bluetooth icon is visible inside the Action Center once the next startup is complete.
Regenerating the Bluetooth icon via Troubleshooting app

If you’re still encountering the same issue, move down to the next method below.

Method 4: Updating each Bluetooth device

Several affected users have reported that the issue was resolved after they revisited each Bluetooth device inside Device Manager and forced update with each of them. After doing this and performing a restart, the Bluetooth icon swiftly returned to the Action Center menu.

Here’s a quick guide on updating each Bluetooth device:

  1. Press Windows key + R to open up a Run dialog box. Next, type “devmgmt.msc” and press Enter to open Device Manager.
    Running Device Manager via Run box
  2. Inside Device Manager, expand the drop-down menu associated with Bluetooth.
    Updating every Bluetooth driver

    Note: To ensure you’re not missing anything, go to View and make sure that box associated with Show hidden items is checked.

  3. At the next screen, click on Search automatically for updated driver software and wait for the process to complete.
    Updating the Bluetooth driver automatically
  4. Right-click on each available entry and choose Update Driver. Do this systematically until every Bluetooth device is updated.
    Important: If you’re seeing any entries with an exclamation point, uninstall them completely.
  5. Restart your computer and see if the issue has been resolved at the next startup.

Method 5: Enabling the Bluetooth Support Service

Another possible scenario in which the Bluetooth icon remains invisible in the Action Center is if the Bluetooth Support service is disabled from the Services screen. Several affected users have reported that they managed to resolve the issue after re-enabling the Bluetooth Support service manually. A 3rd party application, a restrictive power plan or a manual action might have disabled the service permanently.

Here’s a quick guide on enabling the Bluetooth Support Service:

  1. Press Windows key + R to open up a Run dialog box. Then, type “services.msc” and press Enter to open up the Services window.
  2. Inside the Services screen, scroll down through the list of services and locate the Bluetooth Support Service.
  3. Once you see it, double-click on it, go to the General tab and set the Startup type to Automatic. Then, click Apply to save the changes.
  4. Restart your computer and see if the Bluetooth icon is now visible inside the Action Center.
Enabling the Bluetooth Support Service via Services screen

If the issue is still not resolved, move down to the next method below.

Method 6: Disable Fast Startup

Some affected users have reported that the Bluetooth icon started becoming visible inside the Action Center menu after they disabled the Fast Startup feature on Windows 10,  This might make your startup times a little longer, but it’s worth the tradeoff if you need a quick action icon for your Bluetooth feature.

Here’s a quick guide on disabling the Fast Startup feature on Windows 10:

  1. Press Windows key + R to open up a Run dialog box. Then, type “ms-settings:powersleep” and press Enter to open up the Power & Sleep tab of the Settings app.
  2. Once you get to the Power & sleep menu, scroll down to the Related settings menu and click on Additional power settings.
  3. From the Power Options menu, click on Choose what the power buttons do.
  4. Inside the System Settings menu, start by clicking on Change settings that are currently unavailable.
  5. Uncheck the box associated with Turn on fast startup (recommended) and click on Save Changes.
  6. Restart your machine and see if the Bluetooth icon is visible inside the Action Center once the next startup is complete.
Disabling Fast Startup

The post Fix: Bluetooth Not in Action Center Windows 10 appeared first on Appuals.com.

Fix: Microsoft Setup Bootstrapper Has Stopped Working

$
0
0

Some users are reportedly seeing the ‘Microsoft setup boots-trapper had stopped working’ error when trying to launch one, multiple or all programs present inside the Microsoft Office suite. This issue is reported to occur on multiple Windows version (Windows 7, Windows 8.1, Windows 10) and it’s confirmed to appear in conjunction with multiple Microsoft Office versions (2013, 2016, 2019)

Microsoft Setup Bootstrapper has Stopped Working

What is the Microsoft Setup Bootstrapper?

On Microsoft Office 2013, 2016 and 2019, the BootStrappeer is responsible for the initialization of an application built using the Composite Application Library. This relatively new technology was developed in order to simplify the dependencies needed during the installation process.

What is causing the ‘Microsoft setup boots-trapper had stopped working’ error?

We investigated this particular issue by looking at various user reports and the repair strategies that the most affected users have deployed in order to resolve the problem. Based on our investigations, there are several different culprits that are known to trigger this particular issue:

  • 3rd party antivirus is preventing the installer from communicating with MS servers – There are several antivirus suites (McAfee, Avast and a few others) that are confirmed to be overprotective when it comes to letting the Office installer to retrieve some necessary components over the Internet. If this scenario is applicable, you should be able to resolve the issue by either disabling the real-time protection or by uninstalling the security suite altogether.
  • Corrupted registry keys or installation files – Another possible scenario in which this particular error will occur is if some key registry keys or files needed during the installation process of Microsoft Office are tainted by corruption. In this case, you should consider a Microsoft toll capable of dealing with such scenarios.
  •  A conflict with an IObit software – A lot of users have reported that this particular issue appeared due to some incompatibilities produced by a few software products released by IObit.  The only way of identifying the culprit responsible for the issue is to systematically uninstall every IObit product until you see that the issue is no longer occurring.
  • Task Scheduler is disabled from Registry Editor – Microsoft Office needs Task Scheduler to program some tasks (usually having to do with the updating service). If Task Scheduler is disabled on your machine, you’ll receive this error whenever the Task Scheduler can’t be accessed by the Office service.  If this scenario is applicable, you will be able to resolve the issue by re-enabling the Task Scheduler via Registry Editor.
  • AppCompatFlags is breaking the updating process – As it turns out there is one particular registry key (AppCompatFlags) with a huge potential of breaking and rendering the whole Office suite inoperable when it does. In this case, you will be able to resolve the issue by uninstalling the Office installation and utilizing the Registry Editor to remove the faulty key.
  • The Office installation is not compatible with your Windows version – This can happen if you’re trying to install an older Office version on Windows 10. In this case, you can get around the issue by opening the main installation executable (setup.exe) in Compatibility Mode.

If you’re currently struggling to resolve the ‘Microsoft setup boots-trapper had stopped working’ error, this article will present you with several troubleshooting steps that affected users have used to resolve this particular error message.

Below you have several different repair methods ordered by efficiency and severity. Not every method will be applicable to your particular scenario, so please follow them in the order that they are presented and disregard those that can’t be replicated on your machine.

Let’s begin!

Method 1: Uninstalling 3rd party antivirus (if applicable)

Some users have reported that in their case, the issue was resolved after they uninstall their 3rd party antivirus suite. As it turns out, there are several overprotective AV suites (McAfee, Avast, potentially more) that will block the updating feature of the Microsoft Office suite, which will end up triggering the ‘Microsoft setup boots-trapper had stopped working’ error.

If this scenario is applicable to your situation, you might be able to resolve the issue by simply disabling the real-time protection of your security suite. Of course, the steps of doing this are specific to the AV suite that you’re using.

Disabling the real-time protection feature of Avast

But keep in mind that some users have reported that the issue was only resolved after they completely uninstalled their 3rd party antivirus from their system. If you’re prepared to go this far, follow this article (here) on uninstalling security programs and ensuring that any remnant files are also removed.

If you’re still encountering the ‘Microsoft setup boots-trapper had stopped working’ error after dealing with your 3rd party security suite or this method wasn’t applicable, move down to the next method below.

Method 2: Using a Microsoft Fix-It Tool

Fortunately, Microsoft developed an automated tool equipped to resolve this particular error message (and a few others). Several affected users have reported that they managed to resolve the issue by running a Microsoft Fix It tool.

This Fix-It will resolve various problems that end up blocking programs from being launched, installed or removed. You can use it on Windows 10, Windows 7 and Windows 8.1. If the issue is caused by corrupted registry keys or by files from uninstalled or existing programs, this tool might end up resolving the issue automatically.

Here’s a quick guide on how to deploy this fix:

  1. Visit this link (here) and download the .diagcab file by clicking the Download button.
  2. Once the tool has been downloaded, double-click on the .diagcab file to open it.
  3. At the first prompt, click on Advanced and make sure that the box associated with Apply repair automatically is checked. Then, click the Next button to proceed.
  4. Wait until the initial detection phase is complete, then click on Installing at the first prompt.
  5. At the next screen, select the program that you’re encountering issues with (most likely Microsoft Office) and click Next once again.
  6. At the next screen, click on Yes, try uninstall.
  7. Wait until the process is complete, then restart your computer and see if you’re still encountering the same error message.
Resolving the issue via Fix-it tool

If you’re still encountering the error even after using the Fix-it tool, jump down to the next method below.

Method 3: Uninstalling IoBit Software

Based on various user reports, there are multiple IoBit software products that are known to conflict with Microsoft Office and trigger the ‘Microsoft setup boots-trapper had stopped working’ error – IoBit Uninstaller and Advanced SystemCare are on top of this list.

Several affected users have reported that the issue was resolved after they uninstalled the conflicting IoBit software. If you have multiple products from IoBit, the only way of fishing out the culprit is to uninstall every product until you notice that the issue has stopped occurring.

Here’ a quick guide on doing this:

  1. Press Windows key + R to open up a Run dialog box. Then, type “appwiz.cpl” and press Enter to open up the Programs and Features window.
  2. Inside the Programs and Features window, start by clicking on the Publisher column at the top. This will order the applications via their publishers, which will make it easier to locate all IoBit products.
  3. Then, right-click on an IObit product, choose Uninstall, then follow the on-screen prompts to remove the software from your computer.
  4. Restart your computer and launch the application that was triggering the ‘Microsoft setup boots-trapper had stopped working’ error and see the previous uninstallation has been successful.
  5. If you’re still encountering the same error message, return to the Programs and Features screen and uninstall the rest of the IObit products until you manage to identify the culprit that is causing the conflict.
Uninstalling IOBit products

If you’re still encountering the same error message, move down to the next method below.

Method 4: Re-enabling Task Scheduler via Registry Editor

Several users that we’re struggling to resolve the ‘Microsoft setup boots-trapper had stopped working’ error have reported that the issue was finally resolved after re-enabling the Task Scheduler. As it turns out, this error message is known to get thrown in those instances where the Task Scheduler is prevented from running.

If this scenario is applicable, the quickest way to resolve the issue is to re-enable the Task Scheduler via Registry Editor. Here’s a quick guide on how to do this:

  1. Press Windows key + R to open up a Run dialog box. Then, type “regedit” and press Enter to open up the Registry Editor. When prompted by the UAC (User Account Control), click Yes to grant administrative privileges.
  2. Inside the Registry Editor, use the right pane to expand the HKEY_LOCAL_MACHINE key. Then, access the SYSTEM key.
  3. Navigate to the Schedule key folder by going to  CurrentControlSet > Services > Schedule.
  4. With the Schedule key selected, move over to the right-hand pane and double click on the Start value.
  5. Change the Value data of Start to 4 and leave the Base to Hexadecimal.
  6. Click Ok to save the changes, then close the Registry Editor and restart your computer.
  7. Once the next startup is complete, open the application/installer that was previously producing the error and see if the issue has been resolved.
Enabling the Task Scheduler

If you’re still seeing the ‘Microsoft setup boots-trapper had stopped working’ error when trying to open a Microsoft Office application, move down to the next method below.

Method 5: Uninstalling Office Installation & deleting the AppCompatFlags key

Several affected users have reported that the issue was only resolved after they uninstalled their Office installation completely and used Registry Editor to delete a key called AppCompatFlags. After doing this and reinstalling the Microsoft Office suite, some users have reported that they were able to launch any Microsoft Office application without encountering the ‘Microsoft setup boots-trapper had stopped working’ error.

Here’s a quick guide on how to do this

  1. Press Windows key + R to open up a Run dialog box. Then, type “appwiz.cpl” and press Enter to open up the Programs and Features screen.
    Type appwiz.cpl and Press Enter to Open Installed Programs List
  2. Inside the Programs and Features screen, look through the list of applications, right-click on your Microsoft Office suite and choose Uninstall.
    Uninstalling Microsoft Office
  3. Follow the on-screen prompts to complete the uninstallation, then restart your computer.
  4. At the next startup, press Windows key + R to open up another Run dialog box. This time, type “regedit” and press Enter to open up the Registry Editor utility. When prompted by the UAC (User Account Control), click Yes to add administrative privileges.
    Running the Registry Editor
  5. Inside the Registry Editor utility, navigate to the following location:
    HKEY_LOCAL_MACHINE\SOFTWARE\Microsoft\Windows NT\CurrentVersion\AppCompatFlags

    Note: You can either get there manually (by using the left hand-pane) or you can paste the address directly into the navigation bar and press Enter.

  6. Once you get there, right-click on the AppCompatFlags key and choose Export. Then, save the file to a convenient location for easy access.
    Exporting the AppCompatFlags key

    Note: This step is done for backup purposes, just in case things go wrong and the registry changes create an unexpected consequence.

  7. Once the backup has been established, right-click on AppCompatFlags and choose Delete.
    Deleting the AppCompatFlags key
  8. Once the key has been deleted, close Registry Editor and reboot your machine once again. At the next startup, check if you’re able to open the Office application without encountering the ‘Microsoft setup boots-trapper had stopped working’ error.

Method 6: Opening the Setup.exe in compatibility mode

Some users that have been encountering the ‘Microsoft setup boots-trapper had stopped working’ error when trying to install an older Office version (Office 2010, Office 2013) have reported that they managed to get around the issue by opening the installation executable (setup.exe) in Compatibility mode.

Here’s a quick guide on how to do this:

  1. Use File Explorer to navigate to the location of the Office Installation.
  2. Open the Installation folder, right-click on Setup.exe and choose Troubleshoot Compatibility.
  3. At the first Program Compatibility Troubleshooter prompt, click on Try recommended settings.
  4. Click on Test the program button and see if the setup is opening without the error message.
  5. If all is in order, click Next, then choose Yes, save these settings for this program.
  6. Open the installer again and complete the installation process.
Installing the Office suite in compatibility mode

The post Fix: Microsoft Setup Bootstrapper Has Stopped Working appeared first on Appuals.com.

Fix: Minecraft not Responding

$
0
0

Minecraft is developed by Mojang and is played by thousands of players worldwide. It started off a while ago and has been successful since with support in Android and iOS along with its flagship PC application. It features an open world where players build items and buildings using raw materials.

Minecraft not Responding

Minecraft not responding is nothing new and occurs to even the strongest PCs and laptops every now and then. The issue is mostly not related to PC specifications. There are numerous settings and configurations which may cause the application not to work as required and cause bizarre problems like the one under discussion.

What causes Minecraft to become Not Responsive?

We looked at several user reports and after experimenting in our own computers by creating the exact same conditions, we concluded that there are several reasons why the game becomes unresponsive. The game becomes unresponsive for several reasons and can stretch up to minutes and in some cases, indefinitely.

  • Outdated Java Version: Minecraft makes use of the Java platform in order to run properly and get its mechanics up and running. If the Java platform is outdated or not installed properly on your computer, you might experience not responding issues.
  • Outdated Windows: Windows is the main operating system in which Minecraft runs. If the OS is outdated or there are some issues, you Minecraft probably won’t be able to run and become unresponsive.
  • Incomplete/corrupt Minecraft Installation: There are also cases where the Minecraft installation is corrupt or incomplete. This might occur if the version was not updated properly or you moved the game manually to another directory.
  • Outdated Minecraft: Minecraft releases updates every now and then to introduce new features and resolve errors and bugs. If you have an outdated version, Minecraft might refuse to launch and become unresponsive.
  • Mods: If you are running Minecraft with mods, it is recommended that you disable them and try launching the game again. Mods change the behavior of the game by improving the texture.
  • Video drivers: Video drivers are another known cause because of which the issue occurs. If the video drivers are outdated or incomplete, the game will not be able to launch and will go into an unresponsive state.
  • Administrator privileges: In some rare cases, administrator privileges are required to run the game. If the game does not have elevated access, issues will arise like the one under discussion.

Before we move on to the solutions, make sure that you have an active open internet connection and are logged in as an administrator. Also, make sure that your Minecraft is backed up over the cloud.

Solution 1: Updating Java

Java packages contain several different files which are used by games and applications alike in your computer. Minecraft is a huge user of Java and it utilizes the framework so much that it has even added the “Java” tag in its title. Hence if your game is crashing, we will try to update Java manually and see if this does the trick. An incomplete Java installation on your computer is the most likely cause for the not responding issue.

First, we will check your OS type. Depending on the 32 or 64-bit version, we will proceed with updating data.

  1. Right-click on This-PC present on your Desktop and select Properties.
PC Properties
  1. Now in front of System type check the type of operating system installed on your computer. Download the Java files from (here)
Checking System Type
  1. Now extract the file which you just download to an accessible location. Open the folder and copy the file version folder that you see.
Copying Java File
  1. Now press Windows + E to launch Windows Explorer and navigate to the following path:
C:\Program Files\Java   (for 32 bit)

C:\Program Files (x86)\Java   (for 64 bit)

Now paste the file which you copied to the location. Make sure that you copy the name of the folder which we just pasted.

  1. Now launch the Minecraft mod manager and click on Edit profile present at the bottom of the screen.
Editing Java Path in Minecraft
  1. Now underneath Java settings (Advanced), check the executable option and replace the correct path. In the picture above, the path of the file we just pasted is set correctly.
  2. Restart your computer and launch Minecraft again. Check if the issue is resolved.

Solution 2: Updating Windows to the Latest Build

Windows is the main operating system in which the game Minecraft runs. If your Windows version is outdated, many applications will not work properly and will cause errors. Windows update is not just about the OS, instead, a single Windows update contains several bug fixes and improved features for several different modules including video and sound. If your Windows is not updated to the latest build, we recommend updating it as soon as possible.

  1. Press Windows + S, type “update” in the dialogue box and open the application.
Opening Windows Update Settings
  1. Now Settings will be opened up. Click the button Check for updates. Now your computer will automatically check for any latest updates available and install them on your computer.

Note: An active internet connection will be required to apply the updates.

Solution 3: Granting Elevated Access

Usually, games running in an administrator account have no problems with permissions and usage of resources. However, this might not be true for some cases and Minecraft may not be able to utilize all the resources because of restricted access. In this solution, we will navigate to the main Minecraft executable and make sure that administrator privileges are granted. For this, you would need to be logged in as an administrator on your computer.

  1. Navigate to the main directory where Minecraft is installed and locate the main game executable.
  2. Now right-click on it and select Properties.
  3. Once the properties window has opened, click on Compatibility using the top of the window and check the option Run this program as an administrator.
Running Minecraft as Administrator
  1. Press Apply to save changes and exit. Restart your computer and launch the game. Check if the issue is resolved.

Solution 4: Disabling Mods

Mods are very popular in Minecraft and there is a huge variety of them available on the internet. They enhance the player’s experience by adding more content and textures into the game and allows the player to add customized content. However, no matter how useful they are, they are known to conflict with the game’s mechanics since they directly interact with the game core and change variables.

Hence it is recommended that you disable all the mods installed on your Minecraft. You can either disable them or move the mods folder from the Minecraft directory to another one. Don’t forget to restart your computer properly before you start the game again.

Solution 5: Updating Video drivers

Every game makes use of Video drivers installed on your computer in order to display the game correctly on your computer. If you have older drivers installed on your computer or they are outdated, you will not be able to play Minecraft properly.

Now there are two ways through which you can update your video drivers. You can either navigate to your manufacturer’s website and download the driver pack (and run the executable) or you can try to update them manually as we do below.

  1. Press Windows + R, type “devmgmt.msc” in the dialogue box and press Enter.
  2. Once in the device manager, expand the category of Display adapters, right-click on the graphics hardware and select Update driver.
Updating Graphics Driver
  1. Now you have two options. Either you can make use of Windows update so it might install the latest drivers automatically or you can manually navigate to the manufacturer’s website and choose the second option after downloading the file.
Updating Graphics Driver Manually or Automatically
  1. Restart your game properly after updating the drivers and check if you can run Minecraft without it getting unresponsive.

Solution 6: Disabling/Uninstalling Discord

Discord is a VoIP application which lets users communicate with each other while playing games. It offers an overlay which you can enable over any game and communicate with each other without alt-tabbing to any other Window. This is very useful but as you might have guessed, causes issues with Minecraft. It causes issues because the overlay is directly above the running game and if they don’t support each other, there will be a conflict which causes the unresponsive state.

Hence you should disable Discord from running. You should not open it at all after restarting your computer. If Discord is set to open automatically, you can check our article How To Stop Discord from Opening on Startup. Below is the method of how to Uninstall Discord.

  1. Press Windows + R, type “appwiz.cpl” in the dialogue box and press Enter.
  2. Once in the application manager, search for the entry of Discord. Right-click on the application and select Uninstall.
Uninstalling Discord
  1. Restart your computer after installing the application and check if the issue is resolved.

Solution 7: Waiting it Out

If all the above methods don’t work, you can try waiting it out. There are numerous cases where the not responding dialogue usually vanishes after a short while and the game loads up just fine. During the not responding dialogue, Windows is troubleshooting all the possible cases why the application is not running.

If the cause is identified in time, the fix is applied to the game and the game starts up as expected. According to user reports, there were some cases where the dialogue went away in seconds and in some it took several minutes. If you have time, you can try waiting it out or you can move to the next solution and do a complete reinstall of the application.

Solution 8: Updating/Reinstalling Minecraft

If you have an outdated version of Minecraft on your computer, you should update your game as soon as possible. Minecraft developers release updates every now and then to introduce new features to the game or fix the existing bugs. To force update the application, follow the steps below:

  1. Start the Minecraft Launcher and click on Options next to the Username
  2. Now click on Force Update. This will make the application look for available updates forcefully.

After the update process is complete, restart your computer and try launching the game and see if the issue is resolved. If updating doesn’t fix it or you are unable to even launch the launcher properly, you can go ahead and reinstall the game all over. Make sure that your progress is backed up in the cloud before moving on.

  1. Press Windows + R, type “appwiz.cpl” in the dialogue box and press Enter.
  2. Locate the Minecraft entry, right-click on it and select Uninstall.
  3. After uninstalling, restart your computer. Now navigate to the official Minecraft website and download the executable to an accessible location.
Downloading Fresh Copy of Minecraft
  1. Before installing the game, press Windows + R, type “%appdata%” and press Enter. A directory will open. Move a step back and you will see three folders namely:
Local

LocalLow

Roaming

Navigate into each directory one by one and delete the Minecraft folders. Restart your computer again and now install the game using administrator privileges.

The post Fix: Minecraft not Responding appeared first on Appuals.com.

Fix: Sound not Working in Minecraft

$
0
0

Some players reportedly notice a bug while playing Minecraft where they cannot hear any sound from the game. They can hear the sound through Windows and other applications but nothing from the game.

Minecraft

The sound disappearing from Minecraft is not a new issue and is reported to occur mostly when the players update their game to the latest patch available by the developers. This is an ongoing issue and often emerges every now and then. There is nothing to worry about as this is usually a bug or some slight misconfigurations which conflict with the settings of the game.

What causes Sound not to Work in Minecraft?

We looked into this issue by analyzing several different cases through various user reports and fixes that were used to solve the issue at hand. Based on our research and experimentation, there are several culprits which are known to cause this particular issue. Some of them are listed below:

  • Conflicting Sound options: Each game its own sound options and mechanisms which work in sync with options present in Windows. If there is any configuration in Windows which is not supported by the game, the sound will not be transmitted correctly.
  • Minecraft is muted: Each application has its own sound mixer. Sound mixer basically controls the sound transmitting from different applications simultaneously and has the option to lower, increase, or mute. It is possible that Minecraft is muted from the sound mixer.
  • Windows family settings: If you have Windows family settings enabled on your computer, there is a possibility that Minecraft is blocked from transmitting sound according to the protocols stored. We would have to grant the game proper permissions in order to rectify the issue.
  • Mipmap levels: Mipmap levels are a mechanism in Minecraft which allow you to select the correct level according to your needs. However, these are known to get bugged and cause bizarre problems like the one under discussion. Simply refreshing them solves the issue at hand.
  • Enhancements: Windows has the option to add sound enhancements to your computer. These enhancements even though optimize the sound quality of your computer, they are known to cause a number of different issues with games. Disabling them is the only way to avoid problems.
  • Incomplete installation: There is also a possibility that Minecraft was installed improperly and there are some major files missing. Also, the directory could have become corrupt especially if it was moved from one location to another.
  • Game in a bugged state: Minecraft is very well known to go into bugged states because of so many add-ons and modules running side by side. A simple refresh of the console solves the issue because all the temporary configurations get reset.
  • Sound drivers: If all the above methods don’t seem to be the issue, there is a high possibility that your sound drivers are not working as expected and are causing issues with the game. Reinstalling or updating them is the only way to get out of this mess.

Note: This article targets ways to fix the issue only when the sound from Minecraft is not transmitting. If you cannot hear the sound from any application of computer, it is suggested that you check out our article Fix: Windows 10 No Sound

Solution 1: Refreshing the Game and its Textures

The first solution which we are going to try is refreshing the game and its textures. As you all might already know, Minecraft uses hundreds of different textures where each of them is associated with a unique sound and how sound should be transmitted whenever a player interacts with the object. If any of them is in an error state, the game will not output any sound.

You should start by pressing F3 + S on your keyboard. If this doesn’t work, press F3 + T. These commands reload the textures, models, sounds, and other resource pack contents which are linked to your Minecraft game. A complete reload usually solves the issue of no sound when any of the modules is in an error state or was not initialized properly.

F3 + S or F3 + T

Be extremely patient when the textures are being re-applied as this is a tedious task. After the screen has loaded up properly, check if the sound issue is fixed.

Solution 2: Checking if Minecraft was Muted Accidentally

Like all other games, Minecraft also has the option of a separate volume mixer in the computer. A volume mixer allows you to control the volume being output from several different applications or programs. If by any chance, Minecraft was muted, you would not be able to hear any sound except that of produced by other applications. In this solution, we will navigate to your volume mixer and check if indeed Minecraft was muted.

  1. Right-click on the sounds icon present in your Desktop and select Open Volume Mixer.
Opening Volume Mixer
  1. Once the volume mixer is opened, check if there is a Minecraft mini-window.
Changing Minecraft’s Volume in Volume Mixer
  1. After locating the volume mixer, make sure that you increase the volume of Minecraft to the fullest. After the volume mixer is at its peak, try launching the game and check if you can hear the sound perfectly.

Solution 3: Checking Sound in Minecraft

There are also several cases where the sound inside Minecraft is muted or lowered to such an extent that the game doesn’t output any sound at all. This is a very common scenario and there are times where the sound control of the game is lowered by default. In this solution, we will navigate to the settings of the game and make sure that the settings are not set incorrectly.

  1. Launch Minecraft in your computer and click on Options when the screen loads up completely. If you have installed Minecraft from the Windows store, click Settings instead (the Options button will not be available).
Minecraft Settings
  1. Now when the game’s options come up, click on Music and Sounds. If you have downloaded Minecraft from the Windows store, click on Audio.
Audio Settings – Minecraft
  1. Now make sure that each setting is set to 100%. This includes all the sound options including Music, weather, blocks etc.
Changing Volume to 100% in Minecraft
  1. After changing the settings, select Done. Now restart your game and check if you can hear the sound properly without any issues.

Solution 4: Changing Mipmap Levels

Mipmapping lowers the quality of distant textures on your game. It reduces the flicker and aliasing on the texture itself. The mipmap levels determine the game will blur textures as compared to your location (where you are) in the map. Even though this option has nothing to do with the game, there are several reports that changing this option solved the issue instantly and the sound was transmitting again. In this solution, we will navigate to the game’s settings and change the mipmap levels.

  1. Launch Minecraft and click on Options.
  2. Once the options have opened, select Video Settings.
Video settings – Minecraft
  1. Now locate the mipmap You will see a slider. You have to move it in order to change the mipmap levels. Change it to 4 and then restart your game. If this doesn’t work, try changing it to another level and then check again.
Changing Mipmap Settings – Minecraft
  1. Once you have discovered the correct mipmap level where there isn’t any issue, save your changes and enjoy the game.

Solution 5: Changing the Sound to Stereo

Another interesting case which we came across was where the sound, if set to surround caused Minecraft not to work properly and not transmit any audio. This seems like a bug internally inside the game because all games have the ability to transmit sound without depending on any sound setting selected. Here in this solution, we will navigate to your sound settings and change the setting to Stereo instead of Surround.

  1. Press Windows + S, type “sound” in the dialogue box and open the application.
  2. Once in sound settings, click on your output speaker and click on Configure present at the bottom left side of the screen.
Configuring Sound – Minecraft
  1. Select the option Stereo and press Next.
Selecting Stereo – Sound options
  1. Complete the setup. You can leave the default settings and keep pressing Next.
  2. After the sound settings are changed, restart your computer and check if the issue is resolved and you are able to hear Minecraft perfectly.

Solution 6: Disabling Sound Enhancements

Some sound drivers use enhancements in an attempt to improve your sound quality. If these properties are not compatible with Minecraft, this can result in some major problems. We can try disabling the audio enhancements and check of the sound issue gets resolved. Not all sound drivers perform this function. They may have the Enhancements tab renamed as sound blaster. In that case, we can try disabling all the effects to the audio.

  1. Press Windows + R button to launch your Run In the dialogue box, type “Control Panel” to launch the application.
  2. Once in the control panel, type “sound” on the search bar present at the top right side of the screen. Open the options of sound the return in the search result.
  3. Once the sound options are opened, click on the audio device connected to your computer. Right-click and select Properties.
Disabling all Enhancements
  1. Now head over to the Enhancements tab and uncheck all the enhancements enabled (you can also check the box which says “Disable all enhancements”).
  2. Now select the Advanced tab and uncheck the exclusive mode where applications are allowed to override the settings. Save your changes and exit.
Disabling Exclusive Mode
  1. Now try outputting sound from Minecraft and check if the problem is fixed

Solution 7: Reinstalling Audio Drivers

If all the above methods fail to work, we can try reinstalling your Audio drivers and see if they do the trick. Audio drivers are the main components used in making a link between the sound hardware and the operating system. If the drivers are problematic and are not working properly, you will either not be able to hear any sound at all or have intermediate problems (like the one under discussion). In this solution, we will reinstall your Audio drivers and check if the issue gets resolved.

First, we will simply try Disabling and Enabling audio drivers. If this doesn’t work, we will try to install the default drivers. If the default drivers don’t work as well, we will update the drivers to the latest build and see if this fixes the problem.

  1. Press Windows + R, type “devmgmt.msc” in the dialogue box and press Enter.
  2. Once in the device manager, expand the category of Audio inputs and outputs, right-click on your sound device and select Disable Device.
Disabling Audio Device
  1. Now, wait for a few seconds before Enabling the device again. Now check if the issue gets resolved.

If simply enabling/disabling the sound device doesn’t work, we will move on and install the default sound drivers.

  1. Right-click on the sound hardware and select Uninstall device.
Uninstalling Audio Device
  1. Now right-click anywhere on the screen and select Scan for hardware changes. The computer will not scan for any hardware not installed and will find the sound module. It will automatically install the default drivers.

Now check if you can hear Minecraft’s sound properly. If you still cannot, right-click on the sound hardware and select Update driver. You can then prompt for an automatic update. You can also navigate to your manufacturer’s website and download the latest sound drivers and install them accordingly in your computer.

Solution 8: Reinstalling Minecraft

If none of the above methods work on your computer and you still unable to produce any sound output from Minecraft, you should move on and reinstall the entire game. Make sure that you save your progress and backup any files which you might need in the future. Also, make sure that you are logged in as an administrator on your computer.

  1. Press Windows + R, type “appwiz.cpl” in the dialogue box and press Enter.
  2. Once in the application manager, locate Minecraft, right-click on it and select Uninstall.
    You can also uninstall the game by executing the uninstaller from the folder directory. Make sure that you also delete all the mod files and temporary setting files.
    Downloading Fresh copy of Minecraft
  3. Now navigate to Minecraft’s official website, insert the credentials and download the game again. After installing, launch the game and check if the issue is resolved.

The post Fix: Sound not Working in Minecraft appeared first on Appuals.com.

Viewing all 4495 articles
Browse latest View live