Quantcast
Channel: Kevin Arrows | Network Engineer | Appuals.com
Viewing all 4499 articles
Browse latest View live

How to Fix the Machine Activation Error with Word on MacOS and iOS

$
0
0

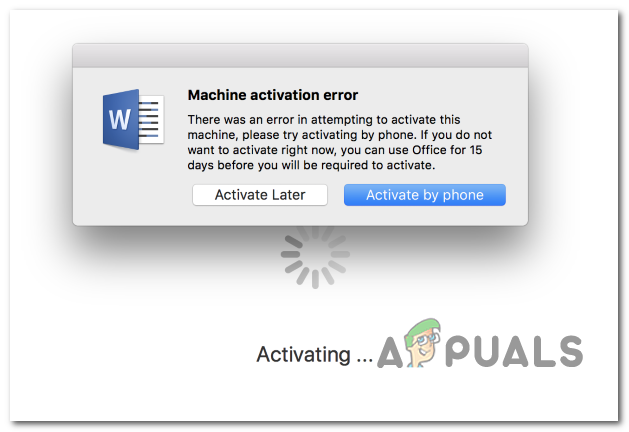
Some macOS and iOS users are unable to activate Word on their machines, even though they have brought the product or are using an Office365 subscription that they’re actively paying for. In most cases, affected users are seeing the ‘Machine activation error‘ whenever they try to sign in through the app.

Machine Activation error on macOS

If you’re seeing the error when you try to open the Word app on iOS, the issue is most likely occurring due to som cached data that was generated during the installation phase. In this case, you should be able to fix the issue by forcing the app to reset from the Settings menu.

On macOS, you might end up seeing the ‘Machine activation error‘ due to the fact that you’re trying to access files that are actively being stored on OneDrive. In this case, you will need to activate Onedrive in order to eliminate the error message.

In some cases, the error appears due to the fact that the Office ID account associated with Word is not signed in with your macOS machine. If this scenario is applicable, you should be able to fix the issue by using the Lock Keychain feature of Keychain Access to activate your Word product properly on macOS.

However, it’s also possible that your Keychain Access app contains conflicting data or some Office activation keys that you’re using are not properly managed by the Keychain Access app. In this case, you’ll need to reset your Keychain Access login password and delete any Office Activation keys that are currently being used.

If the issue is only happening with Word 2016, you might be able to circumvent the issue by installing & using an older Word version instead of the latest version.

Resetting the Word app (iOS Only)

If you’re encountering the issue on an iPad or iPhone and you’ve just installed Word, chances are the issue is occurring due to a series of cached data that was generating during the installation sequence. Several iOS users that we’re struggling to resolve the ‘Machine activation error‘ have managed to fix the problem by going into Word’s setting and forcing the app to reset.

After doing this and launching the Word app once again, the program opened with no issues.

Here’s a short step-by-step guide that will allow you to reset the Word app (whether you’re seeing the error on IOS and Android):

  1. On your iOS device, scroll through the list of options and tap on the for the Settings menu.
    Clicking on “Settings” icon
  2. Once you’re inside the Settings menu, scroll down through the list of items (using the left-hand panel) and tap on Word.
  3. Next, move over to the right-hand section of the screen and tap on Reset Word (under Reset).
    Resetting the button
  4. Inside the Reset Word tab, enable the toggle associated with Delete Sign-in Credentials, then confirm at the confirmation prompt.
    Deleting Sign-in Credentials
  5. Exit the Settings menu, return to the main dashboard, open Word again and, sign in and see if the issue has been resolved by signing in with your account once again.

If the issue was previously being caused by some type of temporary cached data, you should no longer encounter the ‘Machine activation error‘.

Installing and Activating OneDrive

In case you’re seeing the ‘Machine activation error‘ after recently installing Word on a macOS system (coming from the Windows platform), you might need to activate OneDrive in order to be able to open and edit files that are stored on the cloud.

This is not the ideal storage scheme, but Word is notoriously incompatible with Dropbox and iCloud, so your best bet at fixing the issue is to simply install and activate OneDrive on your Mac.

Here’s a quick guide on installing and activating OneDrive on your machine:

  1. Click on the App Store from the Omni bar at the bottom or from the System Preferences menu.
    App Store in System Preferences
  2. Inside the App Store, use the search function in the top-left section to search for OneDrive. Next, click on the Get button associated with the OneDrive listing.
    Note: When prompted, type your administrator password and follow the on-screen prompts to complete the installation.
  3. Once the installation is complete, click the Open button in order to open OneDrive for the first time.
  4. Once you’re inside OneDrive, insert your credentials and complete the Sign-in process.
    Signing in to OneDrive on macOS
  5. Once OneDrive is properly configured, open Word once again and see if the issue is now resolved.

Reinstalling every MS app

As it turns out, some affected users have managed to get this issue resolved by uninstalling every Microsoft application (including Word, Powerpoint, OneDrive, etc.) and then reinstalling them again through the official channels.

The idea is to ensure that you remove any application that might be currently storing temporary data that might be interfering with license validation. Several affected users have reported that after doing this and restarting their computer, they were able to launch Word without encountering the ‘Machine activation error‘.

Here’s a quick step by step guide on reinstalling every MS app:

  1. From the action bar at the bottom, click on the Finder app.
    Opening the Finding App
  2. Once you’re inside the Finder app, click on Applications from the left-hand side menu.
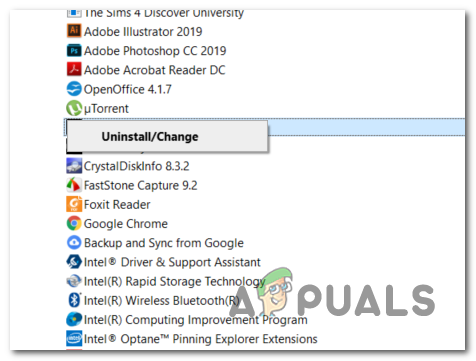
  3. Next, move over to the right-hand side menu and systematically right-click on each app published by Microsoft and click on Move to Bin from the newly appeared context menu.
    Moving to Bin
  4. Next, once you manage to move every installed application to the Bin, right-click on the trash icon from the action bar at the bottom and click on Empty Bin from the list of available options.
    Emptying the Recycle Bin
  5. Once every application has been removed, reboot your macOS and wait for the next startup to complete.
  6. After the next successful startup, re-download your Microsoft products through the official channels and see if the issue is now resolved when you try to launch Word on macOS.

Signing with Apple ID associated with Office using Keychain Access

As it turns out, the ‘Machine activation error‘ can also occur due to the fact that the Office ID account associated with Office is not signed in with your macOS machine. In this case, you should be able to fix the issue by using the Lock Keychain feature of Keychain Access in order to be able to activate your Word product properly on macOS.

Here’s a quick guide on using Lock Keychain to fix the ‘Machine activation error‘ when opening word:

  1. Use the action bar at the bottom to click on LaunchPad.
    Accessing the LaunchPad utility
  2. Inside the LaunchPad app, use the search function up top to search for ‘keychain’ then click on Keychain Access from the list of results in order to open up the utility.
    Opening the KeyChain Access utility
  3. Once you’re inside the Keychain Access app, select the login entry from the left-hand side menu. Next, go use the ribbon menu at the top to access the File menu and click on Lock Keychain “login”.
    Lock Keychain Login
  4. After you do this, open Word (or any other Office app that you’re encountering issues with). Since you previously locked he ‘login’ keychain, you should see a dialog prompt asking you for permission to access the keychain.
    Allowing the Login Keychain to be accessed

    Note: Keep in mind that depending on your current scenario, this dialog box might appear multiple times. Ensure that you provide the correct password and click on Allow or Always Allow at each prompt.

  5. Once you allow every request, complete the sign-in procedure again by inserting your Apple ID that’s associated with Office.
  6. After you’ve successfully signed in, click the Activate button (bottom left corner of the app) and complete the activation process.
  7. If all goes well, you should no longer encounter the Machine activation error.

Clearing KeyChain on macOS & resetting all Office Activation keys

Some users that were previously seeing the Machine activation error or Unable to Activate Office error have confirmed that the issue was resolved after they managed to reset the entire login keychain and clearing any current Office activation keys from macOS.

This operation might make you lose some data associated with Office Products, so it’s advisable to back up your files in advance or create a Time Machine backup before following the instructions below.

Here’s a quick step-by-step guide that will allow you to clear login Keychains and reset every Office Activation key currently stored on your macOS:

  1. Open the KeyChain access app. You can do it either from the Finder App or by opening the LaunchPad app and finding the KeyChain Access app via the search function.
    Opening the KeyChain Access utility
  2. Once you’re inside the Keychain Access app, select the login entry from the left-hand side menu.
  3. With the login entry selected, use the ribbon bar at the top to click on Edit > Change Password for Keychain login.
    Changing the password of Keychain Login
  4. Next, enter the olf password for your user account in the Current Password field and the new password for your user account in the New Password field. The last will be the new password that you will be using from now on (when logging into your Mac or when you need to provide admin access)
    Creating a new password for Keychain Login
  5. Click Ok to save the changes then quit the Keychain Access app.
  6. Next, you’ll need to do a total reset of all Office activation keys you’re currently storing on your Mac.
  7. To do this, access the Go menu from your default screen and click on Go to Folder from the newly appeared context menu.
    Using the ‘Go to Folder’ feature on macOS
  8. Inside the Go to the Folder box, type the following command and press Return to land directly into the Library folder:
    ~/library/
    Accessing the Library folder
  9. Once you’re inside the Library folder, scroll down through the list of folders and double-click on the Group Containers Folder.
  10. Inside the Group Containers folder, right-click on each folder that starts with UBF and choose Move to Bin from the newly appeared context menu.
    Moving all folders to Bin
  11. After you manage to move every UBF folder to the bin, restart your Mac and reactivate your Office product to see if you’re still encountering the Machine activation error.

Installing an older Word version (Office 2016)

Some affected users have confirmed that some older versions of Windows will not trigger this behavior. Although this is not the ideal solution, you should be able to fix the issue by downloading & installing an older Word package using the Microsoft Download Center.

Note: This is only applicable if you’re encountering the issue with the Word version of Office 2016.

Here’s a quick guide on obtaining and installing the older Word package through the official channels:

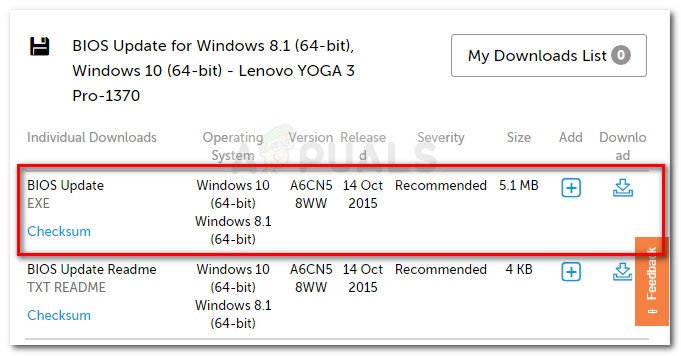
  1. Open Safari or any other browser and visit this link (here). Scroll down through the page and click on Download the Word package now (under Microsoft Download Center).
    Downloading an older Word Package
  2. Once the download is complete, open the .pkg file and follow the on-screen prompts to install the newer version on your Mac.
  3. After the installation is complete, restart your Mac and see if the issue is resolved at the next system startup.

The post How to Fix the Machine Activation Error with Word on MacOS and iOS appeared first on Appuals.com.


Issues Setting up a HomeGroup on Windows 10

$
0
0

HomeGroups, first introduced as part of Windows 7, are Microsoft’s attempt at making networking easy and accessible for the average Joe. A Windows user can create a HomeGroup on their local network, and any computers connected to this network can join the HomeGroup. Computers that have joined a HomeGroup can share files and printers between them by simply making whatever they want to share available to the HomeGroup – no applications or additional wired connections required!

HomeGroups on Windows 10

Naturally, the HomeGroup feature was also brought over to Windows 10. However, users have unfortunately been running into a plethora of issues using the feature. Some of the most common issues that Windows 10 users face (and which we’ll address) with HomeGroups include:

  • Being unable to create a HomeGroup on a local network.
  • Being unable to join or connect to a HomeGroup.
  • Being unable to see or access other computers connected to a HomeGroup.
  • Being able to create new HomeGroups on a local network but being able to join existing ones.
  • Being unable to detect HomeGroups that already exist on a local network.

What causes issues while setting up and using a HomeGroup on Windows 10?

  • HomeGroup services being disabled – If the Windows services that make HomeGroups tick are disabled on your computer, you’ll definitely be running into trouble.
  • Inadequate permissions for HomeGroup system files – If the system files responsible for the HomeGroup feature don’t have have sufficient permissions, there’s a good chance you won’t be having a good time trying to use the feature.
  • Leftover configurations or system files from an old HomeGroup – In some cases, leftover files from an old HomeGroup that has been deleted can prevent the user from creating a new HomeGroup from the computer. Affected computers can, however, still join existing HomeGroups.
  • A faulty or incorrectly configured HomeGroup – If a HomeGroup isn’t configured correctly, it won’t work like it’s supposed to. HomeGroups aren’t perfect, and so sometimes, a HomeGroup just turns out to be faulty – all you can do then is scrap the HomeGroup and start anew.
  • IPv6 being disabled – While you can have a perfectly working internet connection on your computer with IPv6 disabled, you won’t be able to use the HomeGroups feature. In order for a HomeGroup to function, all the computers connected to it must have IPv6 enabled.
  • The wrong date and/or time – Sometimes, it’s the most inconsequential things that drive outcomes. Something as simple as the affected computer having the wrong date and/or time could be the reason why it’s running into problems using the HomeGroup feature.
  • Compatibility issues between a computer and the HomeGroup it is trying to join – In some cases, either the computer or the HomeGroup it is trying to join have a bone to pick with the other, resulting in misery for the user.

How to Fix common HomeGroup issues?

Users can face a number of different issues when dealing with HomeGroups on Windows 10, and so there are just as many possible solutions as there are problems. The following are the most effective solutions you can use to try and fix an issue with Windows 10’s HomeGroup feature:

Make sure the affected computer has the right date and time

As bizarre as it may sound, you could be having a nightmare of a day with HomeGroup simply because the computer you’re using has the wrong date and/or time. To make sure the affected computer has the right date and time configured, simply:

  1. Locate the clock in the right side of your computer’s Taskbar and right-click on it.
  2. Click on Adjust date/time in the resulting context menu.
    Click on Adjust date/time
  3. Disable the Set time automatically option by turning off the toggle underneath it.
    Click on the toggle under the Set time automatically option to disable it
  4. If you would like Windows 10 to automatically set the right time for you, enable the Set time automatically option after a few seconds. If you would like to configure the right date and time yourself (which is actually recommended), click on Change under Change date and time.
    Enable the Set time automatically option

Ensure you have the right password for the HomeGroup

If a HomeGroup already exists on your local network but other computers are unable to join it, there’s a chance you’re using the wrong password to try and join the HomeGroup. A computer can’t just join an existing HomeGroup willy-nilly – you need to type in the password for the HomeGroup you want to join in order to be granted access. Knowing an (even slightly) incorrect password is the same as not knowing a password at all, as you won’t be able to join the HomeGroup in either case. That being the case, be sure to double-check that you have the right password for the HomeGroup you are trying to join. Know that you’ll have to do so on the computer the HomeGroup in question was created on.

Change the affected computer’s name

Changing your computer’s name is an amazing way to get rid of any inherent incompatibilities between the computer and the HomeGroup you are trying to join. Once your computer’s name has been changed, the HomeGroup will treat it as a completely new computer with no bad blood between them. To change a Windows 10 computer’s name, you need to:

  1. Press the Windows Logo key + to initiate a Search.
  2. Type “name” into the Search field and press Enter.
  3. Click on the search result titled View your PC name.
    Search for “name” and click on View your PC name
  4. Click on Rename this PC.
    Click on Rename this PC
  5. Type in a new name for your computer.
  6. Click on Next.
    Type in a new name for your computer and click on Next
  7. Follow the onscreen instructions, and once your computer’s name has been changed, restart it to have the changes take effect.

Once the computer boots up, you should be able to successfully connect to the HomeGroup you previously couldn’t join. If any other computers on your network are experiencing the same problem, you are going to have to repeat the steps listed and described above for each of them.

Make sure that all core HomeGroup services are enabled and running

There are a number of different system services that the HomeGroup feature depends on to function properly, and each of these needs to be enabled and running for a Windows 10 computer to create, join, or use a HomeGroup. In order to make sure that all core HomeGroup services are enabled and running, you need to:

  1. Press the Windows Logo key + R to open a Run dialog.
    Press the Windows Logo key + R to open a Run dialog
  2. Type services.msc into the Run dialog and press Enter to launch the Services utility.
    Type “services.msc” into the Run dialog and press Enter
  3. One by one, locate and double-click on the following services in the list:
    Peer Networking Grouping
    Peer Networking Identity Manager
    Homegroup Listener
    Homegroup Provider
  4. For each service, make sure the Startup type is set to Automatic.
  5. Make sure that each service is currently running on the computer. If it is not already running, click on Start.
  6. Click on Apply and then on OK.
    Set the Startup type to Automatic, click on Start, click on Apply, and click on OK
  7. Check to see if the issue you were facing still persists.

Have IPv6 enabled on all of the computers

Windows’ HomeGroup feature requires IPv6 to work. You don’t need IPv6 enabled on your computer in order to have a working internet connection on it, but you do need it enabled if you want to create, join, or use a HomeGroup on your local network. If you’re running into problems setting up or using a HomeGroup, make sure you have IPv6 enabled on the computer(s) you are experiencing these problems on.

Grant Full Control of the PeerNetworking and MachineKeys folders to all users

  1. Press the Windows Logo key + E to launch the Windows Explorer.
  2. One by one, navigate to each of the following directories, replacing with the drive letter corresponding to the partition of your hard drive Windows is installed on:
    X:\ProgramData\Microsoft\Crypto\RSA
    X:\Windows\ServiceProfiles\LocalService\AppData\Roaming\PeerNetworking
  3. In these directories, locate and right-click on the MachineKeys folder and the PeerNetworking folder respectively, and click on Properties.
    Click on Properties in the context menu

    For each of these folders:

  4. Navigate to the Security tab.
  5. Click on Edit….
    Navigate to the Security tab and click on Edit…
  6. Click on Everyone under the Group or user names section.
  7. Under the Permissions for Everyone section, check the Allow checkbox next to the Full Control option.
    Check the checkbox for Allow next to the Full control option
  8. Click on Apply and then on OK.

Rename the MachineKeys folder

If the PeerNetworking folder is the heart of the HomeGroup feature, the MachineKeys folder is its soul. Renaming the MachineKeys folder will force Windows to create and populate a new MachineKeys folder, resolving authority issues or any issues involving file permissions.

  1. Press the Windows Logo key + E to launch the Windows Explorer.
  2. Navigate to the following directory, replacing with the drive letter corresponding to the partition of your hard drive Windows is installed on:
    X:\ProgramData\Microsoft\Crypto\RSA
  3. Locate the folder titled MachineKeys and right-click on it.
  4. Click on Rename in the resulting context menu.
  5. Type in a new name for the folder. It can be anything you want – something like MachineKeys-old will do just fine.
  6. Press Enter.
  7. Right-click on an empty space within the Windows Explorer menu, hover over New in the resulting context menu and click on Folder.
  8. Type in MachineKeys as the new folder’s name, and press Enter.
  9. Right-click on the new MachineKeys folder and click on Properties.
  10. Repeat steps 48 from Solution 6 above, and grant Full Control of the MachineKeys folder to everyone that needs it.

Delete the contents of the PeerNetworking folder and create a new HomeGroup

Leftover files from older HomeGroups that have already been deleted can prevent a Windows 10 computer from creating a new HomeGroup, and can also stop HomeGroups created on affected computers from being visible to other computers on the network. Deleting files from previous HomeGroups won’t affect any future HomeGroups you create as the PeerNetworking folder is populated with new files every time a HomeGroup is created.

Note: If the affected computer is already part of a HomeGroup, right-click on the Start Menu button to open the WinX Menu, click on Control Panel, search the Control Panel for “homegroup“, click on Leave the homegroup… in the HomeGroup settings, and confirm the action. Repeat this process for all computers on the HomeGroup before proceeding.

Click on Leave the homegroup…
  1. Press the Windows Logo key + E to launch the Windows Explorer.
  2. Navigate to the following directory in the Windows Explorer, replacing X with the drive letter corresponding to the partition of your hard drive Windows is installed on:
    X:\Windows\ServiceProfiles\LocalService\AppData\Roaming\PeerNetworking 
  3. Press Ctrl + A to select all of the files and folders within the PeerNetworking folder.
  4. Right-click on the selection.
  5. Click on Delete in the resulting context menu.
  6. Click on OK to confirm the action.
  7. Repeat the steps listed and described above for every single computer on the affected HomeGroup.
  8. Turn all of the computers off.
  9. Boot up the computer that was previously unable to create a new HomeGroup, and try creating a HomeGroup. Not only should the HomeGroup now be created successfully, it should also be visible to all other computers on the network.

The post Issues Setting up a HomeGroup on Windows 10 appeared first on Appuals.com.

How to Use Windows Live Photo Gallery on Windows 10?

$
0
0

When Windows 7 came out, the standalone Windows Photo Gallery application was renamed to Windows Live Photo Gallery and moved to the Windows Live Essentials suite of applications. The program has since been discontinued by Microsoft and is no longer officially supported.

Windows Live Photo Gallery on Windows 10

However, despite the occasional issues users face, Windows Live Photo Gallery remains one of the most effective Windows programs ever at organizing images, as well as a competent image editor, and so still has demand. While the program can no longer be installed and used on Windows 10 through official channels, installers for offline iterations of the Windows Live Essentials suite and its components are still available elsewhere. To install Windows Live Photo Gallery on Windows 10, you need to:

  1. Click here to start downloading an installer for the standalone version of the last Windows Live Essentials 2012 build released by Microsoft.
  2. Wait for the download to complete.
  3. Once the download has been completed, navigate to the directory the installer was downloaded to.
  4. Locate the file named wlsetup-all.exe and double-click on it to run it.
  5. Wait for the installer to prepare the files required for the installation.
    Wait for the installer to prepare installation files
  6. On the What do you want to install screen, click on Choose the programs you want to install.
    Click on Choose the programs you want to install
  7. Uncheck the boxes next to all of the programs included in the Windows Live Essentials 2012 suite, only leaving the box next to Photo Gallery and Movie Maker checked and selected.
  8. Click on Install.
    Only select Photo Gallery and Movie Maker, and click on Install
  9. Wait for the program to be installed.
    Wait for the program to be installed
  10. Once the installer is done installing the program, click on Close.
    Click on Close when the installation has been completed

You should now see Windows Live Photo Gallery on your computer, and double-clicking on the Photo Gallery shortcut will launch the program for you.

Double-click on the Photo Gallery shortcut to launch Windows Live Photo Gallery

While installing Windows Live Photo Gallery on Windows 10 is pretty easy and straightforward, getting it to work and using it is a different story altogether. Windows 10 wasn’t necessarily built to be compatible with applications as dated as Windows Live Photo Gallery, and so is missing some files and components required to run the program. That being the case, you may run into the following error message when you try to launch Windows Live Photo Gallery on Windows 10:

Photo Gallery can’t start because Microsoft SQL Server 2005 Compact Edition is missing. Would you like to go to the Microsoft Download Center to install it?

The “Microsoft SQL Server 2005 Compact Edition is missing” error message

Unfortunately, much like Windows Live Photo Gallery, Microsoft no longer offers Microsoft SQL Server 2005 Compact Edition for download. The component can, however, still be downloaded from third-party sources. To download and install Microsoft SQL Server 2005 Compact Edition, simply:

  1. On an internet browser of your choice, go here.
  2. Click on the Download Now button, and your computer will start downloading a Microsoft Installer for the Microsoft SQL Server 2005 Compact Edition.
    Click on Download Now
  3. Wait for the download to complete.
  4. Once the download has been completed, navigate to the directory the Microsoft Installer was downloaded to.
  5. Locate the file named SQLServerCE31-EN.msi and double-click on it to run it.
  6. Follow the onscreen instructions and prompts to install Microsoft SQL Server 2005 Compact Edition.
  7. Once the component has been successfully installed, close the Microsoft Installer.

Try launching Windows Live Photo Gallery with Microsoft SQL Server 2005 Compact Edition now installed, and the program should launch and run smoothly.

The post How to Use Windows Live Photo Gallery on Windows 10? appeared first on Appuals.com.

Fix: Sonos was unable to add the music folder

$
0
0

The Sonos Error 1002 (Unable to add the music folder) typically occurs when users try to add their Music Library to the Sonos Controler. This typically occurs with Sonos smart speakers when the user tries to import Music Library from Spotify or a similar app and is confirmed to occur on macOS, Windows iOS, and Android.

Sonos Error Code 1002 (Sonos was unable to add the music folder)

In most cases, the Sonos 1002 Error code points towards a connectivity problem on the network. If you’re encountering this issue, the first thing you need to do is to update to the latest Sonos app (They have released a couple of hotfixes for this issue).

If you’ve already updated to the latest version of Sonos, take some steps to resolve any sort of network inconsistency that might be causing this issue – A reboot or reset of your router or modem should be enough.

Overprotective firewalls can also be responsible for this error code if they end up blocking communications with the Sonos Controller. To resolve the issue in this case, simply whitelist the Sonos app (or the used ports) or simply uninstall the 3rd party AV.

Note: In case you’re using Kaspersky or a different 3rd party AV, check the settings to see if Local Services (TCP) are not being actively blocked. If they are, reconfigure the Packet Rules to allow Local Services.

In case you’re only seeing the Sonos 1002 Error code when trying to add entire playlists to the queue at once, try queuing them in small batches. According to some users, playlists with over 500 songs might trigger this error.

Updating to the latest Sonos App version

As it turns out, this particular issue is known to occur due to a bug that Sonos developers have been trying to patch since the end of 2018. Since a couple of hotfixes have been released so far on all platforms (Windows, macOS, iOS and Android), your first attempt at fixing this issue should be to ensure that you’re using the latest version of the app.

Note: This will not fix the issue if you are dealing with a common inconsistency or some kind of 3rd party interferences that is interfering with the connection to the Sonos Controller.

However, if this scenario looks like it could be applicable, follow one of the guides below (the one compatible with the platform you’re encountering the issue with) to update the Sonos App to the latest version.

Update Sonos app on Android

  1. Open the Google Play Store App.
  2. Use the action menu on the left to select the My apps & Games entry.
  3. From My apps & games, select the Updates tab and click on the Update button associated with the Sonos App.
    Updating the Sonos app on Android

Update Sonos app on iOS

  1. On your iOS device, open the App Store and tap on the Today button (at the bottom of the screen).
  2. From the next screen, tap your profile icon at the top of the screen.
  3. Next, scroll down to see all the available updates and click on the Update button associated with the Sonos app.
    Update the Sonos app on iOS
  4. Follow the on-screen prompts to complete the Sonos App update.

Update Sonos app on Windows

  1. Press Windows key + R to open up a Run dialog box. Next, type ‘appwiz.cpl’ and press Enter to open up the Programs and Features screen.
    Type appwiz.cpl and Press Enter To Open Installed Programs Page
  2. Inside the Programs and Features screen, scroll down through the list of installed applications, right-click on Sonos Controller and choose Uninstall from the newly appeared context menu.
    Uninstall Sonos on Windows
  3. Follow the on-screen prompts to complete the installation, then restart your computer to complete the process.
  4. Once the next startup is complete, visit this link (here) and click on the Download the Windows controller button.
    Downloading the Sonos app
  5. After the download is complete, open the installer and follow the on-screen prompts to install the latest version of Sonos Windows Controller.
  6. Launch the app and see if you’re still encountering the same issue.

Update Sonos app on macOS

  1. Use the main navigation bar at the bottom to access the App Store.
  2. From the sidebar, click on Updates.
  3. Scroll down through the list of pending updates and click on the Update button that’s associated with the Sonos app.
    Updating the Sonos app on Mac
  4. Follow the on-screen prompts to complete the update, launch the app again and see if the issue has been resolved.

Reboot or Resetting router/modem (if applicable)

If you’ve previously made sure that the Sonos app is fully updated but you’re still encountering the Sonos Error 1002, it’s also possible that the Sonos Controller is unable to forward media to your smart speakers due to a common network inconsistency.

In case this scenario is applicable, you should be able to fix the issue by rebooting or resetting your networking device (modem or router).

Our recommendation is to start with a simple reboot since this operation will not override any custom settings.

To do a simple reboot on your modem or router, simply go to your device and press the On / Off button (typically located on the back). After you press it once to turn it off, wait for 30 seconds or more before turning it back on in order to ensure that the power capacitors are completely rained.

Additionally, you can also physically unplug the device cable from the power outlet in order to ensure that the operation is completed successfully.

reboot router
How to restart the router or modem

In case you’re still seeing the Sonos Error 1002 when forwarding media to the Sonos Controller despite rebooting your networking device, you should ty a router reset. But keep in mind that is operation will also reset any custom settings – Even login credentials from your router settings page.

In order to perform a router reset, use a toothpick, a needle (or any similar small sharp object) to reach the reset button on the back of your networking device. When you manage to reach it, keep it pressed for a minimum of 10 seconds (or until you see that every front LED starts flashing synchronously).

Resetting Router

Allowing Local Services (TCP) service in your AV settings (if applicable)

If you’re using a 3rd party AV, it’s also possible that the Sonos Controller cannot be reached due to the fact that the Local Services (TCP) service is blocked in your AV settings. In this case, you will be able to fix the issue by reconfiguring your Packet Rules in order to allow the Local Services (TCP).

Of course, the steps of doing so will be different depending on the 3rd party Antivirus that you’re using.

On Kaspersky (the A/V that’s most likely causing this error), you can do this by going to Settings > Full Protection >  Enhanced Firewall > Packet Rules. Inside the Packet Rules menu, allow every instance associated with Local Services (TCP) and save the changes in order to resolve the issue.

Modifying the Packet Rules in your 3rd party A/V

Whitelisting Sonos or Uninstalling 3rd party Firewall

Keep in mind that an overprotective firewall can also be responsible for the apparition of this particular issue. This is confirmed to happen with both mobile (iOS, Android) & desktop (Mac, Windows) with a whole suite of different products that end up communications to the Sonos Controller due to some kind of false positive.

In this case, the ideal way to fix it is to check your Firewall settings and whitelist the Sonos app and the ports used by the application. But keep in mind that the steps of doing so will be different depending on 3rd party solution that you’re using.

Note: As opposed to a regular AV, disabling the real-time protection of your firewall will NOT fix the issue. The communication process trying to reach the Sonos Controller is already blocked, and disabling the AV will not change the ruleset. The only viable solution, in this case, is to uninstall.

If you’re encountering the issue on Android or iOS, the quickest and most efficient way of resolving the issue is to simply uninstall the firewall app that you’re using. Of course, the steps of doing so are specific to the operating system that you’re using.

But since the steps of uninstalling the 3rd party firewall on desktop (Mac and Windows) are a little more complex, we decided to feature separate guides to accommodate each user base.

Uninstalling the Firewall on Windows

  1. Press Windows key + R to open up a Run dialog box. Next, type ‘appwiz.cpl’ and press Enter to open up the Programs and Features menu.
    Type appwiz.cpl and Press Enter to Open Installed Programs List
  2. Once you’re inside the Programs and Features menu, scroll down through the list of installed applications and locate the 3rd party firewall solution that you’re using.
  3. Right-click on the 3rd party suite that you wish to remove and click on Uninstall from the newly appeared context menu.
    Uninstalling Avast Firewall
  4. Follow the on-screen prompts to complete the uninstallation, then reboot your computer and wait for the next startup to complete.
  5. Once the next startup is complete, follow the steps outlined in this article (here) to remove any remnant files from your AV that might still block some ports from being used.

Uninstalling the Firewall on macOS

  1. On your Mac, open the Finder App from the omnibar at the bottom of the screen.
    Opening the Finder App
  2. Inside the Finder app, select the Applications folder and look for the app that you want to uninstall. Once you manage to locate the 3rd Party firewall that you wish to uninstall, simply right-click on it and click on Move to Bin from the newly appeared context menu.
    Uninstall the 3rd party AV
  3. Next, right-click on the Bin icon from the same omnibar at the bottom of the screen and choose Empty Trash from the context menu.
    Empty Trash on Mac
  4. Once your firewall solution has been removed, repeat the action that was previously causing the Sonos Error 1002 and see if the issue is now resolved.

Adding fewer tracks to Queue

As it turns out, for most users affected by this problem, the Sonos Error 1002 appears whenever they try to add a very large number of songs into the queue at once from Spotify, Tidal, Pandora and other similar music streaming services.

If this scenario is applicable to you, you might be able to circumvent the issue by trying to forward the songs in several small batches.

According to affected users, this issue is only reported to occur in situations where the user tries to load a playlist that contains over 500 songs at once in the Sonos Queue.

As long as you don’t go over that number and the issue is not being caused by some kind of interference or network inconsistency, you should no longer encounter the ‘Sonos was unable to add to the music folder‘.

The post Fix: Sonos was unable to add the music folder appeared first on Appuals.com.

How to Install Autotune Plugin in Audacity?

$
0
0

Autotune is a piece of software that measures and alters pitch in the vocals. Autotune is used to correct the singer’s wavering pitch and bad notes. However, some users are looking for the Autotune feature in the Audacity that isn’t available by default. In this article, we will show you the methods to install the Autotune plugin in Audacity.

Autotune plugin in Audacity

Installing Autotune Plugin in Audacity

Audacity does not have the Autotune plugin of its own. However, you can install some third-party plugins for your Audacity. Installing plugins is easy, the user just needs to copy the plugin files in the Audacity plugins folder. There are many Autotune plugins that Audacity supports and you can use the one you like. Down below we have mentioned some of the best free Autotune plugins that you can try to use in Audacity.

Installing GSnap VST Pitch Correction Plugin in Audacity

GSnap is an Autotune plugin that users can use in their audio editing programs. By using the GSnap, users can correct the pitch of vocals or create robotic voice effects for fun. The GSnap will work better with the simple audio material. It can take more time if the audio is full of complex material with rapid notes. The GSnap will be downloaded as a zip file and it will be containing a single DLL file that you can copy to the Audacity Plugin folder as shown below:

  1. Open the browser and download the GSnap Free VST pitch-correction for Audacity.
    Downloading GSnap for Audacity
  2. Extract the zip file and open the folder.
    Extracting GSnap zip file
  3. Copy the GSnap.dll file and paste it into the Audacity plugin folder as shown below:
    C:\Program Files (x86)\Audacity\Plug-Ins
    Copying GSnap file to the Audacity Plugin folder
  4. Open the Audacity application by double-clicking the shortcut. If it was already running during the copy process, then restart it.
  5. Click on the Tools menu in the menu bar and choose Add / Remove plug-ins option. Scroll down, select the GSnap and click on the Enable button. Then click the Ok button.
    Note: If you get the ‘fails to register’ error, then make sure you download the 32-bit GSnap.
    Enabling GSnap plugin in Audacity
  6. Now open any of the audio files by clicking the File menu and choosing Open option or you can record. Then click on the Effect menu and choose the GSnap option.
    Opening GSnap effect
  7. Now you can adjust the options and Autotune the vocals in the audio track.
    Using the GSnap to autotune in Audacity

Installing Auto-Tune Evo VST Plugin in Audacity

Auto-Tune Evo VST is created by Antares Audio Technologies. This tool is not free and the user must purchase it to use it. However, you can try the trial version or use one of the outdated versions to test it in Audacity. The procedure for installing this plugin is similar to the others, you need to copy the plugin file into the Audacity plugins folder as shown below:

  1. Open your browser and go download the Auto-Tune Evo VST for Audacity.
    Downloading the Autotune EVO old version
  2. Extract the zip file and install it. In the installation process choose the path Desktop for VST Plugin.
    Unzipping the autotune zip file
  3. You will find the Auto-Tune Evo VST file on the desktop. Copy this file and paste it in Audacity plugin folder as shown below:
    Copying the DLL file and pasting it in Audacity plugin folder
  4. Open the Audacity by double-clicking the shortcut. Click on the Tools menu in the menu bar and choose Add / Remove plug-ins option.
  5. Then select the Auto-Tune Evo VST and click on the Enable button. Click on the Ok button to confirm changes.
    Enabling Auto-tune Evo VST plugin
  6. Click on the Effect menu in the menu bar and choose the Auto-Tune Evo VST option at the bottom.
    Opening Auto-tune Evo VST effect
  7. Now you can Autotune your voice and vocals in Audacity easily.
    Using autotune to adjust the pitch in the vocals

The post How to Install Autotune Plugin in Audacity? appeared first on Appuals.com.

Installing FFmpeg Library in Audacity

$
0
0

Any user that is trying to encode AAC audio will require importing FFmpeg in Audacity. Some other formats also require this library in Audacity. However, this library is not available in Audacity by default. Audacity will ask users to locate the ‘avformat-55.dll‘ for this library to work. Users need to install this library from the official Audacity manuals. In this article, we will show you how to Install FFmpeg Library in Audacity.

Installing FFmpeg Library in Audacity

Audacity is including every most used library as a built-in with the latest version updates. Recently Audacity added the LAME MP3 Encoder as a built-in within the latest version of Audacity. Now users do not need to install the LAME library anymore. There is a possible chance that they will include the FFmpeg Library as built-in in the upcoming version of Audacity. However, for now, you can use the below method to install the FFmpeg Library in Audacity.

Installing FFmpeg Library  in Audacity

Most of the libraries are already built-in with Audacity. The FFmpeg library allows Audacity to import and export large audio files. The formats that require this library are M4A (AAC), AMR, WMA, and AC3. However, some libraries like FFmpeg will still require the installation in Audacity. If you open the FFmpeg library in preference of Audacity, it will ask to locate the ‘avformat-55.dll‘ file to make this library work. There is no ‘avformat-55.dll‘ file in the Audacity folder. A user is required to download this library from the internet so that it can provide the DLL file to Audacity.

  1. Open your browser and download the FFmpeg libraries for your Audacity. Click on the download link of the executable file (.exe) for FFmpeg as shown below:
    Downloading the FFmpeg installer
  2. Open the FFmpeg installer file and run the setup. Follow the installation process and install the FFmpeg for Audacity.
  3. Now open your Audacity application. Click on the Edit menu in the menu bar and choose the Preferences option.
    Note: You can also just press the CTRL + P keys to open the preferences of Audacity.
    Opening the Preferences in Audacity
  4. Select Libraries in the list on the left side. Click on the Locate button in front of the FFmpeg Library and it will automatically find the installed FFmpeg library for Audacity.
    Adding the FFmpeg Library by clicking the locate button
  5. Choose the No option for manually adding the library. Click Ok to close the Preferences window.
  6. Now you can import and edit large range or audio format files into your Audacity without any problem.
    Importing audio in Audacity

The post Installing FFmpeg Library in Audacity appeared first on Appuals.com.

Saving GIF Images from Twitter

$
0
0

If you are using Twitter, then there are a lot of GIFs that you see every day. GIFs refers to a short animated picture without the sound. People on Twitter share many different kinds of GIFs in tweets and comments. Just like memes, GIFs can be used as a reaction of a person through messages. However, there is no option available on Twitter for saving the GIF that you liked. In this article, we will show you how you can save GIFs from Twitter on PC, Android, and iPhone.

Saving GIFs from Twitter

Saving GIFs from Twitter on PC

You can save the Twitter GIFs on PC by using the online downloading websites. Using the websites to save GIFs is the easiest and reliable method. All you need is to copy the URL of the GIF and paste it on the website to download. Follow the below steps to save the GIF from Twitter on PC:

  1. Open Twitter in your browser and find the GIF tweet that you want to download. Right-click on it and choose Copy GIF Address option.
    Copying GIF address
  2. Open the EZGIF website in the new tab and select Video to GIF option.
  3. Now paste the GIF address and click the Upload video button as shown below:
    Pasting link and clicking the Upload video button
  4. It will load the GIF in the video format. Scroll down and click on the Convert to GIF button.
    Clicking Convert to GIF button
  5. The video will convert and provide the GIF output down below. Click on the Save button in the Output GIF section and the GIF will save into your computer.
    Saving the GIF to PC

Saving GIFs from Twitter on Android

There are a lot of applications on the Google Play Store for saving Twitter GIFs. Most of them provide additional features in the application, including saving GIFs. We are going to demonstrate the Tweet2gif application for this method, which we successfully used without any problem for saving twitter GIFs. Follow the below steps to try saving GIFs from Twitter:

  1. Go to Google Play Store and search for the Tweet2gif application. Tap on the Install button to install it on your phone.
    Installing Tweet2gif from Google Play Store
  2. Now open your Twitter and find the GIF that you want to save to your phone. Tap on the Share button and choose Copy link to Tweet option.
    Copying the Tweet Link
  3. Open the Tweet2Gif application that you just installed. Tap on the Paste icon and then press the Download GIF button.
    Pasting Link and Downloading the GIF
  4. The application will start downloading the GIF and it will be saved on your phone.

Saving GIFs from Twitter on iPhone

Just like Android, iPhone also has many applications on the App Store for this purpose. In this method, we are going to use GIFwrapped application, which has simple steps for saving GIFs on your iPhone. Due to the iPhone security, you need to save the GIF in the application, then save it to the Camera Roll as shown below:

  1. Open App Store on your iPhone and download the GIFwrapped application.
    Downloading GIFwrapped application from the app store
  2. Open the Twitter app on your phone and find the Tweet of the GIF that you want to download.
  3. Tap on the Share icon, choose the Share Tweet via option and then select Copy Link to Tweet option.
    Copying Tweet Link
  4. Now open GIFwrapped application and select the Search tab at the bottom. Paste the link or tap on Use the Clipboard option.
    Pasting the link in the application
  5. Select the GIF on the screen and tap on the Share button at the top right corner. Then choose Save to Library option.
    Saving the GIF to the Library
  6. Now select the Library tab at the bottom and tap on the downloaded GIF. Tap on the Share button again and choose the Save to files option.
  7. Provide the saving location and press the Add button to confirm.
    Saving the GIF from Library to Camera Roll
  8. The GIF will be saved to the Camera Roll of the iPhone.

The post Saving GIF Images from Twitter appeared first on Appuals.com.

Fix STOP Error 0x000000A5 when Installing Windows 7

$
0
0

Some users are complaining about the fact that they end up seeing the Stop Error 0x000000A5 every time they attempt to install Windows 7 on their computer. In most reported cases, the error appears during the phrase where the installation is ‘Copying Windows Files‘.

STOP Error “0x000000A5” Error upon installation of Windows 7

In most cases, this particular issue is caused by a BIOS inconsistency. In order to fix the issue, in this case, you’ll need to follow the documentation provided by your motherboard manufacturer in order to update your BIOS version to the latest version.

In case you’re using a traditional HDD but your BIOS is configured to use WIMBoot, you will need to adjust some BIOS settings in order to allow the installation in Windows 7. In this case, go into your BIOS settings and adjusting the LPSS & SCC configuration in order to accommodate Windows 7.

However, as it’s been reported by some affected users, the Stop Error 0x000000A5 can also occur due to a failing RAM or by a partially broken RAM slot (or a slot filled with dust and lint). In this case, you should be able to fix the issue by replacing your RAM stick or by changing the RAM slot that you’re actively using.

On an older rig, you might need to force the installation of the Standard PC HAL if the BIOS that you’re using is not fully ACPI compliant. This can be done during the first screens of the Windows installation sequence.

If all else fails, you should reset your BIOS or UEFI settings to the default and redo the installation again to see if the issue is still occurring.

Updating your BIOS to the latest version

As it turns out, in the vast majority of cases, this particular issue will be caused by a BIOS inconsistency. This stop code usually indicates that the BIOS version is incompatible with the Advanced Configuration and with the Power Interface (ACPI) that is supported with Windows 7.

If this scenario is applicable, you should be able to fix the issue by updating the BIOS version to the latest available. But keep in mind that due to the fact that BIOS interfaces are vastly different across various motherboard manufacturers, it’s not possible to provide you with step-by-step guides.

The best way to get specific instructions on updating your BIOS version is to go online and do a search query on ‘BIOS Update + motherboard model‘ and read the documentation on the official website very carefully.

Keep in mind that most motherboard manufacturers will offer their own BIOS updating utility, so following the steps to the letter is essential. Asus has E-Z Flash, MSI has MFlash, etc.

Updating your bios version

Here’s a shortlist of official documentation directories for BIOS updating for some of the most popular motherboard manufacturers:

If you’re looking for some general guidelines that will allow you to update your BIOS version, follow the instructions below to do it via a USB flash drive:

Note: Make sure to consult the official documentation for step by step instructions. This is just a general guideline.

  1. Start by ensuring that you have a blank USB flash drive sat the ready. If it’s already filled with data, back it up and then right-click on the flash drive and choose Format from the context menu.
    Formatting the USB drive
  2. Inside the Format screen, set the file system to FAT32 and check the box next to Quick Format. Next, click on Start to format the drive.
    Formatting the removable drive 
  3. Once the operation is complete, visit your motherboard manufacturer’s website, consult the BIOS update documentation and download the latest BIOS firmware version. Next, copy that file to the USB flash drive that you’ve just formatted.
    Downloading the latest BIOS version

    Note: Depending on your motherboard manufacturer, you might need to make some additional changes to the files used for the BIOS update – that’s why it’s very important to consult the official documentation.

  4. After you manage to copy the Boot files on the USB flash drive, restart your computer and press the required (Setup key) at the next startup to access your BIOS settings menu.
    press a key to enter setup or bios
    Press [key] to enter setup
    Note: If the Setup screen doesn’t appear on the screen, try pressing the Esc, Del, or the F keys (F2, F4, F6, F8, and F12). In case none of these potential BIOS keys work, search online for the specific BIOS Settings key according to your motherboard model.
  5. Once you’re inside your BIOS settings, look under the Advance settings for an option named Update System BIOS (or similar)
    Updating the System BIOS via USB flash
  6. After the update operation is complete, restart your computer and wait for the next startup to complete. Once you reach this point, you can safely remove the USB flash disk from your computer.

If you’ve already taken some steps to update your BIOS to the latest version and you’re still encountering the same error message, move down to the next potential fix below.

Adjusting the LPSS & SCC Configuration

If you’re using an older motherboard and a traditional HDD, it’s possible that you’re struggling with the Stop Error 0x000000A5 due to inconsistency with WIMBoot. Keep in mind that WIMBoot is not supported on traditional drives that still use rotational components or hybrid drives (that contain both solid-state and rotational drive components)

If this scenario is applicable, you should be able to fix the issue by accessing your BIOS settings and adjusting the LPSS & SCC Configuration so that it’s configured to work on Windows 7. Several affected users have confirmed that this operation finally allowed them to complete the installation of Windows 7 without encountering the Stop Error 0x000000A5.

Here’s a quick guide on adjusting the LPSS & SCC Configuration from the Advanced BIOS settings menu:

  1. Open up the machine that you’re encountering issues with and start pressing the Setup key as soon as you get to the initial screen.
    Pressing the Setup key to enter BIOS settings

    Note: The Setup (BIOS) key should be installed on the screen. If you’re having trouble finding your particular Setup key, search online for specific instructions on accessing your BIOS or UEFI settings.

  2. Once you’re inside your BIOS settings menu, go to the Advanced settings menu and look access the entry named LPSS & SCC Configuration.
    Accessing the LPSS & SCC Configuration menu
  3. Inside the LPSS & SCC Configuration menu, change the drop-down menu associated with Operating System to 7.
  4. Save the changes that you just made your BIOS settings, then attempt to repeat the installation of Windows 7 and see if you’re able to complete it without encountering the same Stop Error 0x000000A5.

Replacing the RAM or using a different slot

As it turns out, the Stop Error 0x000000A5 can also occur if the memory is not properly seated or if the RAM stick that you’re using is starting to fail. This is only applicable if you’re encountering this issue during random intervals or at the system startup.

Some affected users that were dealing with the same kind of issue have reported that they did a memory test to see if there are any issues with their RAM.

If you’re currently overclocking your RAM frequency & voltage, revert to the default values and monitor the usage with a program like HWmonitor to check for any voltage or temperature spikes that might end up producing this error.

Additionally, you can also run the Memtest utility to verify the integrity of your RAM files.

In case you find no red flags with your RAM, simply change the RAM slot that you’re currently using. If the issue doesn’t repeat once you change slots, there’s a high chance that you’re dealing with a faulty RAM slot on your motherboard – in this case, take your computer to a technician for further investigations.

Installing the Standard PC Hardware abstraction layer (HAL)

If you’re using an older rig, it’s also possible that you’re encountering the Stop Error 0x000000A5 due to the fact that the BIOS you’re trying to use during the installation of the new Windows version.

In case this scenario is applicable, you should be able to fix the issue by obtaining a BIOS that is fully ACPI compliant. By doing this, Windows will automatically disable the installation of the ACPI HAL and install the Standard PC HAL.

Here’s a quick guide on installing the Standard PC Hardware abstraction layer:

  1. Reboot your machine in order to bring back the Windows Setup screen.
  2. once you see the ‘Press F6 if you need to install a third-party SCSI or RAID driver‘ bottom prompt, press F7 (Not F6) in order to bypass the installation of ACPI and install the Standard PC HAL.
    Installing the Standard PC HAL
  3. Follow the installation prompts normally – This time, you should no longer be interrupted by the same Stop Error 0x000000A5 error.

Reverting BIOS / UEFI to the Default Settings

If none of the methods above have worked for you and you’ve previously made sure that you’re using the latest BIOS / UEFI version and that Standard PC HAL is active, one last fix that might fix the issue for you is to revert every BIOS or UEFI settings to the default values.

Keep in mind that due to the fragmented nature of BIOS versions and the fact that newer rigs use UEFI instead, we can’t provide you with a definitive guide that will allow you to revert the values of BIOS or UEFI to the default.

Because of this, we created two separate guides that will allow you to do this regardless of the boot technology that you use (BIOS or UEFI). Follow whichever guide is applicable to your current situation.

Resetting BIOS Settings to Default

  1. Power up your machine (or restart it) and start pressing the Setup (Boot key) once you get to the original screen.
    Pressing the setup key

    Note: If the boot key is not displayed on the screen, try Esc, Del, F1, F2, F4, F8, F12 or search online for the dedicated setup key.

  2. Once you’re inside your BIOS settings, look for an option named Setup Defaults (or Setup Default, Factory Default or Reset to Default), confirm, then save the changes to return to the default BIOS configuration.
    Load default system configuration

    Note: If you have the generic BIOS version that most manufacturers are using you can revert back to the default settings by pressing F9 once you’re inside the BIOS setting menu.

  3. Once you’ve ensured that the changes are saved, exit the BIOS settings and attempt to perform the Windows 7 installation again and see if the issue is still occurring.

Resetting UEFI Settings to Default

  1. Press Windows key + R to open up a Run dialog box. Next, type ‘ms-settings:recovery’ and press Enter to open up the Recovery menu of the Settings app.
    Accessing the Recovery tab
  2. Once you land inside the Recovery window, click on the Restart button associated with Advanced startup.
    Accessing Advanced Startup using Settings
  3. After you do this, your computer will restart directly into the Advanced Options menu. Once you get to this point, navigate to Troubleshoot > Advanced Options and click on UEFI / BIOS Firmware settings.
    Accessing the UEFI firmware settings
  4. From inside the UEFI settings, click on the Settings menu and search for the option named Restore Defaults (or similar).
    Restore UEFI settings to the defaults
  5. Next, complete the operation and save the changes before you exit the UEFI settings.
  6. At the next system startup, attempt to install Windows 7 again and see if you are able to complete the process without encountering the Error 0x000000A5 error.

The post Fix STOP Error 0x000000A5 when Installing Windows 7 appeared first on Appuals.com.


What is GIFV and How to Save GIFV as a GIF?

$
0
0

Everybody is aware of the GIF files format and how they work around as a short series of images. However, some users have also witnessed the GIFs in the form of videos and the GIFV name with it. Some may think that GIFV is another file format for something similar to GIFs. In this article, you will learn the basic of what GIFV is and how you can save the GIFV as the normal GIF.

What is GIFV?

What is GIFV?

GIFV is the GIF video with high quality that has no sound like the normal videos. Just like a normal GIF, the GIFV also plays in loops forever until the user stops it. It uses the same functionality as GIF. GIFV project was introduced by the Imgur a few years ago. It was for automatically converting the uploaded GIF files into the WebM or MP4 video formats. They implemented the video in such a way that it looks and behaves just like a GIF. GIFV is not really a file format, users will only be able to find this on websites like Imgur. If a user downloads the GIFV from GIFs sharing website like Imgur, it will be downloaded in WebM or Mp4 format.

GIFV in the link of Imgur GIF

GIFs are a short series of images that can make a little animation. However, if the user creates GIFs with a few seconds longer than usual, then the file size will be increased by a big margin. GIFV frames will be more in numbers and it will play smoother rather than the normal GIF. There is also a color difference between GIFV and GIF, colors are duller and less sharp in GIF. The video GIFs will be overall a high-quality GIF. GIFV is now found very less and only the name exists, even the URL shows the MP4 or WebM for GIF videos.

Saving GIFV as a GIF

Most of the time if you open a GIFV on the Internet and try to save it, it will be in the WebM or MP4 format. As mentioned above GIFV is just the project name for GIFs in the video formats on the Imgur website. Downloading the GIFV in a GIF format rather than the video format will be downloaded as a large file. As you can see the size difference below, we downloaded the 24seconds video in both GIF and WebM format from Imgur.

The size difference between GIF and WebM

However, if you still want to download it in the GIF format, then you can open any GIF on Imgur in the new tab, click on the menu icon under GIF and choose Download Post option. This will download the video format as a normal GIF in your device.

Downloading video GIF as a normal GIF

If you can’t find the option, using another website or already have downloaded the GIF video in WebP/MP4 format, then you can use the online converter. Here are two examples

MP4 to GIF

Converting MP4 to GIF

WebM to GIF

Converting WebM to GIF

The post What is GIFV and How to Save GIFV as a GIF? appeared first on Appuals.com.

How to Troubleshoot SystemSettings.exe Crashing on Windows 10

$
0
0

There are many Windows processes that run in the background. They make sure that the user is provided a reliable and robust working platform. “SystemSettings.exe” is an executable file and is often seen as one of the background services. It is visible as Settings in the Process tab in the Task Manager.

Background Processes in Task Manager

What is SystemSettings.exe?

“SystemSettings.exe” is a Windows executable file that comes from Microsoft, hence being safe and not a malware program. It is about 85 to 90kb  in size and when the user opens the control panel, it can be seen running in the background. “SystemSettings.exe” resides in the following location (if Windows is installed in “C” partition):

"C:\Windows\ImmersiveControlPanel"

Since SystemSettings.exe is an executable file that contains executable machine code (not pure machine code but some metadata), it is not in human-readable form. When the user opens the control panel, the Windows kernel calls for the execution of the program which is inside SystemSettings.exe. This program contains instructions that are executed to make sure that the control panel is displayed and functions properly.

SystemSettings.exe running in the background

Is ‘SystemSettings.exe’ a Threat?

It is not a threat, however, in some cases, it can cause your PC to get slow. Antivirus programs do not detect “SystemSettings.exe” as a malicious program. We recommend not to remove this file as it is part of the Operating System.

SystemSettings.exe Crashes

There have been some cases in which when the user navigates to Windows settings and the settings crash. This is frequently encountered on systems using Windows 10 1809, 1903 & 1909 version. The crash can result in a blue icon appearing and then disappearing after a few seconds. Follow the steps below to get rid of this problem.

Here are a few methods through which you can resolve the crashes related to this file. Make sure you are logged in as an administrator before proceeding.

Run System File Checker scan and DSIM Command

SFC scan is a functionality provided by Microsoft which allows the user to perform a scan of Windows Files in order to check for corrupted files. DSIM stands for Deployment Image Servicing and Management. It is a tool that helps users to repair Windows images. .Make sure you have tried out both the methods before proceeding to the solutions given below.

Disable Antivirus

Sometimes Antivirus can also cause apps to crash. Try disabling your antivirus by following the steps below.

  1.  In the bottom right corner of the screen, there is the Windows notification bar, find your antivirus icon there.
    Bottom-right notification bar
  2. Right-click on it and click on exit or disable or shutdown.
  3. To disable additional features of the antivirus, you will have to navigate its main menu.
  4. If the problem still persists follow the step below to further attempt to resolve this issue.

Create Another User

If all of the above solutions did not work for you then try creating another user account. Follow the steps below to do so.

  1. On your bottom left corner of the screen, there should be a Windows logo(Start Button) click on it.
  2. Click on the settings icon.
  3. Click on Accounts once Windows Settings pop up.
    Accounts in Windows Settings
  4. Click on Family & other users which is an option on the left panel in the Windows Settings.
  5. Select “Add someone else to this PC“.
    Account Settings
  6. Now choose “I don’t have this person’s sign-in information” and then add a user without a Microsoft account.
  7. Enter the credentials as you wish and select next.
  8. After creating a new account, log into it and check if the issue is resolved.

The post How to Troubleshoot SystemSettings.exe Crashing on Windows 10 appeared first on Appuals.com.

Converting Batch Files .BAT to Executables .EXE

$
0
0

Batch scripts are the series of commands stored in a plain text file that can be executed by the command-line interpreter. Whereas executable files are used to perform various operations and tasks on a computer. Some users are wondering if there is a way of converting the batch script (BAT) to an executable file (EXE). In this article, you can find the methods that will tell you how to convert the batch scripts to executable files.

Converting to a batch script (BAT) to Executable (EXE) in Windows

There are different methods that include the using of third-party software or using the Windows self-extracting package wizard. We are going to show you the simple converting of batch scripts to executable files. However, there can be some complications if the batch scripts have errors or complexity. We are using the batch script of ping checking as an example in this article. Some of the methods below will look like repeated, but all of the converting software has almost similar names.

Using the iexpress.exe to Convert BAT to EXE

Iexpress.exe is the setup creation wizard that is available in the Windows operating system. This tool is made from a bunch of commands that help the users to create a single self-extracting package from a set of files.  This executable file is part of the Windows Internet Explorer. However, by using this executable file, the user can convert the batch script (BAT) to the executable file (EXE). Follow the below steps to get an EXE file through iexpress.exe:

  1. Hold the Windows key and press S to open the search feature. Type ‘iexpress.exe‘ in the search, right-click on it and choose Run as administrator.
    Note: After typing the name, you can also hold CTRL + Shift and press the Enter button to open it as an administrator.
    Opening the iexpress.exe Run Command as an administrator
  2. Choose the Create New SED option and click on the Next button.
    Selecting Create a new SED
  3. Do not change the Package Purpose and click Next. Provide the Package title for the dialog boxes.
  4. Click the Next button for both the Confirmation prompt and License agreement. Now click on the Add button in Packaged files, select your Batch Script and click on Open button.
    Adding the batch script
  5. Click on the Install Program menu and select your batch script. After selecting type the command before the file name as shown below:
    cmd /c appuals.exe

    Note: appuals.exe is the batch script name that you choose in the Install Program menu.

    Adding command in front of the file name
  6. Press the Next button for both the Show Window and Finished message. Now provide the path and file name for the package by clicking the Browse button.
    Note: You can select the options or leave them unchecked, it’s up to you.
    Providing the path and file name for saving
  7. Click the Next button for both Configure Restart and Save SED. Finally, click Next for Create Package and then click the Finish button.
    Files are successfully created
  8. Find the two files in the path that you provided. One will be the EXE file and the other will be SED. Double-click the EXE file to run it.

Using the BAT to EXE Converter

If the first method is confusing for you, then you can download one of the third-party applications. Most third-party tools are specially designed for this specific conversion of two files. BAT to EXE converter is one of the famous tools that most users use to convert batch scripts. Follow the below steps to try BAT to EXE converter:

  1. Open your browser and download the BAT to EXE Converter installer. Install the tool by running the installer.
    Downloading BAT to EXE Converter
  2. Double-click on the BAT to EXE Converter shortcut to open it. Click on the Open button icon at the top. Choose the batch script file and click on the Open button.
    Opening the batch script in BAT to EXE Converter
  3. Now click on the Convert button icon at the top and choose the name and location to save the converted file.
    Converting and saving the EXE file
  4. The executable file for the batch script will be created.

Using the Advanced BAT to EXE Converter

This tool is different from the above one. Most of the tools have similar names but they are published by different developers. This will have some of the extra features that users can use according to their needs. However, converting the batch scripts is simple with this tool. Follow the below steps to convert the batch script to executable file by using the Advanced BAT to EXE converter:

  1. Open your browser and download the Advanced BAT to EXE Converter software. Then Install it on your computer.
    Downloading Advanced BAT to EXE Converter
  2. Hold the Windows key and press S to open the Windows search feature. Search for Advanced BAT to EXE and open the application.
  3. Click on the File menu in the menu bar and choose the Open option. Select the batch script and click on the Open button.
    Opening the batch script in Advanced BAT to EXE Converter
  4. Now click on the Build EXE icon under the menu bar. A new window will appear and click on the Build EXE button in that.
    Build EXE for the opened batch script
  5. Type the saving EXE file name and click on the Save button.
    Saving the EXE file
  6. Your file will be ready as an Executable file. Open it by double-clicking the file and check it will work successfully.

There are many other tools that can help users to convert the BAT file to EXE. BAT 2 EXE is another good tool that you can check. It can convert all the available batch scripts that are available in the folder by just selecting the folder. BAT 2 EXE tool also allows you to add the Administrator manifest.

The post Converting Batch Files .BAT to Executables .EXE appeared first on Appuals.com.

How to Fix Xbox Live Error 8015402B?

$
0
0

The Error 8015402B is typically encountered by Xbox 360 users when trying to access Xbox Live, when trying to create a new Microsoft account or when trying to add a family member to your Microsoft to a particular console.

Xbox Live Error 8015402B

The Error 8015402B essentially means that the email address associated with the MSA has not been verified. If this scenario is applicable, you should be able to fix the issue by getting access to the email account that you used and verifying it by following the steps included inside the verification email. If this doesn’t work, force your account to download the profile locally.

In case you’re seeing this error while trying to create a new account directly from your console, you should be able to circumvent the issue by creating a new account directly from the microsoft.account.com website.

Verifying the email address

Keep in mind that Microsoft is extra protective of email addresses from Gmail.com and Yahoo.com. If this scenario is applicable, you will need to access your email inbox and click on the verification link in order to be able to sign in on your Xbox360 console without seeing the 0x8015402B error.

Note: If you use a Microsoft Exchange account or Outlook account, this verification is bypassed.

But if you’re using Yahoo.com, Gmail.com or a different client, access your email Inbox and look for the verification email coming from Microsoft Account team. When you see it, simply click on the Verify button and wait for the operation to complete.

Verifying the 3rd party email account for use with Xbox Live

Once you manage to verify your email account, return to your Xbox 360 console and retry the sign-in procedure. If the operation is completed successfully, you should no longer see the 0x8015402B error.

In case you’re encountering the issue while trying to create a new Microsoft account directly from an Xbox 360 console, move down to the next workaround below.

Creating the Microsoft Account from a browser

If you’re only encountering the issue when trying to create a new Microsoft account to use on an Xbox 360 console, you might be able to circumvent the issue by creating the account from a browser instead of from the console.

Of course, this means that you will lose any data (including saves) that is currently stored on the other Microsoft account that you were previously using.

Several affected users have confirmed that this operation finally allowed them to complete the signup process without encountering the 8015402B error. Here’s a quick step by step guide with what you need to do:

  1. Open your computer browser (or a mobile browser) and access this link (here). Once you’re inside the Microsoft Accounts page, click on Sign In.
  2. Inside the Sign-in screen, click on the Create one hyperlink.
    Creating a new Microsoft account
  3. Next, follow the on-screen to create a new Microsoft account (use a different address if you already have one created) and make sure you complete the verification process (you’ll need to activate your account from your email box).
  4. Return to your Xbox console at the same sign-up screen and complete the sign-up process with the account that you previously created.
    Signing in with the Microsoft account
  5. If the validation process was completed successfully, you should no longer encounter the same Error 8015402B.

If you’re only encountering the Error 8015402B when trying to sign in with an already created Xbox profile, follow the instructions below

Downloading the Xbox Profile locally

In case you’re seeing the Error 8015402B with a profile that is already created and stored on Microsoft’s servers, you should be able to fix the issue by forcing the Xbox Profile to download locally. A lot of affected users that have previously encountered the issue have confirmed that this operation allowed them to fix the issue.

If this scenario is applicable, follow the instructions below to complete force your Xbox 360 console to download the profile locally:

  1. Once you get to the initial Sign Up screen and you see a list with all your profile (before forcing the error), scroll all the way to the right and access the Download Profile menu.
    Downloading the Xbox360 Profile locally
  2. Next, from the next menu, tap on Download profile and follow the on-screen instructions to complete the copying procedure of your Xbox 360 Profile.
    Downloading the Xbox 360 Profile locally
  3. This way of circumventing the sign-in procedure should allow you to use your Xbox 360 account locally.

The post How to Fix Xbox Live Error 8015402B? appeared first on Appuals.com.

What is the Difference between FLAC and WAV File Formats?

$
0
0

Some users will be confused about FLAC vs WAV when choosing between them. As both are lossless audio formats and one might consider what is the difference between these two and which one is better than the other. Some websites provide the download option for both files. In this article, you will learn about what FLAC and WAV are and what is the difference between these two.

Difference between WAV and FLAC

Free Lossless Audio Codec (FLAC)

FLAC is one of the popular lossless audio formats. This audio format is similar to MP3, but it is compressed without losing any quality of the original sound. The FLAC works similarly as the ZIP format works for files. However, FLAC audio format can be played with supporting music players without decompressing the audio. FLAC is free to use and open source for anyone to use the code to modify and redistribute.

FLAC format available to download

Waveform Audio File Format (WAV)

WAV is the raw audio uncompressed format that is developed by IBM and Microsoft. WAV audio files are the exact copies of the original source audio. This format is widely supported in many music players on many platforms. WAV can hold a number of audio codecs as a container, but most of the time PCM-encoded audio will be found.

WAV format available to download

Difference between FLAC and WAV

The first thing that is different between these two is that FLAC is the compressed format and WAV is an uncompressed original audio format. FLAC as the compressed format is mostly used to make sure that the audio file occupies less space. Whereas WAV will take much more space compared to FLAC. If you compare the same audio file in both formats, then the FLAC file will be half the size of the WAV file.

Unlike the lossy audio files, WAV and FLAC both are lossless audio formats. Even the FLAC format is compressed and the size will be decreased, the audio quality won’t be lost since FLAC is a lossless format. A user should not be worried about losing quality because FLAC is a compressed format.

When it comes to storage, as we talked about it FLAC occupies half the space compared to WAV. However, this depends on the situation of the user and how they are dealing with the audio files. WAV files will take longer for transferring, uploading, and downloading whereas FLAC will take half the time. There is also a possible chance that the user will not like to keep the WAV files on limited cloud storage. When it comes to playing those audio files, do remember that WAV is supported on more devices and FLAC is less supported without the third-party software.

The size difference between WAV and FLAC

Users can convert these two formats back and forth as much they want, but they will still get the same exact audio. There are many applications that can help in converting FLAC to WAV and WAV to FLAC. Even if just for saving space, users can convert the WAV file to FLAC, and later on, convert them back to use it for WAV supporting music players.

The post What is the Difference between FLAC and WAV File Formats? appeared first on Appuals.com.

How to Cut/Trim/Arrange Audio in Audacity?

$
0
0

Audacity is open-source free audio software for editing and recording audio tracks. It is the simplest application for editing audio files with minimum steps. It has all the features that users want in a good audio editing software. However, new users will require a guide for the basic cutting, trimming and arranging features of Audacity. In this article, we will be teaching you these features.

How to Cut, Time, and Arrange Audio in Audacity

How to Cut/Copy Audio with Audacity

In Audacity, the user can cut part of the track from the audio file. This feature can be used for removing some parts of the soundtrack or taking that part to use in other tracks. Sometimes in remix songs, the user will require to get parts from different songs to make the remix. Follow the below steps to learn how to cut and copy part of the track:

  1. Open Audacity by double-clicking the shortcut or searching Audacity in the Windows search feature.
  2. Click on the File menu in the menu bar, choose the Open option and select the track you want to add. Click on the Open button.
    Opening an audio file in Audacity
  3. Select the Selection tool from the tools menu. Hold mouse right-click on the area in the track channel from one point and move it to the other point as shown below:
    Selecting the area of the track
  4. Hold CTRL key and press X to cut or you can just click on the Cut icon on the tools menu at the top left.
    Note: Holding CTRL and pressing C will copy the track. You can also find the copy icon next to the Cut icon.
    Cutting part of the track
  5. The selected area in the track channel will be cut. You can add it to the new track channel or other track by pasting it.

How to Trim Audio in Audacity

Now trim is the opposite of the cut operation in Audacity. If you select some part of the track and use the trim feature, it will remove all the unselected parts of the track. Trim defines making it neat or cutting the unwanted parts. So rather than cutting all the unwanted parts, the user can just select the required part and use the trim feature to remove unwanted parts by one click. Follow the below steps to use the trim feature in Audacity:

  1. Open your Audacity application by double-clicking the shortcut icon or by searching Audacity in the Windows search feature.
  2. Click on the File menu in the menu bar and choose the Open option. Select your audio file and click on the Open button.
    Opening the audio file in Audacity
  3. Select the Selection tool from the tools menu at the top. Select the area in the track by holding a mouse right-click from one point to another.
    Selecting the area of the track
  4. Once you have selected the area of track that you need, click on the Trim button in the tools menu at the top right side.
    Trimming the unwanted area of the track
  5. All the unwanted parts will be removed from your soundtrack.

How to Arrange Audio in Audacity

Arranging audio is one of the important features in Audacity. If the user is editing the audio in Audacity, they must know how to arrange the different track channels. For combining multiple tracks, the user will need to arrange and move the tracks at different times so one can end and another can start after that. Follow the below steps to arrange your audio in Audacity:

  1. Open Audacity application by double-clicking the shortcut or by searching Audacity in the Windows search feature.
  2. Click on the File menu in the menu bar and choose the Open option. Select your audio track and click on the Open button.
    Note: If you want to open multiple audio files in the same project, then click on the File menu and choose Import > Audio.
    Opening the audio file in Audacity
  3. Select the Time Shift tool in the tool menu, click and hold mouse right-click on the track and arrange it in the track channel to wherever you want to.
    Arranging tracks with the time shift tool
  4. You can also silence part of the track by selecting that area of a track with the selection tool and clicking on the Silence audio selection tool.
    Making part of track silence
  5. You can do many things more to arrange audio tracks depending on your needs.

The post How to Cut/Trim/Arrange Audio in Audacity? appeared first on Appuals.com.

What is: smss.exe and Should I Remove It?

$
0
0

Task Manager shows all the running applications and services of the operating system with details. Users open task manager when they have a slow system performance issue or checking process details. Most users see a process named ‘smss.exe’ running in the background and they are wondering what this process is. Some might even consider thinking if it is a legitimate process or malware. In this article, you will find out what smss.exe process is, what it does, and is it an important process or you can remove it for saving memory.

smss.exe in the Task Manager

Smss.exe in Windows Task Manager

Smss.exe is a Windows NT family component that is responsible for starting and handling the user session. The SMSS stands for Session Manager Subsystem and .exe extension indicates an executable file. This process will start running at startup by default and it is responsible for various activities. No ‘smss.exe’ is not a virus, it is a legitimate process by the Windows operating system unless you see multiple of them in different locations. The size of this file is very small and it consumes very little system resources when running in the background. The session manager subsystem starts the users and kernel modes of the Win32 subsystem. It also starts the Windows logon application ‘winlogon.exe‘.

Is smss.exe Safe?

Yes, the genuine smss.exe file is important for running the Windows and it poses no security threat whatsoever. However, some malware camouflages itself as smss.exe, which can be a security threat to the system. You can check the location of the file to be sure about the file being legitimate. The easiest way to check the file location is by opening the Task Manager and finding the process in Details tab; by right-clicking on the process you can choose Open file location. If the smss.exe file is located in the C:\Windows\System32 folder, then there is nothing to worry about, since that is the real file location. If the file is located somewhere else in the system, then it is a Trojan probably. You should probably run a full system scan by downloading the Malware bytes for Windows.

The original location of smss.exe application

Should I Remove smss.exe?

Now that we know that smss.exe is a legitimate Windows file developed by Microsoft. We recommend users to not remove or exit this particular component, since it is one of the Windows components and helping the System to be stable and run securely. If you disable or close it while the Windows is running, then the system may freeze, which will require a hard reboot. If a user deletes this file, then the Windows will not start.

The post What is: smss.exe and Should I Remove It? appeared first on Appuals.com.


How to Fix ‘Your Mailbox Has Been Temporarily Moved’ Error?

$
0
0

Some Office 365 users are reporting that they always see the ‘Your mailbox has been temporarily moved on Microsoft Exchange server‘ error whenever they try to use Microsoft Outlook to manage their email addresses. Affected users are reporting that the error message returns the next time they attempt to start Microsoft Outlook regardless of what they choose at the prompt (Use Temporary Mailbox or Use Old Data).

Your Mailbox has been temporarily moved error

If you’re encountering this issue, the first thing you should do is remove any complementary Outlook profile that is stored alongside your active one in order to avoid any conflicts. If that doesn’t work, you should proceed by removing every Outlook profile that’s stored locally and create a new one from scratch that uses the same email account.

If you’re using an MS Exchange account, you should be able to fix the error prompt by accessing your email settings and enabling the Use Cached Exchange Mode option from Offline Settings. Renaming the current Outlook profile in order to force the program to create a new instance can also fix the issue if the problem occurs due to some corrupted temporary files.

In case you’re encountering the issue with Outlook 2010, you might see this error due to the fact that the KB2878264 update is not installed on your computer (Method 3 will show you how to install it manually).

However, if you’re seeing the ‘Your mailbox has been temporarily moved on Microsoft Exchange server‘ error with Outlook 2013 on Windows 10, you might need to do some registry tweaks in order to accommodate Mod auth.

Method 1: Remove any other Outlook profile

As it turns out, one of the most common causes that will trigger the ‘Your mailbox has been temporarily moved on Microsoft Exchange server‘ error is a conflict with one of the other Outlook profiles that are being stored locally.

Some affected users have managed to resolve the issue by removing every Outlook profile except for the user’s primary profile. But before you go through with this, keep in mind that when you remove a profile in Outlook, every bit of data for that associated account will also be removed.

To ensure that you’re not losing any important data, make sure to back up any information that you need (unless the data is also stored on the server or you are sure that you have no use for the data).

Note: If you want to backup your data, go to File (ribbon-bar at the top) > Open & Export > Import / Export > Export to a file, choose Outlook Data File (.pst) and hit Next to complete the operation.

After you’ve made sure that you backed up you. PST file or you are certain that you don’t need it, follow the instructions below to remove any other Outlook profile that’s not the primary one:

  1. Close Outlook and any associated instances.
  2. Press Windows key + R to open up a Run dialog box. Next, type ‘control’ inside the text box and press Enter to open up the classic Control Panel interface.
    Accessing the Classic Control Panel interface
  3. Inside the classic Control Panel interface, use the search function in the top-right corner of the screen to search for ‘mail‘.
  4. Next, from the list of results, double-click on Mail (Microsoft Outlook) from the list of results.
  5. Inside the Mail Setup window, click on the Show Profiles… button under Profiles.
    Accessing the Profiles menu
  6. Once you’re inside the Mail window, select a profile that is not your primary one and click the Remove button associated with it. Do this with every profile that you’re not actively using.
    Removing any additional Outlook email profile

    Note: If you’re not sure which profile is your primary one, select each profile and click On Properties > Email accounts and see which one is using the email address that you’re encountering issues with.

  7. Click Yes at the confirmation prompt to confirm the removal of the additional Outlook profiles.
  8. Once every Outlook profile has been removed (except the primary profile), click Ok in the Mail dialog box to close the window.
  9. Launch Outlook again and see if the issue has been resolved.

In case you’re still encountering the ‘Your mailbox has been temporarily moved on Microsoft Exchange server‘ error, move down to the next potential fix below.

Method 2: Create a new Outlook profile

In case the first method wasn’t effective, it’s possible that you’re dealing with a partially corrupted Outlook profile that is locally stored. Several affected users finding themselves in a similar situation have reported that they managed to resolve the issue by creating a brand new profile using the same email account and removing the original Outlook Profile.

Here’s a step-by-step guide that will allow you to do this:

  1. Close Outlook and any associated instances.
  2. Press Windows key + R to open up a Run dialog box. Next, type ‘control mlcfg32.cpl‘ inside the text box and press Enter to open up the Mail box directly.
    Opening the Mail dialog box

    Note: If you’re on Windows 10, this command will not work. In this case, type ‘control’ and click on the Mail entry from the classic control panel interface.

  3. Once you’re inside the Mail window, click on the Show Profiles button associated with Profiles.
    Show Profiles in Mail Setup
  4. Inside the Mail box, start by selecting each email profile individually and hit the Remove button. Do this until the list of connected email profiles is completely empty.
    Removing any Outlook email profiles
  5. Once every profile has been removed, click on Add. Next, specify a name for the new profile and click Ok to create it.
  6. Follow the steps inside the Add Account wizard to add the user’s email account. Once you fill every required information, click on Finish to complete the process.
    Adding the primary account again
  7. Once the new account has been created, return to the main Mail dialog box, select the Always use this profile toggle and set it to Outlook using the drop-down menu.  Finally, click Apply to save the changes.
    Connecting the newly created profile with Outlook
  8. Start Outlook again and see if the issue is now resolved.

In case you’re still seeing the ‘Your mailbox has been temporarily moved on Microsoft Exchange server‘ error when you attempt to launch Outlook with the newly created profile, move down to the next fix below.

Method 3: Installing the KB2878264 Outlook update

As some affected users have reported, this issue can also be caused in scenarios where the Outlook update KB2878264 is not installed on the Outlook machine. This is only applicable for users that are encountering the ‘Your mailbox has been temporarily moved on Microsoft Exchange server‘ error with Outlook 2010.

It turns out that Microsoft already released a hotfix for this issue (KB2878264, pushed through Windows Update).

The WU component should have automatically installed it on your machine in case if you haven’t taken any steps to prevent the installations of new updates for your operating system.

However, you can also install the update manually through the official channels. here’s a quick step-by-step guide that will show you how to install the KB2878264 Outlook update for Outlook 2010:

  1. Open your File Explorer, right-click on My Computer (This PC) and click on Properties from the newly appeared context menu.
    Open PC Properties

    Note: If you already know your system architecture, skip step 1 and step 2.

  2. Inside the System Properties screen, take a look at the System type (under System). If it shows a 64-bit Operating system, you need to install the 64-bit update. Else, you need to install the 32-bit version.
    Checking on your OS architecture
  3. Once you know your OS architecture, visit this link (here) and download the version of the KB2878264 that’s compatible with your Windows version.
    Downloading the Outlook update compatible
  4. Once the download is complete, open the installation executable and follow the on-screen prompts to install it on your system.
  5. After the update is installed, restart your computer and see if the issue is resolved at the next computer startup.

In case the same issue is still occurring, move down to the next potential fix below.

Method 4: Enable Cached Exchange Mode

If you were already connected with an Exchange account, you might be able to fix the issue by going to your email User Account configuration window and enabling the ‘Use cached Exchange Mode‘ option. This operation has proven to be successful for a lot of users that we’re struggling to fix the ‘Your mailbox has been temporarily moved on Microsoft Exchange server‘ error.

Here’s a quick guide that will allow you to enable the ‘Cached Exchange Mode’ option on the email account that you’re actively using for Outlook:

  1. Close Outlook along with any associated instances.
  2. Press Windows key + R to open up a Run dialog box. Next, type ‘control.exe’ and press Enter to open up the classic Control Panel interface.
    Opening the Control Panel
  3. Inside the Control Panel window, click on Mail from the list of options or use the search function to search for it first.
    Open Mail in Control Panel
  4. Inside the Mail Setup screen, click on the E-mail account button associated with E-mail Accounts.
    Accessing the Email accounts menu
  5. From the Accounts Settings menu, select the E-mail tab first, then click on the entry associated with the account that you’re currently using. Next, double-click on the email account that you’re actively using.
    Accessing the email account that is currently active
  6. Inside the settings menu, go to the Offline Settings section and check the box associated with Use Cached Exchange Mode.
    Enabling Cached Exchange Mode

    Note: If the option is already enabled, disable it, save the change, enable it again and restart Outlook.

  7. Restart Outlook and see if the issue is resolved at the application startup.

Method 5: Renaming the Outlook folder

As it turns out, the ‘Your mailbox has been temporarily moved on Microsoft Exchange server‘ error can also occur due to some corrupted data present in the main AppData folder of the Outlook application.

Some users facing the same issue have managed to get the problem fixed by accessing the AppData folder and renaming the existing Outlook folder in order to force the application to create a fresh folder. This operation will also ensure that you don’t have to deal with any data loss in case the operation is not successful.

Here’s a quick guide that will show you how to rename the existing Outlook folder:

  1. Press Windows key + R to open up a Run dialog box. Next, type ‘%appdata%’ and press Enter to open up the AppData folder on your computer.
    Opening AppData in the Run dialog box

    Note: Keep in mind that this folder is hidden by default.

  2. Once you’re inside the AppData folder, look for the entry associated with Outlook. When you see it, right-click on it and choose Rename.
  3. Next, rename the exiting Outlook folder with the ‘.old‘ extension in order to force the application to create a new folder.
  4. Restart your machine and launch Outlook at the next startup to see if the issue has been resolved.

In case you’re still having the same problem, follow the method below if it’s applicable to your particular scenario.

Method 6: Tweak Registry settings for ModAuth (Outlook 2013 ONLY)

If you’re having the ‘Your mailbox has been temporarily moved on Microsoft Exchange server‘ error with Outlook 2013, chances are you might be able to fix the issue by doing some registry tweaks in order to accommodate ModAuth.

If this scenario is applicable and you are using Outlook 2013, follow the instructions below to modify the EnableADAL and Version values in order to fix the issue:

  1. Press Windows key + R to open up a Run dialog box. Next, type ‘regedit’ inside the text box and press Enter to open up the Registry Editor.
    Open Regedit

    Note: When prompted by the UAC (User Account Control), click Yes to grant admin access.

  2. Once you’re inside Registry Editor, use the menu on the left to navigate to the following location:
    HKCU\SOFTWARE\Microsoft\Office\15.0\Common\Identity\

    Note: You can get to this location instantly by pasting the location directly into the navigation bar and pressing Enter.

  3. Once you’re inside the Identity key, move over to the right-hand pane, double-click on EnableADAL and set the value to 1 and the Base to Hexadecimal.
    Enabling the EnableADAL registry

    Note: In case the value REG_DWORD is not created, create yourself by right-clicking on an empty space > New > Dword (32-bit) value.

  4. Next, double-click on the Version value and set the Base to Hexadecimal and the Value data to 1.
    Modifying the value of Version registry
  5. Close the Registry Editor and restart your computer to implement the changes.
  6. Once the next startup, open up Outlook and see if you’re still encountering the ‘Your mailbox has been temporarily moved on Microsoft Exchange server‘ error.

The post How to Fix ‘Your Mailbox Has Been Temporarily Moved’ Error? appeared first on Appuals.com.

How to Share Google Calendar with Other People?

$
0
0

One of the top features for Google Calendar is sharing it with other people. Since Google Calendar is an online scheduling service, users can use it for sharing the events and reminders with other users. However, for new users, finding the correct settings for sharing the calendar can be a bit confusing. In this article, we will share some methods for sharing the Google Calendar with other people.

Sharing Google Calendar with Other People

Sharing Google Calendar with Other People

Google calendar is a digital calendar that can be used to share events and reminders with other users. Most of the offices use the Google calendar to remind the employees about the upcoming events. The calendar can be shared among friends and family members too. A person’s email is required to share the calendar with them.

Method 1: Sharing Google Calendar with Google Account Users

This is the default method for sharing the Google Calendar with other users. All you need to know is their email address and then it’s simple to share it. You can share one calendar with many users and many calendars with one user. Follow the below steps to share a Google calendar with other users:

  1. Open your web browser and navigate to the Google Calendar page. Login to your Google account if prompted.
  2. Expand your calendar on the left side and move the mouse cursor over the name of the calendar you want to share. Click on the menu icon and choose Settings and Sharing option.
    Opening Settings and Sharing option
  3. Now click on the Share with Specific people option on the left side. Click on the Add people button to add people that you want to share with.
    Clicking on Add people button in Sharing with Specific People option
  4. A small window will appear, add the email of the person that you want to invite. You can also type the name if that person is in your contact list of the email.
  5. Permission levels can also be set for the invited people by clicking on the Permissions menu. Click the Send button once you are ready.
    Note: if you put the email addresses of people who don’t have a Google account, you will get an option for inviting them to make a Google account.
    Adding people through email addresses
  6. Everyone will get an email for informing them about your calendar as shown below:
    Email address sent to other people

Method 2: Sharing Google Calendar with Users who don’t have a Google Account

This method is for sharing the Google calendar with people that have a different platform email address and don’t have a Google account. If the user wants to share the Google calendar only with specific people, then they are unable to share with those who don’t have a Google account. The only option to share with non-Google account users is to make the calendar public to everyone. Public calendar events will be visible to all the world and Google Search too.

  1. Open your Google Calendar page in your web browser. Sign in if you are prompted.
  2. Click on the Settings icon at the top right corner and choose the Settings option to open the Google Calendar Settings.
    Opening Google Calendar Settings
  3. Click on the calendar from the list that you want to share with non-Google users. Then click on the Make available to public checkbox under Access Permissions.
    Selecting Calendar and changing privacy to public
  4. This option will make all events visible to the world as the warning message says. Click on the Ok button if you still want to share it.
    Confirming the warning message
  5. You can change the sharing details option to show details or hide details. Once you are done, click on the Get shareable link button.
    Clicking on the Get sharable link
  6. Click on the Copy link button and share the link with all the users who don’t have a Google account.
    Copy this link and send it to all the users that you want to share with.

The post How to Share Google Calendar with Other People? appeared first on Appuals.com.

How to Recover Your Steam Account Lost Password?

$
0
0

There are many reasons for losing the Steam account password. The most common reason is when the user forgets the password for login. There are also situations where the Steam account is stolen by hackers. However, some users will be facing this problem for the first time, and they are probably unaware of how to recover their lost password. In this article, we will show you the methods about resetting your Steam account lost password.

Recover Steam Lost Password

Recovering Steam Account Lost Password

The Steam application and Steam website both have the option for sign in and forgot password. In the Steam application, it will be a different button (I Can’t Sigh In) rather than forgot your password. However, both will take you to the same Steam Support page where you can provide the information to recover your password.

Method 1: Recovering Steam Lost Password through Email Address

If users have access to their email address on which the Steam Account is registered, then they are able to recover the lost password without any problem. Steam will send the user a verification code to their email address to confirm the user’s identity and then it will provide the new password option for their Steam account.

  1. Open your Steam application and click on the ‘I Can’t Sign In‘ button or open the Steam website, click on the Login button at top right and click on the Forgot Password button.
    Note: These both are similar options for recovering the password.
    Opening the recover password page
  2. Click on ‘I forgot my Steam Account name or password‘ on the Steam Support page.
  3. Provide your Steam username, email address or phone number to identify your account for recovering the password. Click on Search to get to the next step.
    Searching your account for recovery
  4. Once the account is found, you can choose to get email verification through your email or choose the no longer access to the email option.
    Note: If you choose I have no longer access option, then check Method 3.
    Choosing email address to recover password
  5. However, if you choose your email verification method, then you will get the verification code to your email address. Open the email, copy the verification code and paste it on the Steam Support page. Click on the Continue button to get to the next step.
    Copying the verification code from the email
  6. Finally, you will get to the page where you can get the ‘Change your password‘ option. Click on that and Enter the new password for your account.
    Putting new password for the Steam account
  7. Your password will be recovered for your Steam Account.

Method 2: Recovering Steam Account Password with Steam Guard Authenticator and Phone Number

This is similar to the first method, however, the user will require confirming through Steam Guard to recover the password. Since in this method the user will be using Steam Mobile App then the recovering option will be forwarded to the phone number option. Follow the below steps if you have Steam Guard Authenticator enabled on your account:

  1. Open the Steam Login Page and click on Forgot Password link to open the Steam Support page.
    Opening forgot password
  2. Click on the first option for Forgot my Steam account password, provide the Steam username and click on the Search button.
    Searching your account for recovery
  3. Select Send confirmation to the Steam Mobile App option.
    Selecting confirmation to Steam Mobile App option
  4. Open your Steam Mobile App, click on the menu icon and choose the Confirmation option.
    Note: If you no longer have access to the Steam Mobile App, then check Method 3.
    Opening Steam Mobile App confirmation
  5. Select the Account recovery option and tap on the Confirm button to verify the request for account recovery.
    Confirming the recovery for the Steam account
  6. Click on the Change my Password and select I forgot my password option when asked for the account’s password.
    Choosing to change my password option
  7. Choose the Text to my phone number option to get the verification code in the text.
    Note: You can also choose I have no longer access option and check method 3.
    Choosing the phone number as a recovery option
  8. Get the code from the text, type it in the verification box and click the Continue button.
    Copying code from the text
  9. You will get to the new password page, Enter the new password and click on the Change Password button. Your password will be recovered successfully.
    Insert the new password and click change password

Method 3: Recovering Steam Password through Contacting Steam Support

In this method, we will show you how to recover the Steam password if you have no access to an email address or phone number. There can be several situations where a user loses an email address or doesn’t have a phone number added to the Steam account. Other than that, nowadays, the phishing links are too common to hack the user’s Steam account. If a user provides his login information through these links, then in just a few seconds they will lose their account and the password will be changed. You can follow the below steps to get your account back if you are the real owner.

Note: If your account got hacked, it is recommended to contact the Steam Support as soon as possible.

  1. Open your Steam login page and click on Forgot Password link to open the Steam Support page.
    Opening forgot password
  2. Provide your account username and click on the Search button to find your account.
    Searching your account for recovery
  3. Once the account is found, click on I have no longer access to the email address option.
    Selecting I have no longer access option
  4. Provide the current email address where Steam Support will contact you and all the other details. Click on the Send button to send the message.
    Note: The more details (purchase invoice, CD Keys, old email screenshots) you provide, the easier it will be to recover your Steam account.
    Providing full details related to the account
  5. Steam will send a code to the new contacting email address you just provided. Open the email, copy the code and paste it in the Contact Steam Support window. Click on the Send button.
    Confirming the new email address for contacting Steam Support
  6. Your message will be sent and a ticket will be created, from here on you will be directly talking to the Steam Customer Support. Answer their questions and provide the asked proof to get your account back in no time.
    Note: The replies from Steam Support might take a little while but be patient.
    Providing information and recovering account password

The post How to Recover Your Steam Account Lost Password? appeared first on Appuals.com.

How to Insert an Animated GIF in PowerPoint?

$
0
0

Animated GIFs in presentations are amazing for capturing attention and boosting the mood of the audience. Whether the presentation is for education or business, a good GIF can help to gain the focus of your audience. If you already have the GIF or are still looking for one, inserting a GIF animation will take less than a minute in PowerPoint. In this article, we will show you the simplest way of finding and inserting a GIF animation to your PowerPoint presentation.

Inserting GIF animation in PowerPoint Slide

Inserting an Animated GIF in PowerPoint

To insert a GIF to your presentation, first you need to know what kind of GIF you want for it. You can easily find GIF animations on Google, GIPHY, and on most of the social media applications/websites. However, Google Images is an easier way for finding the GIF, since it shows all the results of the GIFs located on the other sites. Follow the below steps to insert the GIF animation in PowerPoint:

  1. First, you need to download a GIF animation file from the Internet or you can also create your own GIF. To download the GIF, simply search the keyword of the reaction that you need for your presentation in Google Images as shown below:
    Note: You can also use one of the other famous websites for GIF known as GIPHY.
    Searching for the related GIF animation that is appropriate for the presentation
  2. Click on the GIF that you like. It will open the preview mode on the side, right-click on the GIF and select Open image in new tab option.
    Note: If you download from the preview mode, sometimes it will download as an image file and sometimes it will be in low resolution. Make sure you check the resolution of the GIF that you are downloading.
    Opening GIF animation in new tab for full size
  3. Click on the New tab where GIF file was opened. Right-click on the GIF and choose Save Image As option. Provide the path where you want to save the GIF.
    Note: You can also choose Copy Image and Paste the Image directly to your slide, however, sometimes the application or GIF privacy won’t allow that option.
    Saving the GIF animation to your computer
  4. Open your presentation in Microsoft PowerPoint application. Click on the Insert tab and choose the Picture option.
    Inserting GIF animation to the presentation slide
  5. Choose the GIF that you just downloaded and click on the Insert button.
    Choosing the downloaded GIF to insert
  6. You can move the GIF around the slide and resize it if you want. It won’t be playing until you go to Slide Show mode by pressing the F5 button.
    Note: Most of the GIF animation files are made for the infinite loop, so the animation will play in an infinite loop and there is no option for changing the animation playtime on PowerPoint.
    Checking the GIF animation in Slide Show mode

The post How to Insert an Animated GIF in PowerPoint? appeared first on Appuals.com.

What is the Difference Between Quick Format and Full Format in Windows?

$
0
0

The term format is mostly used when users are completely wiping data from their drives. Most of the time users delete data by simply using the delete feature, but if they want to remove data completely in the drive, they use format operation. Formatting can be done by using disk management. However, there are two types of formatting, a quick format, and the full format. In this article, we will discuss the difference between the two types of format.

Difference between quick format and full format

Difference Between Quick Format and Full Format

The formatting option is mostly used whenever the user is installing a new operating system or removing data completely from some external drive. It always provides the choice for the quick format or the normal full format. Apart from the speed of the process, there is more difference between these two.

Quick Format:

The quick format will take less time to format the drive. It simply removes the file system journal (address of the data), but the data will still be there even if the user can’t see it. When a user copies the new data, it will overwrite the old data and get a new address for the data. It will not rebuild the file system or scan for bad sectors. If there were any bad sectors and the user uses a quick format, the overwritten data might get corrupt because of bad sectors.

Using the quick format

Users can also use the command in the elevated command prompt to use the quick format on a drive:

format fs=ntfs quick
The quick format command in cmd

Full Format:

The full format will remove the files completely from the drive and it also scans the drive for bad sectors. If the full format process finds any bad sectors, it will also fix them in the process. This format is mostly used when the drive is in bad shape and the data always gets corrupt because of bad sectors. That is why this process will take much more time than the quick format. A full format will replace all the data with zeroes.

Using the full format

The command for full format a drive in the elevated command prompt:

format fs=ntfs
Full format command in cmd

In simple words, the difference is that a quick format is time-saving and faster than full format and it will only remove the file system journal and not the actual data. The full format will remove all the data and file system journal. It will also scan and fix the bad sectors. Depending on the situation, the user can choose which format is better for them to apply.

The post What is the Difference Between Quick Format and Full Format in Windows? appeared first on Appuals.com.

Viewing all 4499 articles
Browse latest View live