Some Mac users are encountering the ‘You’re already syncing this account‘ error in OneDrive and OneDrive Business whenever they try to add new work or school account or whenever they try to synchronize the files between OneDrive Online and the OneDrive for Mac app.
‘You’re already syncing this account’ when adding an account in OneDrive for MacOS
In most cases, the ‘You’re already syncing this account‘ error will appear due to badly cached data stored inside the OneDrive Cached Credential folder. In order to fix the issue, you can use the KeyChain utility to find and clear the OneDrive Cached Credential data.
But if you want to take the focused approach, the most efficient way of resolving this issue is to use access the Group Container folders and deleting the two folders belonging to OneDrive (UBF8T346G9.OneDriveSyncClientSuite.plist and UBF8T346G9.OfficeOneDriveSyncIntegration.plist).
However, if you don’t want to get your hands dirty at all, you can simply access the Resource folder belonging to Onedrive and run the ResetOneDriveApp.command or ResetOneDriveAppStandalone.command (depending on your OneDrive version) in order to reset the entire applications.
Method 1: Clearing the OneDrive Cached Credential
As it turns out, this particular issue can occur due to badly cached data stored inside the OneDrive Cached Credential folder. If this scenario is applicable, you should start by the less intrusive approach – in this case, this is clearing the OneDrive Cached Credential file.
Several affected users have reported that they managed to fix the issue by opening the KeyChan Access utility and using it to find and delete the OneDrive Cached Credential.
Here’s a quick guide on how to do this:
Ensure that OneDrive and every associated instance is closed.
Click on the Spotlight icon (top-right corner of the screen) and search for ‘Keychain Access‘ and hit Return. Next, from the list of results, click on Keychain Access and wait for the utility to open.
Accessing the KeyChain Access utility
Once the KeyChain Access utility is loaded, use the search function in the top-right section of the screen to search for ‘OneDrive‘ and press on Return.Opening the OneDrive KeyChain entry
From the list of results, right-click on OneDrive Cached Credential and choose Delete ‘OneDrive Cached Credential‘.
Deleting the Cached Credential using KeyChained Access
After you do this, restart your OneDrive application and see if the issue is now resolved.
In case you’re still encountering the same ‘You’re already syncing this account‘ error, move down to the next potential fix below.
Method 2: Deleting two syncing files
As it turns out, there are two files called UBF8T346G9.OneDriveSyncClientSuite.plist and UBF8T346G9.OfficeOneDriveSyncIntegration.plist that are located in /Users/[username]/Library/Group Containers/ which are often signalled by users as being responsible for the apparition of the ‘You’re already syncing this account‘ error.
The first file (ClientSuite) contains all the info regarding the accounts that you’re currently loge into, while the second one (Integration) contains log and file data about every SharePoint folder that you’ve ever connected to.
Since OneDrive has the ability to regenerate the files without any other inconveniences, you should be able to fix the issue by using the Keychain Access utility to find and delete the two files responsible for the error.
Here is a step by step guide that will allow you to delete the two syncing files that are most likely causing the ‘You’re already syncing this account‘ error:
Ensure that OneDrive and every other associated instance is closed.
Click on your Finder icon (bottom-left corner of the screen).
Opening the Finding App
Next, once you’re inside the Finder application, use the search function (top-left section. Type ‘Group Containers‘ and press Return to retrieve the results.
next, from the list of results, click on Group Containers.
Finding the Group Containers folder
Inside the Group Containers folder, locate the UBF8T346G9.OneDriveSyncClientSuite.plist folder, right-click on it and choose Move to Bin from the newly appeared context menu.
Deleting the UBF8T346G9.OneDriveSyncClientSuite.plist Folder
Repeat step 5 with the other folder that might be responsible for the problem: UBF8T346G9.OfficeOneDriveSyncIntegration.plist
Restart OneDrive and see if the issue is now resolved.
In case you’re still encountering the same ‘You’re already syncing this account‘ error, move down to the next method below.
Method 3: Resetting OneDrive via Resources folder
If the above methods didn’t allow you to fix the issue, it’s most likely due to the fact that some temporary files are interfering with Onedrive’s ability to sync files in real-time. One way to fix this problem is to simply run the ResetOneDriveApp.command in order to refresh every component automatically.
If this scenario is applicable, you should be able to fix the issue swiftly and OneDrive should syncronize normally the next time you start it.
Here’s a quick guide on Resetting OneDrive via the Resources folder:
Ensure that OneDrive and any associated instance is closed. The quickest way to do this is by going to the cloud icon in the top tray and select Settings > Quit OneDrive.
Closing OneDrive
Next, click on the Finder icon (bottom-left section) and wait for the application to load.
Opening the Finding App
Inside the Finder app, use the search function (top-right section) to search for ‘OneDrive’ and press Enter. Note: Ensure the search covers This mac, not Recents, otherwise you will not be able to find Ondedrive.
Next, from the list of results, locate your OneDrive application, right-click on it and choose Show Package Contents from the newly appeared context menu.
Showing the Package Contents of OneDrive
Inside the show package contents folder, click on Contents and then open up the Resources folder.
Once you’re inside the Resources folder, double-click on the ResetOneDriveApp.command file and wait for the command to be processed in the terminal.
Resetting the OneDrive app
Note: If you’re using the standalone app, run the ResetOneDriveAppStandalone.command file instead.
After the operation is complete, restart OneDrive, sign in with your user credentials once again and see if the problem is now fixed.
Some Windows users that have been using Avast Antivirus are reporting that upon checking their Event Viewer logs, they are seeing regular 1316 Errors (every hour or so). Although the issue doesn’t manifest itself outside Event Viewer, some affected users are concerned that due to this issue, they are leaving their system exposed to security issues.
Avast Helper Error 1316
If you haven’t updated your Avast application version in a while, chances are the issue is occurring due to an old bug that ended up affecting Avast Free and Avast Security. This problem was resolved by Avast at the beginning of 2019, and you can take advantage of the fix by installing the latest available version of Avast.
In case the problem started occurring after a machine interruption or after a failed application update, chances are you are dealing with some type of corruption that cannot be resolved conventionally. If this scenario is applicable, you can use the built-in repair function to troubleshoot and heal the application.
However, there are also two types of program conflicts that might cause these types of event viewers. The first one involves using Avast Security Browser with the default AV suite (Microsoft Defender). The second possible problem can be caused by Nvidia ShadowPlay when it doesn’t release the Registry Keys before shutting down. In both of these cases, you can fix the issue by uninstalling the conflicting application.
Method 1: Update Avast to the latest version
As it turns out, back in 2018, there was a whole surge of Avast Helper Error 1316 after Avast pushed a quality-of-life update that ended up increasing the memory and CPU usage of Avast Free and Avast Security. A lot of those affected users complained that whenever the usage went up, the Event Viewer filled up with events pointing towards the Error 1316.
Several affected users that they managed to resolve the issue by forcing the Avast installation to update to the latest version.
Here’s a quick guide on updating your Avast version to the latest build (Avast Free or Avast Security):
Open up your Avast Antivirus application and start by clicking on the Menu icon (top-right corner).
Next, from the newly appeared context menu, click on Settings.
After you manage to access the Settings menu icon, click on the General tab, then click on the Update subtab.
Inside the Update sub-tab, click on Check for Updates button and wait until the operation is complete. The application will download the newest version and install the latest version automatically.
Once the process is complete, you will be prompted to restart. When you see the prompt, accept and wait until the next startup sequence is complete.
Open up Event Viewer again by pressing Windows key + R. Inside the text box, type ‘ eventvwr.msc’ and press Enter to open up the Event Viewer.
See if you’re still seeing new instances of the 1316 Error pointing to Avast Helper error.
Updating Avast Antivirus to the latest version
If you’re still having the same issue, move down to the next potential fix below.
Method 2: Using the built-in repair function
If you’ve only started to encounter this issue after an unexpected machine interruption or after a failed application update, it’s possible that you’re seeing this error due to a partially corrupted application installation.
Several affected users have managed to fix the issue by running the built-in repair function that all Avast products have built-in. You can run it directly from the application and it’s really effective in fixing most local issues that will end up triggering the Avast Helper Error 1316.
Here’s a quick guide on running the built-in troubleshooter in order to repair the Avast AV product:
Open up your Avast installation and click on the Action Menu (top-right hand corner). Then, from the newly appeared context menu, click on Settings.
Inside the Settings menu, select the General tab and click on Troubleshooting from the list of sub-menu items.
Once you get inside the Troubleshooting tab, scroll down to the Still having problems? section and click on Repair app.
At the confirmation prompt, click Yes and wait for the initial scan to complete.
At the end of this process, you will get a list of the potential issues that were uncovered. To fix every identified instance, click on Resolve all fix the problems.
After the operation is complete, restart your computer and see if the issue is resolved at the next computer startup.
Repairing the Avast application using the Troubleshooter
In case the same problem is still persisting, move down to the next potential fix below.
Method 3: Uninstall Avast Secure Browser
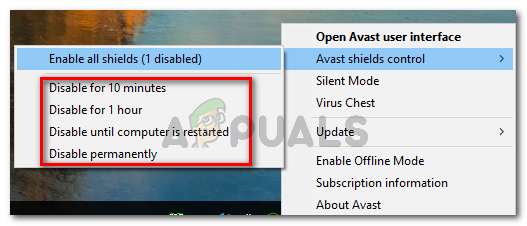
If you’re using Avast Secure Browser, keep in mind that it’s one of the most frequent culprits that is known to trigger the regular Avast Helper Error 1316 entries in Event Viewer. As it turns out, the issue is most likely occurring due to a conflict between Avast Secure Browser and the default security product on Windows 10 (Windows Defender) or a different 3rd party antivirus.
The majority of users encountering this problem have reported that they’ve managed to fix the issue simply by uninstalling the Avast Secure browser. If you’re looking for a good alternative that doesn’t conflict with Windows Defender, you should consider Brave browser:
Here’s a step by step guide on uninstalling Avast Secure Browser:
Press Windows key + R to open up a Run dialog box. Inside the text box, type ‘appwiz.cpl’ and press Enter to open up the Programs and Features menu.
Typing in “appwiz.cpl” in the Run prompt
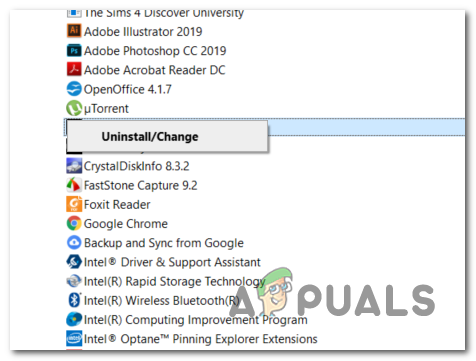
Once you are inside the Programs and Features menu, scroll down through the list of installed Programs and Files apps and locate your Avast Secure Browser installation. Once you see it, right-click on it and choose Uninstall from the context menu.
Uninstalling Avast Secure Browser
Next, follow the on-screen prompts to complete the uninstallation procedure, then restart your computer and see if the issue is resolved at the next computer startup.
In case the same issue is still occurring, move down to the next potential fix below.
Method 4: Uninstalling ShadowPlay (or similar application)
In case you are using an AVAST product but you also game regularly and you use ShadowPlay (or the ShadowPlay functionality included with Nvidia Experience), chances are the event is caused by an app (ShadowPlay) that does not release the Registry Keys before shutting down.
In some cases, this particular issue will occur due to the fact that an application like ShadowPlay runs in the background and doesn’t release it’s Registry keys when a user signs off. This behavior will end up forcing Windows to unload the registry.
This issue should have no other meaningful impact to the users other than rare cases where recent configurations changes will not get saved (but this happens very rarely).
Although there are no other repercussions (other than frequent Event Viewer entries), you can stop new events from appearing by uninstalling ShadowPlay conventionally.
Here’s a quick guide on how to do this:
Press Windows key + R to open up a Run dialog box. Next, type ‘appwiz.cpl’ and press Enter to open up up the Programs and Features menu.
Type appwiz.cpl and Press Enter To Open Installed Programs Page
Inside the Programs and Features menu, scroll down through the list of installed apps, right-click on ShadowPlay and choose Uninstall from the context menu.
Uninstall Nvidia ShadowPlay
Inside the uninstallation window, follow the on-screen prompts to complete the uninstallation, then restart your computer when the process is complete.
After the next startup sequence is complete, see if the issue is now resolved.
Installing programs on Windows has been getting increasingly easier in these past years (especially with the launch of Windows 10). But with some programs, it’s still important that you install the right binary type of the program version. Depending on your Windows architecture (32-bit or 64-bit), you will want to install applications versions that fully compatible with the default binary type that your Windows version is built around.
Binary type of inspected application
If you have a 64-bit Windows version, you should always look to install 64-bit binary type applications since they will perform better on your computer. However, 64-bit applications will not function properly on 32-bit Windows versions.
Because of this, Windows users are looking for ways to discover their Windows architecture type and figure out if the applications they installed are 64-bit or 32-bit.
If you’re one of them, this article will clear the confusion. Start by following the guide below to discover your OS architecture. After you find that out, follow any of the methods below that will allow you to discover if the file or program is of 32-bit or 64-bit.
Let’s get started!
How to Find Out your Windows Architecture?
Before you start testing out the different ways of discovering the binary type of a program, it’s important to start by double-checking your Windows installation architecture. This will allow you to ensure that you’re always installing the best binary version of the apps that make their way on your computer.
Note: If you’re already certain of your windows architecture, move down directly to the ‘How to Check if Program or File is 32-bit or 64-bit‘ section.
There are multiple ways that will allow you to find out if you have a 32-bit or 64-bit Windows installation. But for the sake of keeping things simple, we’re only going to feature two different approaches – finding our Windows architecture via GUI or via CMD.
Feel free to follow whichever guide you feel more comfortable with:
1. Finding out the WIndows Architecture via Windows Menu
Open File Explorer, right-click on This PC and choose Properties from the newly appeared context menu.
Accessing the Properties screen
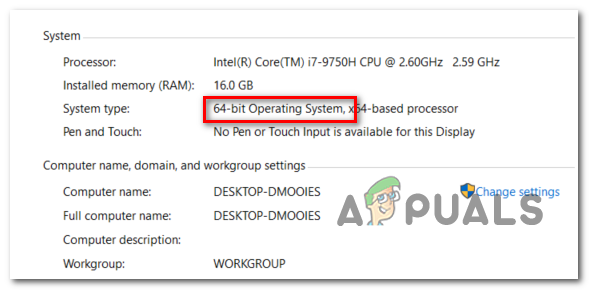
Once you’re inside the Basic Information Properties screen, look on the right-hand side menu of the screen and check the System type (under System).
Discovering the System Architecture type
If it shows a 64-bit Operating system, that’s your Windows architecture.
Note: If you have an x64-based processor, it makes no sense to install a 32-bit Windows version since you’ll end up limiting the performance of your computer.
2. Finding out the Windows Architecture via CMD
Press Windows key + R to open up a Run dialog box. Next, type ‘cmd’ inside the text box and press Ctrl + Shift + Enter to open up an elevated CMD prompt. When you’re prompted by the User Account Control, click Yes to grant administrative privileges.
Running the Command Prompt
Once you’re inside the elevated Command Prompt, type the following command and press Enter to reveal your current OS architecture:
wmic OS get OSArchitecture
Look at the line under OSArchitecture: 64-bit or 32-bit – That is your current Windows architecture.
Getting the current OSarchitecture
How to Check if Program or File is 32-bit or 64-bit
After you’re certain what OS architecture you have, you can use one of the methods below to discover the program architecture of the programs or files that you want to inspect.
There are several methods that will allow you to do this, but depending on which file you need to analyze, some methods might be more applicable than the other.
In case you are looking to determine the binary type of a program that was installed conventionally, follow Method 1 and Method 2. However, if you just want to analyze a single file or you want to expose the Machine Target of a portable executable, follow Method 3 or Method 4.
Method 1: Checking Program architecture using Task Manager
If you’re looking to inspect a program that is already installed on your computer, the most efficient way to do it is via Task Manager. It’s clean and efficient, allowing you to view a list of every installed application according to the platform (32-bit or 64-bit)
Here’s a quick guide on configuring Task Manager to display whether it’s built for 32-bit or 64-bit:
Press Ctrl + Shift + Esc to open up Task Manager.
If you see the simple Task Manager interface, click on More details to see the full version.
Once you see the full version of Task Manager, select the Detail tab from the horizontal menu at the top.
When you’re inside the Details menu, right-click on the Name column and click on Select columns from the newly appeared context menu.
Inside the Select Columns window, scroll down through the list of potential columns and check the box associated with Platform and click Ok to save the changes.
Once you get to this point, you should see the Platform column, showing you exactly which executable is 32-bit and which one is 64-bit.
Checking the Program Architecture via Task Manager
In case you want to check the binary type of the program without opening it up so it shows up in Task Manager, follow one of the next two methods below.
Method 2: Checking in Program Files (if applicable)
If the program you’re trying to inspect was installed conventionally in the default location, you can also find out its binary type by checking in which of the two Program Files folders it was installed into.
If the Program was installed inside the Program Files folder, it’s clearly of 64-bit. But if the files and the main executable resides in the Program Files (x86) folder, it’s of 32-bit.
Here’s a quick guide on how to check this manually via File Explorer:
Open File Explorer and open up your OS drive (most commonly C:).
Inside the root folder of your OS drive, you will see two different default folders for programs installations: Program Files and Program Files (x86) Verifying the Program Files version
Open each folder individually and see which one of them contains the program you’re inspecting. In case the program is installed in Program Files, the binary type is 64-bit. If you find the program in Program Files (x86), the program is clearly built for the 32-bit architecture.
Method 3: Inspecting executable via Notepad++
In case you want to inspect the binary type of a program that wasn’t installed or isn’t signed by a publisher, the easiest way of discovering its binary type by opening the executable with a third party text editor like NotePad++.
As it turns out, you can easily discover the binary type of any executable by opening it via Notepad. Here’s a quick guide with what you need to do:
In case you don’t have NotePad++ or an equivalent software installed on your computer, install Notepad++ from this link here. Then, follow the on-screen instructions to install it on your computer and restart your computer once the installation is complete.
At the next computer startup, right-click on the executable (or it’s shortcut icon) and choose Edit with Notepad++ from the newly appeared context menu.
Opening the executable with Notepad++
Once you manage to get the file opened with Notepad++, press Ctrl + F to open up the Find window.
Inside the Find window, select the Find tab from the top, then type ‘PE’ under Find what and press Find Next button.
Finding the PE environment
Once the search results are generated, look at the letter after PE. If you see the letter L, it means that the program is 32-bit. In case you see the letter D, it means that the program is 64-bit.
Method 4: Analysing file with VirusTotal
If you’re only looking to analyze a file – not a program that is already installed and uses a background process – the easiest to discover it’s binary type is to upload it on VirusTotal.
Sure, the main use of this process is to determine if the file is infected, but it can be used just as good to discover the PE header’s basic information. The only requirement is to have your computer connected to the Internet.
Here’s how to discover the binary type of a file using VirusTotal:
Visit this link (here) and click on File, then click on Choose File and select the file that you want to analyze.
Analyzing the file with Virus Total
Once the analysis is complete, click on the Details tab, scroll down to the PE header basic information and check out the entry associated with the Target Machine. This will tell you if the file is of 32-bit or 64-bit.
Some Windows are encountering the DLG_FLAGS_SEC_CERT_DATE_INVALID error in Internet Explorer when trying to access certain websites. In most cases, affected users are reporting that the same web page is accessible from other 3rd party browsers such as Chrome, Firefox or Opera.
DLG_FLAGS_SEC_CERT_DATE_INVALID error message
If the issue is not beyond your control, badly cached data is often responsible for invalidating the security certificate. This is frequently reported on Microsoft Edge and Internet Explorer.
But it’s also possible that the behavior is caused by an outdated or corrupted certificate store that resides locally (or some dependencies that are located inside the user profile folder) or an incorrect date & time.
However, the DLG_FLAGS_SEC_CERT_DATE_INVALID error can be triggered by a network administration restriction (fairly common with work and school networks) or due to an expired SSL certificate. In this case, the only resolution is to try and get in contact with the web admin.
Method 1: Clearing Browsing data
As it turns out, in most cases, the issue will occur due to badly cached data that will end up invalidating the security certificate used for that particular website. This is especially true if you’re only encountering them on Edge or Internet Explorer (the webpage loads fine on 3rd party browsers).
Several affected users that found themselves in a similar situation have reported that they finally managed to get the issue resolved by clearing the browsing data in order to force the browser to load everything from scratch.
Keep in mind that the steps of doing so will be different depending on if you’re encountering the issue on Microsoft Edge or Internet Explorer – Because of this, we created two different guides that will accommodate every possible scenario.
Clearing browsing data in Edge
Open your Edge browser and click on the action button (top-right section of the screen).
Then, from the newly appeared context menu, scroll all the way down and click on Settings.
Inside the Settings menu, select the Privacy & Security tab, then scroll down Browsing data and click on Choose what to clear.
Choose what to clear
Once you get to the next screen, uncheck Browsing history and check the boxes associated with Cookies and saved website data, Cached data and files and Tabs I’ve set aside or recently closed. Once the Clearing browsing data utility is configured, click on Clear to start the process.
Clearing data in Microsoft Edge
Once the operation is complete, restart your browser and see if the issue is resolved at the next browser startup.
Clearing browsing data in Internet Explorer
Open an Internet Explorer tab and press Ctrl + Shift + Delete to open up the Delete Browsing History window.
Once you’re inside the Delete Browsing History window, check the following boxes while leaving everything else unchecked: Temporary Internet files and website files Cookies and website data
When you are ready to start the operation, click on the Delete button and wait for the operation to complete.
Deleting Cookies in Internet Explorer
Restart your browser and see if the issue is resolved.
In case you’re still encountering the same DLG_FLAGS_SEC_CERT_DATE_INVALID error while trying to visit certain websites in IE or Edge, move down to the next potential fix below.
If the guides above didn’t allow you to resolve the issue, chances are the issue is beyond your control – It’s most likely a certificate issue that the webmaster will need to resolve.
However, if you are encountering the issue on Internet Explorer and you are certain that the website will not expose you to any security risks, you can configure your browser to ignore certificate addresses mismatches, which will eliminate the DLG_FLAGS_SEC_CERT_DATE_INVALID error.
Important: Keep in mind that this won’t resolve the issue. It will simply mask the issue and allow your browser to establish access with the web server, but the reason for the previous error will remain.
If you understand the security risks and you still want to disable the certificate mismatch verification, follow the instructions below:
Press Windows key + R to open up a Run dialog box. Inside the text box, type ‘inetcpl.cpl’ and press Enter to open up the Internet Properties screen.
Opening the Internet Properties screen
Note: Depending on your account control settings, you might be prompted by the User Account Control prompt. If this happens, click Yes to grant admin access.
Once you’re inside the Internet Properties screen, select the Advanced tab from the horizontal menu at the top.
Inside the Advanced tab, scroll the menu belonging to Settings to the very bottom and uncheck the toggle associated with Warn about certificate address mismatch. Disabling certificate address mismatch in Internet Properties
Click Apply to save the changes, then restart your computer in order to enforce the changes.
Once the next startup sequence is complete, visit the same web address that was previously triggering the DLG_FLAGS_SEC_CERT_DATE_INVALID error and see if the problem has been fixed.
In case the same issue is still occurring, move down to the next method below.
Method 3: Update Computer Certificate store
Another reason that might cause this particular behavior is an outdated or certificate store or corrupted data.
Every Windows operating system stores a collection of locally Store certificates in a storage location called the Certificate Store. Typically, this location has numerous certificates from numerous different certification authorities (CAs).
However, a machine interruption during the installation of a new certificate or a virus infection (or a AV cleaning attempt) might end up corrupting this location, thus producing a myriad of errors including DLG_FLAGS_SEC_CERT_DATE_INVALID.
One way to fix it is to update your computer Certificate Store. There are multiple ways to do so, but the quickest approach is to use a command in an elevated CMD prompts that will update the root CA store.
Here’s a quick guide on updating the root CA store on your computer in order to fix a corrupted or outdated computer certificate store:
Press Windows key + R to open up a Run dialog box. Next, type ‘cmd’ inside the elevated CMD prompt, then press Ctrl + Shift + Enter to open up an elevated CMD prompt.
Running the Command Prompt
Note: When you are prompted by the UAC (User Account Control), click Yes to grant administrative access.
Once you’re inside the elevated CMD prompt, type the following command and press Enter to update an outdated or corrupted certificate store:
certutil.exe -generateSSTFromWU roots.sst
After the operation is complete, restart your computer and see if the issue is resolved at the next startup.
In case the same problem persists, move down to the next method for steps on resolving a local profile issue.
Method 4: Create a new user profile
According to several affected users, this problem can also surface due to some corrupted certificate store dependencies that are actually stored inside your user profile folder. If this scenario is applicable, you should be able to fix the issue by creating a new Windows profile in order to replace any corrupted files with healthy ones.
Note: This operation might end up resetting some user preferences.
The following fix was effective for users that encountered this problem with Internet Explorer.
Here’s a quick guide on creating a new user profile in order to resolve the DLG_FLAGS_SEC_CERT_DATE_INVALID:
Open up a Run dialog box by pressing Windows key + R. Next, type ”ms-settings:otherusers’ and press Enter to open up Family & other people tab of the Settings app.
Running dialog: ms-settings:otherusers
After you manage to get inside the Family & other users tab, scroll down to the Other users tab and click on Add someone else to this PC.
Once you move forward to the next screen, add the email or phone number associated with the Microsoft account that you plan to connect. If you want to create a local account, click on ‘I don’t have this person’s sign-in information‘.
Once you manage to successfully login with your Microsoft account, click on Add a user without a Microsoft account (if you want a local account).
As soon as you do this, add the username and password that you want to use for the new account, then fill up the security questions and click on Next once again.
After you manage to create your new account, restart your computer. Once you get to the next startup screen, log in with the newly created account.
Repeat the action that was previously causing the DLG_FLAGS_SEC_CERT_DATE_INVALID error and see if the issue has been resolved.
Creating a new Windows account in order to bypass system file corruption
If the issue is still not resolved, move down to the final potential fix below.
Method 5: Connect to a different network (if applicable)
If you’re encountering the issue on a restricted network (like a school of a work environment), it’s possible that the network administrator has enforced some type of restrictions that will prevent you from accessing that particular website.
In case this scenario is applicable, you should be able to fix the issue by connecting it to a different network – preferably your home network to see if the issue is still occurring.
However, if you are already connected to a network without restrictions, move down to the next potential fix below.
Method 6: Setting the correct Date & Time or timezone
Another fairly common instance that will end up triggering the DLG_FLAGS_SEC_CERT_DATE_INVALID is an inaccurate date, time or timezone that will end up invalidating the security certificate. In most cases, a faulty CMOS battery will be responsible for your computer’s inability to keep track of time.
If you’re time & date are indeed off, the certificate issue should be resolved as soon as you establish the correct date, time and timezones values.
Here’s a quick guide on setting the correct date & time:
Open up a Run dialog by pressing Windows key + R. Inside the text box, type ‘timedate.cpl’ and press Enter to open up the Date & Time window.
Opening the Date and time window
Once you get to the Date & Time window, click on the Date & Time tab and click on Change Date & time.
Setting the correct date & time
When you are prompted by the User Account Control, accept to allow the timedate.cpl admin access.
At the next menu, use the calendar (under Date & Time) to set the appropriate values according to the time zone that you live in.
Modifying Time & date
After the correct values are instated, click on Apply to save the changes and ensure that the timezone is set accordingly to the location where you live.
Restart your computer and attempt to access the same website that was previously failing once the next startup is complete.
If the issue is still not resolved, move down to the final potential fix below.
Method 7: Contacting the webmaster
If none of the methods above have allowed you to fix the issue and you’re only encountering the issue with a particular website (every browser throws a different error after the connection fails), it’s most likely due to an expired security certificate.
In this case, you’re only hope of getting the issue resolved is to get in contact with the web administrator and let them know that they have a certificate problem on their website.
Note: If the website is yours, you should check if your SSL certificate is still value.
If you’re not the owner of the website, you can typically find contact information by using the Contact us link – Most websites have one.
If that doesn’t work, you can also do a Whois search in order to find the owner and contact info of the domain owner. You can use this service (here) to search for that information.
Some Windows users are encountering the 0x800710FE (This file is currently not available for use on this computer) when attempting to delete a file or folder. The issue is not OS-specific, but it seems to mostly occur with files and folders that we’re generated by 3rd party security suites.
0x800710FE: This file is currently not available for use on this computer.
By far, the most common instance that will be responsible for the apparition of the 0x800710FE error is the native Office File Synchronization (that is present on every recent Windows version, but it’s not enabled by default).
If you’re technical, you can prevent the error from re-appearing by accessing the Sync Center settings via the Classic Control panel and disabling Offline Files or by running a series of commands inside an elevated CMD prompt.
In case the issue is caused by a CSC database glitch, you can fix the issue by creating a FormatDatabase key using Registry Editor.
However, the issue can also be caused by logical errors on your drive – In this case, a CHKDSK scan should resolve the issue automatically. If the file is encrypted or your user doesn’t have the permission to edit it, one way that will allow you to delete it is to boot from a LIVE USB Ubuntu drive and delete it via the terminal.
Method 1: Disable Offline File Synchronization
As it turns out, in most cases, this particular issue is caused by a file or dependencies associated with Offline File Synchronization.
If this scenario is applicable, you should be able to fix the issue by using the Classic Control Panel interface to access the Sync settings and disabling Offline Files from the Manage Offline Files menu.
Here’s a quick guide on how to do this:
Note: The instructions below should be applicable regardless of the Windows version that you’re encountering the issue on.
Press Windows key + R to open up a Run dialog box. Inside the text box, type ‘control’ and press Enter to open up the classic Control Panel interface.
Once you’re inside the classic Control Panel interface, use the search function (top-right section) to search for ‘sync center‘ and press Enter.
Then, double-click on Sync Center from the list of results.
Next, from the left-hand side menu, click on Manage offline files.
Once you’re inside the Offline Files menu, select the General tab and click on Disable offline files.
When prompted by the UAC (User Account Control), click Yes to grant admin access.
After Offline Files feature is disabled, repeat the action that was previously causing the 0x800710FE
Disabling the Sync Center
In case you’re still encountering the same error or Offline features was already disabled, move down to the next potential fix below.
Method 2: Formatting CSC Database via Registry Editor
If disabling file synchronization didn’t work for you, the next logical step would be to use Registry Editor to create a FormatDatabase key that will allow you to reset any cluster of data that might trigger the 0x800710FE due to permission issues.
Several affected users have confirmed that the issue was swiftly resolved and the This file is currently not available for use on this computer error no longer occurred after they followed the instructions below and restarted their computer.
Here’s a quick guide that will allow you to format the CSC database via Registry Editor:
Open up a run dialog box by pressing Windows key + R. Next, type ‘regedit’ inside the text box and press Enter to open up Registry Editor. When you’re prompted by the UAC (User Account Control), click Yes to grant administrative privileges.
Running the Registry Editor
Once you’re inside the Registry Editor, use the left-hand side menu to navigate to the following location:
Note: You can also get there instantly by pasting the location directly into the navigation bar and pressing Enter.
After you manage to arrive at the correct location, move over to the right-hand side menu. Once you’re there, right-click on an empty space and choose New > Dword (32-bit) value.
Name the newly created Dword value ‘FormatDatabase’, then double-click on it to modify it.
Creating the FormatDatabase menu
Inside the Edit DWORD (32-bit)Value window associated with FormatDatabase, set the Base to Hexadecimal and the Value Data to 1. Then, click Ok to save the changes.
Configuring the FormatDatabase registry value
After the modification is complete, close the Registry Editor and restart your computer to see if the issue has been resolved.
In case the same problem is still occurring and you’re still prevented from deleting certain files by the 0x800710FE error, move down to the next potential fix below.
Method 3: Disabling Sync Center via CMD
As it turns out, one of the most common features that will end up causing this 0x800710FE (This file is currently not available for use on this computer) is the Sync Center. Even though this feature should not be enabled by default, you might find this scenario applicable in case you previously established a synced partnership (you made some network files or folders available offline).
If one of those files/folders part of this shared partnership ends up causing the 0x800710FE, you can most likely get the issue resolved by disabling the Sync Center driver and service, clearing the Client-Side Cache, disabling the scheduled tasks and preventing the Sync Center from starting at every logon.
A lot of users encountering this issue have reported that the issue went away and they were able to delete the folder after following the instructions below and restarted their computer.
Here’s a quick guide on disabling the Sync center in order to resolve the 0x800710FE error code:
Press Windows key + R to open up a Run dialog box. Inside the text box, type ‘cmd’ and press Ctrl + Shift + Enter to open up an elevated CMD prompt. When you see the UAC (User Account Control), prompt, click Yes to grant admin access.
Running the Command Prompt
Inside the elevated CMD prompt, type the following command and press Enter in order to disable the driver and service associated with the Sync Center:
for %G in ("CSC","CscService") do sc config "%~G" start= disabled
In the same CMD window, type the following commands and press Enter after each one to clear the Client-Side Cache (CSC):
takeown /f "%windir%\CSC" /a /r
icacls "%windir%\CSC" /grant:r *S-1-5-32-544:F /t /c /q
icacls "%windir%\CSC" /grant:r *S-1-5-18:F /t /c /q
for /d %G in ("%windir%\CSC\v2.0.6\namespace\*") do rd /s /q "%~G"
Once every command is processed successfully, type the following commands and press Enter after each one to disable the scheduled tasks associated with the Sync Center:
Once every command is successfully processed, close the elevated CMD prompt and restart your computer.
At the next startup sequence, attempt to delete the folder or file that was triggering the error and see if the problem is now fixed.
In case you’re still encountering the 0x800710FE (This file is currently not available for use on this computer), move down to the next potential fix below.
Method 4: Deleting file via USB Ubuntu drive
If none of the other methods above have allowed you to fix the issue, you should try creating a USB Live ubuntu drive and boot from it in order to remove the file or folder that is causing the 0x800710FE (This file is currently not available for use on this computer).
Several affected users that have tried this fix and performed a CHKDSK afterward have reported that they’ve successfully managed to get rid of the file or folder that was refusing to go conventionally.
Here’s a quick guide on creating a Live Ubuntu USB drive on Windows and boot from it in order to delete the folder or file that’s triggering the 0x800710FE:
Visit this link (here) and download the latest ISO image of Ubuntu. It’s recommended that you download the LTS version if possible. Just click on the Download button once you get to the correct page.
Downloading the latest Ubuntu version
While the Ubuntu image is downloading, visit this link (here) and download the latest version of the Universal USB Installer via the Download UUI button. Find it by scrolling down the page.
Downloading the latest version of the Universal USB Installer
Insert a flash disk that you plan on using as the Ubuntu Live image. Make sure to backup any important data on it, since the next procedure will end up formatting the drive.
After the installation executable of UUI is downloaded, double-click on it, accept the License Agreement, then follow the on-screen instructions to complete the installation.
Agreeing with the Universal USB installer
At the next screen, choose Ubuntu via the drop-down menu (under Step 1), then click on Browse (associated with Step 2) and select the .ISO image that you downloaded at step 1.
Next, use the drop-down menu associated with Step 3 to select the drive you want to install the live Ubuntu image on.
After you select the drive, ensure that you check the box associated with Fat32 Format Drive. Once you are ready to go, click on Create and wait for the process to complete.
Creating the Ubuntu Live Image
After the process is complete, restart your computer and boot from the USB drive at the next system startup by pressing the key associated with entering your boot menu (most commonly F2, F10, and F12). Once you get to the Boot Menu, select your flash drive to boot from your Ubuntu live image.
Selecting Advanced Options for Ubuntu
Wait until your computer boots from the Ubuntu live image, open a Terminal and type the following command and press Enter to remove the directory that was previously triggering 0x800710FE:
rm -r MyDirectory
Note: Keep in mind that MyDirectory is simply a placeholder. Be sure to replace it with the exact location that you want to delete.
After you manage to delete the file or folder from within the Ubuntu Live image, restart your computer and ensure that you boot from your HDD or SSD at the next startup by removing the Ubuntu live flash drive as soon as you get past the initial screen.
In case you did follow the instructions above, it’s highly recommended that you also perform a CHKDS scan. Do this by following the next method below.
Method 5: Performing a CHKDSK scan
Since using a Ubuntu Live image to delete a directory is known to open to create bad sectors and metadata corruption, it’s very important to eliminate this complimentary issue as soon as possible.
Fortunately, Windows includes a built-in utility (CHKDSK) that is capable of scanning for errors and corruptions and repair any logical errors and corrupted data that a forceful deletion attempt might have left behind.
CHKDSK (Disk Error Checking utility) on Windows 10 is much more efficient than previous iterations, but in order to ensure that it has the necessary permissions to repair the bad files, you will need to ensure that it’s opened into an elevated CMD window.
Minecraft has been one of the popular game for many years. It is a sandbox game where you can do anything in the game that is on your mind. The game has three different modes that you can play single player or multiplayer with friends. There are many custom maps created by users to enjoy different environments with different modes. However, most of the users don’t know how to install these maps for their Minecraft. In this article, we will show you the methods of installing custom maps for Minecraft on different platforms.
How to download and install maps on Minecraft
Download and Installing Maps in Minecraft on Windows
There are many custom maps for Minecraft that users want to play on their PC. Every map is made for different game modes. Downloading and installing Minecraft maps on PC is simple and easy. We need to copy the maps to the saves folder of Minecraft and the game will consider it as a saved map by user. Follow the below steps:
Go to the MinecraftMaps website and search for the map that you want to download.
Choosing the Minecraft map
Open the map that you want to download and check the version details. If the version of that map is similar to your Minecraft or close enough then click on the Download button as shown below: Note: It’s better to find a similar version. If not, then the version gap must be small, so that the Minecraft can convert it easily without crashing.
Checking version and download the map
Unzip the downloaded file by using default windows feature or by using a third-party application. Note: You can find the file in your download folder.
Unzipping the zipped file
Open the unzipped folder and you will find another folder of the same name. Copy that folder and paste it in the following location. Note: Make sure the folder contains files and not a subfolder of the same name. Instead of Kevin, you will have your username.
C:\Users\Kevin\AppData\Roaming\.minecraft\saves
Pasting the downloaded map in the Minecraft maps folder
Now start your Minecraft game and find the map on the list. Open it and it will start loading the map.
Downloading and Installing Maps in Minecraft Pocket Edition on Android
Minecraft Pocket Edition will require a different map file format than the Windows version. However, the procedure is similar, you need to copy the download map files into Minecraft maps folder (minecraftWorlds). The minecraftWorlds folder can be found where you installed the game. Follow the below steps to download and install Minecraft maps on Android:
Go to the MCPEDL website and search for the map that you want to download for your Minecraft Pocket Edition. Once you find the map tap on the name of the map.
Scroll down to the bottom of the page, you will find the download links for that specific map. It is recommended to always download the zip file, but you can download the map using other links too. Note: If the file is with the extension .mcworld, you can just rename it to the .zip.
Downloading the map
Once the files are downloaded, you need to unzip the file. You can use File Manager for this step or use a third-party application such as ES File Explorer.
Unzipping the zipped file
Copy the unzipped folder of the map and paste in the following path:
game > com.mojang > minecraftWorlds
Copying the downloaded map folder to game folder
Now start your Minecraft Pocket Edition and tap on Play. You will find the new map available on the list.
Downloading and Installing Maps in Minecraft Pocket Edition on iOS
Installing maps on the iPhone will be a bit different than Android because of iPhone security. However, both the Android and iOS versions have the same maps folder. Installing Minecraft on the iPhone will require a third-party application for moving files from one place to another. Follow the below steps to install custom maps of Minecraft on iOS:
Search for the map that you want to download on MCPEDL Once you find the map tap on the name of the map.
Scroll down to the bottom of the page to find the download links. It is recommended to always download the zip file, but you can download the map using other links too. Note: If the downloaded file has the extension .mcworld, you need to rename it to .zip.
Downloading map
Go to the app store and download the Documents by Readdle application. Go back to your download file, tap and hold it for options menu then choose Move option.
Now go to On My iPhone, then Documents byReaddle and tap on the Copy button above.
Downloading application and copying map file to the application folder
Head over to Documents by Readdle application. Open the iTunes Files folder and you will find the map file there.
Opening iTunes files
Tap the menu icon for the file and choose Rename. Change the extension from .mcworld to .zip.
Renaming the extension of the file
Tap on the zip file to unzip it. Now tap on the menu button for the unzipped folder and choose the Share option.
Unzipping and choosing share option
Scroll down and choose Save to File option. Go to the following path in On My iPhone and Save the file.
On My iPhone > Minecraft > games > com.mojang > minecraftWorlds
Copying the file to the game folder
Run your Minecraft game and tap on Play. You will find the new maps in the list of the Worlds.
Some Mozilla Firefox users are encountering the ‘The Proxy server is refusing connections‘ error when they’re attempting to access certain websites. In most cases, affected users are reporting that the same problem doesn’t occur when they try to access the same website from a different browser.
‘The Proxy Server is refusing connections’ on Mozilla Firefox
In Firefox, this particular issue means that while your system is able to talk to the proxy, but the service is not letting the browser to forward the data that it needs in order to display the web page that you’re trying to visit.
In most cases, this happens due to the fact that your Proxy solution requires some type of authentication, but Firefox isn’t configured to use the system’s proxy. If this scenario is applicable, you can get the issue resolved by forcing your Firefox browser to Auto Detect the Proxy settings used by your system (Method 1).
Another potential scenario that will cause this problem is if the proxy server does NOT allow SSL on the port you are trying to connect to. This can be fixed by accessing your Proxy configuration and adding that SSL port to the list of allowed items (Method 2).
In case you encounter this error while attempting to access an FTP site through an HTTP proxy, the error will no longer appear once you move to a more secure HTTPS proxy (Method 3).
And if all else fails, you should start considering disabling the Proxy server that you’re using (Method 4) or uninstalling the VPN client (Method 5).
Method 1: Forcing Firefox to Auto Detect Proxy Settings
As it turns out, this particular issue can also occur due to the way Firefox is configured to treat proxy servers by default. Unlike many of the other proxy servers, Firefox will not adopt the system-wide proxy services that are being used for the network that you’re currently connected to.
Fortunately, you can modify the default settings in order to force the browser to Auto-detect proxy settings for this network, which will end up resolving the issue. Several affected users have confirmed that this operation finally allowed affected users to visit every website without encountering the ‘The Proxy server is refusing connections‘ error.
Here’s a quick guide on accessing the Network Settings of Mozilla Firefox and modifying the default Connection Settings so that the network-wide proxy HTTP and port is adopted:
Open up your Mozilla Firefox browser and click on the action button in the top-right section of the screen. From the newly appeared context menu, click on Options.
Once you’re inside the Options tab, select the General category from the vertical menu on the left, then use the right-hand side menu to scroll all the way down to Network Settings. When you get there, click on Settings to bring up the advanced menu.
After you manage to reveal the Connection Settings menu, simply change the toggle associated with Configure Access to the internet to ‘Use system proxy settings‘.
As soon as you make this modification, click Ok to save the changes, then restart your browser and attempt to access the same web-page that was previously failing.
Forcing Firefox to use the system’s proxy server
In case the same ‘The Proxy server is refusing connections‘ error is still occurring, move down to the next potential fix below.
Method 2: Adding URL SSL port to the allowed list (if applicable)
Another scenario that will cause this issue is a situation in which the end-user tries to access a URL that contains an alternate port for an SSL connection. Some Proxy solutions including EdgeWave iPrism will treat this as a possible security violation.
If this scenario is applicable, you can get the issue resolved by going to your proxy server configuration and adding the port an alternate SSL port.
Of course, the steps of doing this will be way different depending on which Proxy solution you’re using. But in order to make things easier for you, here is a general guideline that you can use in order to add the blocked SSL port to the allowed list:
Analyze the URL that is triggering the ‘The Proxy server is refusing connections‘ error to see if it contains any evidence of a port that is being actively used.
Checking the URL for evidence of an SSL port
After you manage to identify the problematic port, open your proxy configuration settings and look for a setting that will allow you to add the port as an alternate SSL port.
Adding the HTTPS port as an alternate SSL port in your Proxy configuration
Once you do this, save the configuration and restart your computer.
After the next startup is complete, see if the problem is resolved at the next computer startup.
In case this issue is still not resolved after following the instructions below or this method was not applicable, move down to the next potential fix.
Method 3: Switching to an HTTPS Proxy (if applicable)
You might also be encountering the ‘The Proxy server is refusing connections‘ error while trying to access an FTP site through an HTTP proxy. As opposed to HTTPS proxies, HTTP proxy servers don’t allow that.
If this scenario is applicable, you can get the issue resolved by making the switch to an HTTPS proxy solution that ensures communications with end-to-end security. In case you don’t want to pay for a premium service, you can use this site to find viable SSL Proxy servers that you can use.
In the event that you aren’t encountering the issue when trying to access a site with FTP functionality, move down to the next potential fix below.
Method 4: Disabling the built-in proxy server (if applicable)
Another scenario that will end up spawning this issue is if a proxy server is enabled in your Local Area Network (LAN) settings without you knowing about. Even if you’re willingly using a dedicated Proxy solution, you should take a trick to the Internet Properties tab and see if you’re not actually using two proxies at the same time.
This regularly occurs after a computer has been attacked by malware or adware – Some viruses will deliberately adjust your proxy settings in order to redirect you towards spammy advertisements.
A lot of affected users have reported that they managed to fix the issue entirely after they disabled the built-in proxy function from the Internet Properties tab.
How to disable built-in proxy on Windows 10
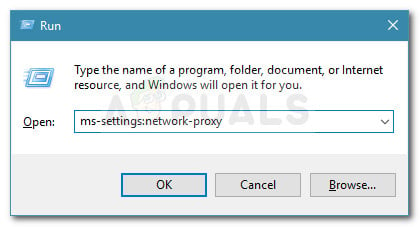
Open up a Run dialog box and press Windows key + R. Next, type ‘ms-settings:network-proxy’ and press Enter to open up the Proxy tab of the Settings menu.
Run dialog: ms-settings:network-proxy
Once you’re inside the Proxy tab, use the right-hand side menu to scroll down to the Manual Proxy setup section and disable the toggle associated with Use a proxy server.
Disabling the use of a proxy server
Once this modification is enforced, restart your computer and see if the issue is resolved at the next computer startup.
How to disable built-in proxy on Windows 7, Windows 8.1
Press Windows key + R to open up a Run dialog box. Inside the text box, type ‘inetcpl.cpl’ inside the text box and press Enter to open up the Internet Properties tab.
Opening the Internet Properties screen
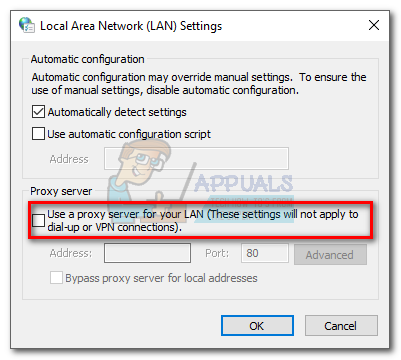
After you manage to open the Internet Properties tab, select the Connections tab from the horizontal menu at the top, then click on LAN Settings (under Local Area Network LAN settings).
Open LAN settings in Internet Options
Once you manage to get inside the Local Area Network (LAN) Settings menu, go to the Proxy server setting and uncheck the box associated with ‘Use a proxy server for your LAN’ Disabling the Proxy server
Once the Proxy server has been disabled, restart your computer and see if the issue is resolved at the next computer startup.
In case the ‘The Proxy server is refusing connections’ error persists, move down to the next potential fix below.
Method 5: Uninstalling VPN Client (if applicable)
As it turns out, Firefox does not have a specific error message pointing towards a problem caused by a VPN network. So in case you’re using a VPN client that actually facilitates the apparition of this issue, you can expect to still get the same error message (The Proxy server is refusing connections).
If this scenario is applicable, you can get the issue resolved simply by disabling the VPN client that is causing the issue. If that’s not an option, the only remaining option is to uninstall the VPN solution altogether.
In case you’ve run out of options, here’s a quick guide on uninstalling the VPN client from your computer:
Press Windows key + R to open un a Run dialog box. Inside the text box, type ‘appwiz.cpl’ and press Enter to open up the Programs and Features screen. When you’re prompted by the UAC (User Account Control), click Yes to grant administrative privileges.
Typing in “appwiz.cpl” in the Run prompt
Inside the Programs and Features screen, scroll down through the list of installed applications and locate the VPN client that you’re actively using. After you manage to find the VPN solution, right-click on it and choose Uninstall from the newly appeared context menu.
Uninstalling the VPN tool
Follow the on-screen prompts to complete the uninstallation, then restart your computer and see if the issue is resolved at the next system startup.
The RunDLL error ‘There was a problem starting ~. The specified module could not be found‘ mainly occurs when Windows users try to open an HDD or external HDD drive. But for some users, the error only appears when they try to open up a shortcut that is pointing to an executable stored on this disk.
This particular issue is not exclusive to a certain Windows version and is confirmed to occur on Windows 7, Windows 8.1 and Windows 10.
As it turns out, in most cases, this particular error will occur due to an autorun.inf file stored in the root of the HDD that is either system-protected, read-only and hidden – this issue is most likely facilitated by some kind of virus infection. If this is the case, you can fix the problem easily by deleting every autorun.inf file that might be causing the problem – You can either do this via a CMD prompt (Method 1) or by using Registry Editor (Method 2).
However, the issue can also be caused by logical errors on the affected drive (Method 3), a partially removed infection (Method 4) or a severe case of system file corruption (Method 5).
Method 1: Deleting the autorun.inf file
According to various user reports, this issue is popularly caused by what’s known as a ‘shortcut virus’. This type of malware hides all your files and folders, then replaces them all with shortcuts that look exactly the same. Nowadays, every major AV suite is equipped to detect and eliminate this kind of security threat, but the problem is, not all of them are capable of removing the autorun.inf file that was previously created.
If this happens, the drives affected by the virus might become inaccessible as a result and show the ‘There was a problem starting ~. The specified module could not be found‘ when the user tries to access them.
If this scenario is applicable, you can fix the issue by using the terminal to navigate to the root location of your hard disk and deleting the autorun.inf file – Most likely, it has read-only properties, it’s hidden or it’s a system protected.
The instructions below will help you to get rid of it and fix the issue:
Press Windows key + R to open up a Run dialog box. Next, inside the text box, type ‘cmd’ and press Ctrl + Shift + Enter to open up a CMD window with elevated privileges. When you’re asked to provide administrative access via the UAC (User Account Control), click Yes to grant admin access.
Running Command Prompt
Once you’re inside the elevated CMD prompt, type the following command in order to navigate to the root location of the affected drive:
CD X:\
Note: Keep in mind that X is simply a placeholder for the affected drive. Replace it according to the letter corresponding to the drive-in your particular scenario.
Once you manage to get to the root location of the affected drive, type or paste the following locations in order and press Enter after each one to delete the autorun.inf file forcefully:
Attrib -r -s -h d:\autorun.inf
Del /F d:\autorun.inf
After the operation is complete, close the elevated CMD prompt and restart your computer. Once the next startup sequence is complete, open File Explorer and double-click on the affected drive again to see if the issue has been fixed.
If you’re still encountering the ‘There was a problem starting ~. The specified module could not be found‘ error, move down to the next potential fix below.
Method 2: Deleting autorun.inf keys via Registry Editor
If you’re not comfortable with using a terminal to delete the problematic autorun.inf files or multiple drives are affected and you want to fix the issue all at once, a better way to do it is via Registry Editor.
By using Registry Editor to navigate to the location of every saved Run and RunOnce key, you can effectively disable the autorun.inf files that might be triggering the ‘There was a problem starting ~. The specified module could not be found‘ error.
There are four different locations in the Registry where the autorun.inf files might be found. Using Registry Editor, you can get to each location manually and remove the Run and RunOnce keys that are allowing the autorun.inf file from denying you access to the drive.
Here’s a quick guide on how to do this:
Note: The steps below are universal and can be followed on Windows 7, Windows 8.1 and Windows 10.
Press Windows key + R to open up a Run dialog box. Inside the newly appeared text box, type ‘regedit’ and press Enter to open up the Registry Editor. When you see the UAC (User Account Control) prompt, click on Yes to grant admin access.
Running the Registry Editor
Once you’re inside the Registry Editor, use the left-hand side to navigate to the following location:
Note: You can either navigate there manually or you can paste the location directly into the navigation bar and press Enter to get there instantly.
After you manage to arrive to the correct location, move over to the right-hand side and look for any entry that doesn’t lead back to a known program that you willingly installed. Be sure to look at the location (Data) to see if this list contains evidence of a PuP (Potentially unwanted Program) or remnants of a malware program.
Investigating for the corrupt Run or RunOnce key
Note: Ignore the (Default) entry.
In case you manage to find evidence of a malicious Run key, right-click on it and choose Delete from the newly appeared context menu.
Deleting the problematic key
Next, it’s time to ensure that the rest of the remaining Run and RunOnce locations don’t contain the same link to the problematic autorun.inf file. To do this, navigate to each of the following locations and repeat step 3 and 4 with all of them until every potential problem-causing key is deleted:
After every key has been deleted, close Registry Editor and restart your computer. Once the next startup is complete, attempt to access the drive again and see if the issue is now resolved.
If you’re still encountering the ‘There was a problem starting ~. The specified module could not be found‘ error when trying to access it, move down to the next potential fix.
Method 3: Running CHKDSK
Another potential culprit that might lead to the apparition of this issue is corrupted data on your HDD. If this is the main culprit behind the issue, you can probably get the issue fixed by running the CHKDSK utility.
Some users that we’re also dealing with the same problem have reported that the ‘There was a problem starting ~. The specified module could not be found‘ error no longer appeared when they accessed their driver after running an Automatic CHKDSK scan with the ‘Scan for and attempt recovery of bad sectors’ checkbox enabled.
If none of the methods above have allowed you to fix the issue, it’s also possible that the issue is being caused by an ongoing security infection. If you haven’t done it yet, we highly recommend that you perform a deep scan with a competent AV suite.
If you already pay for a premium AV subscription, use it to scan for any malware that might still be lingering on your computer.
But if you’re looking for a competent AV suite that is capable of identifying and removing any remnant files that might still cause issues, you should consider using Malwarebytes.
If none of the potential fixes above have helped you access your drive, it’s very likely that the problem occurs due to some type of system file corruption.
In order to replace every Windows component without affecting your personal files, consider doing a repair install.
In case that’s not a possibility, the only viable fix as this point is to go for a clean install.
Photo editing is a popular feature these days and the Lightroom is one of the top software for it. Presets are most commonly used for editing photos quicker and better. However, Lightroom has only limited presets installed by default and users may need to install more from the internet. In this article, we will show you how to install presets for your Lightroom on a different platform.
How to install presets in Lightroom
What is Preset in Lightroom?
Presets are the combination of editing adjustments that you can easily reapply to any photo. All the settings that are stored in a preset file will be applied to the new photo with one click. Preset is a time-saving feature for many photographers and it creates amazing results. You can use the default presets, downloaded presets or create your own presets.
Using preset in Lightroom
Installing Presets in Lightroom
There are several methods for installing the presets in Lightroom. Users can use the available options inside the Lightroom to add the presets or use the copy/paste operations to install the presets in their Lightroom.
Important: Before trying these methods, you must have downloaded the preset files that you want to install in Lightroom. Photonify, Fix the Photo, Look Filter, and Free Presets are some websites that you can check for free presets or you can just Google search to find thousands of presets for Lightroom.
Method 1: Importing the Downloaded Presets in Lightroom
In this method, we will be using the import feature available in the Develop mode of Lightroom. Using import is the easiest way of installing presets in Lightroom. The feature of importing presets is similar to importing photos from the phone to the PC. Follow the below steps to install presets using the import feature:
Open Lightroom by double-clicking the shortcut on your desktop.
Click on the Develop mode button on the top. Click on the plus icon on left and choose the Import Presets option.
Choosing the import preset option
Locate your downloaded preset files and select them. Press the import button to import them in your Lightroom.
Importing preset files to Lightroom
Restart your Lightroom. Now you can choose any preset in the list to apply to your photos.
Method 2: Copying the .lrtemplate Presets to the Lightroom Folder
.lrtemplate is the older version of presets for Lightroom. It saves the modified settings that users can apply to any photo by using that preset. .lrtemplate has a specific folder in Lightroom directory where the user can copy the downloaded preset files to install them as shown below:
Open Lightroom, click on Edit in the menu bar and choose Preferences. Now select the Presets tab and click on Show Lightroom Develop Presets button.
Opening Lightroom presets folder through Preferences
Open the Lightroom folder and then open the Develop Presets folder. Paste your .lrtemplate folder in here to install them.
Paste the .lrtemplate folder into the develop presets folder
Restart your Lightroom to see the presets in the list that you just added.
Method 3: Copying the .xmp Presets to the Lightroom Folder
.xmp is another type of version for Lightroom presets. It is similar to .lrtemplate and is most commonly used in the latest versions of Adobe Lightroom. .xmp saves the data similarly, but it is the latest technology. However, the .xmp have a different folder where the user can copy the downloaded files as shown below:
Open Lightroom and click on Edit in the menu bar to choose the Preferences option. Go to the Presets tab and click on the Show All Other Lightroom Presets button.
Opening all other Lightroom presets folder through preferences.
Open the Settings folder and paste the .xmp folder in this folder to install them for your Lightroom.
Pasting the .xmp folder to the Settings folder.
Go ahead and restart your Lightroom to find the presets in the list.
Installing Presets in Lightroom Mobile
In this method, we will be adding presets to your Lightroom mobile version. Nowadays, most people edit their photos directly on their phones for the quick edit. It works the same as the Lightroom version on a PC. Lightroom mobile presets will be in the format of .dng (Digital Negative). DNG files have additional information about the photo which we are going to use as presets as shown below:
Download the free Lightroom mobile presets from any site. It will be in a zip file so extract them on your phone.
Open Lightroom application on your phone. Tap on the plus button and choose the create an album option. Give the album a name and tap on the OK button.
Creating an album in Lightroom
Go to the album that you just created and press the add photo button down below. Choose the Files option.
Adding files to the album
Now go to the extracted folder and tap on the preset files to add them. Open the photo that you added to your album.
Adding the DNG file to the album
Tap on the menu icon on the top and choose the save settings option. Here you need to select all options and press the Ok button.
Copying the settings
Go back to the main menu of Lightroom, find a photo and tap on the menu icon on top. Now choose the Paste Settings option and the preset settings will be applied to your image.
Pasting settings to the new photo
Some Windows users are experiencing a weird issue where they continually get HTTPS certificate errors such as ‘There is a problem with this website’s security certificate‘ error when attempting to access high-profile sites & apps such as Twitter, Google, Facebook, etc. In most cases, affected users are reporting they get the same type of error with every browser that they try to use.
‘There is a problem with this website’s security certificate’ error on all browsers
As it turns out, the most common causes that will cause these certificate errors are severely outdated date & time values. And although the error that gets shown by the browser is different, the fix is always the same – ensuring that the certificate gets validated by bringing your system date & time up to date. (Method 1)
However, if changing the date & time only proves to be a temporary fix, there’s a high chance that the issue is actually originating from a faulty CMOS battery. In this case, you can get the problem resolved by replacing your motherboard CMOS battery with a new equivalent. (Method 2)
Once you’ve made sure that your system date & time is not causing this issue, you should look to install any missing certificates that might be causing browser errors of this kind (Method 3).
And if you’re recently installed any suspicious PUPs, investigate to see if it’s not actually interrupting with your certificate’s verification (Method 4).
Method 1: Setting the correct date & time
By far, the most common situation that will lead to the apparition of this type of certificate error is an inaccurate system date & time. It’s possible that the date or type has changed without you noticing, or you might have done a hardware change that ended up interfering with your machine ability to keep track of time.
Keep in mind that if your date and time is far off, this will cause the majority of security certificates to fail – This might explain why you are getting certificate errors with multiple browsers.
If this scenario is applicable, you should be able to fix the issue by setting the correct date & time via the Date & time menu. Here’s a quick guide on how to do this:
Note: The steps below are universal and will work regardless of which Windows version you’re encountering the issue on.
Open up a Run dialog box by pressing Windows key + R. When you see the text box, type ‘timedate.cpl’ and press Enter to open up the Date & Time window.
Opening the Date and time window
At this point, you should land directly into the Date & Time window. Once inside, select the Date & Time tab and click on Change Date & time.
Setting the correct date and time
When you see the User Account Control (UAC) window, click Yes to grant administrative privileges.
Once you’re inside the Date & time Settings menu, use the calendar under the Date and Time box to set the appropriate values according to the time zone that you live in.
Modifying Time & date
Once the correct values are set, click Apply to save the changes and restart your computer to see if the issue has been resolved.
After the next computer startup is finished, open a page that was previously showing a certificate error and see if the problem is now fixed.
If the same error is still showing or you have discovered that the date & time has changed again, move down to the next method below.
Method 2: Replacing the CMOS battery
If the previous method has revealed your computer’s inability to save the date & time between restarts, this can only mean one thing – You’re actually dealing with a faulty CMOS (Complementary Metal Oxide Semiconductor) battery.
Every motherboard has a CMOS battery. Its main job is to remember key information about your machine (custom BIOS preferences, system-wide time and date, critical error logs, etc.)
But just like any battery, this thing is prone to going bad eventually. If you’re encountering the issue on an old motherboard model, your best chance at resolving the issue is to simply replace the new CMOS battery with a new equivalent.
These things are very common since they are used on a variety of electronic devices, so you should be able to find one at every electric supply store – You might even have one laying around in your household.
Once you have a brand new CMOS battery in hand, here’s what you need to do to replace it with the faulty one:
First things first, turn off your computer completely and ensure that it is unplugged from the power source.
Equip yourself with a static wristband if you have one. These things work by grounding you to the frame of the computer, ensuring that you don’t end up damaging any components due to static electricity.
Example of a static wristband
Note: This step is optional.
Remove the cover of your computer, take a look at your motherboard, and identify the CMOS battery – It shouldn’t be that hard to spot it.
Identifying the CMOS battery
Once you see it, use your fingernail or a non-conductive screwdriver to remove the faulty battery from its slot.
Insert the new CMOS battery and put the side cover back before plugin your computer back to a power source and starting it back up.
Removing the CMOS battery
Now that the new CMOS battery is installed, wait until the startup is complete, then follow Method 1 again to set the correct time & date values, then restart to see if your computer is now able to remember the changes.
After you confirm that everything is working, open Internet Explorer (or Edge) and see if you still get the ‘There is a problem with this website’s security certificate‘ error when trying to access certain web-pages.
In case the same problem is still occurring, move down to the next potential fix below.
Method 3: Installing missing certificates from trusted CAs
If the first method didn’t allow you to fix the issue, it’s clear that time & date has nothing to do with this problem. At this point, the biggest possible culprit is the missing of some key root certificates from trusted CAs (Certificate Authority).
Several affected users have confirmed that they managed to get the issue fixed after they downloaded and install every third party root certificate via the Windows Root Certificate Program.
When it comes to doing this, you can either do it by using Local Security Policy and Certification Manager tools together or by installing them manually via the Management Console. Because of this, we created two separate guides. Feel free to follow whichever one you feel more comfortable with:
Option 1: Installing missing certificates via Local Security Policy and Certificate Manager
Important: You will not be able to follow this guide on Windows 10 Home since the Local Security Policy is only available on Windows 10 Pro and Windows 10 Enterprise.
First, you need to download the missing certificates manually according to the web pages that are triggering the error. You can either use the Windows Root Certificate Program or you can go for a 3rd party alternative like GeoTrust.
Once you have downloaded the missing certificates, press Windows key + R to open up a Run dialog box. Next, type ‘secpol.msc’ inside the text box and press Enter to open up the Local Security Policy.
Opening the Local Security Policy editor
Note: If you are prompted by the User Account Control (UAC), click Yes to grant administrative privileges.
Once you’re inside the Local Security Policy, select the Public Key Policies from the left-hand side menu. Next, move to the right-hand side section and double-click on Certificate Path Validation Settings.
Accessing the Certificate Validation Settings menu
Inside the newly opened Properties window, select the Stores tab from the horizontal menu at the top, then start by ensuring that the box associated with Define these policy Settings is checked.
Defining these policy settings
Once the Per User certificate stores menu becomes available, go ahead and enable the boxes associated with Allow user trusted root CAs to be used to validate certificates and Allow users to trust peer trust certificates.
Next, move down below to the Root Certificate stores menu and select the toggle associated with Third-Party Root CAs and Enterprise Root CAs (recommended). Configuring the Certificate Validation settings
Once you’ve made sure that the Certification validation settings are correctly configured, you can safely close the Local Security Policy.
Open another Run dialog box by pressing Windows key + R once again. This type, type ‘certmgr.msc’ and press Enter to open up the Certification Manager utility. When you are prompted by the UAC (User Account Control), click Yes to grant administrative privileges.
Opening the Certificate Manager Utility
Note: This utility will list every digital certificate that you have installed and will allow you to import the missing certificates that you downloaded at step 1.
Once you’re inside Certification Manager, use the left-hand section to select Trusted Root Certification Authority.
Next, right-click on the Certificates submenu and choose All Tasks > Import from the newly appeared context menu.
Importing the Certificates submenu
Once you manage to get inside the Certificate Import Wizard, start by clicking the Next button once. Then, once you get to the next screen, click on Browse to locate & select the root files of the certificate that you’re looking to install (at step 1).
Importing the missing CA certificates
Once every certificate is finished, click on Next then Finish before closing the utility.
Restart your computer and see if the issue is resolved at the next computer startup.
Option 2: Installing missing certificates via Local Security Policy and Certificate Manager
Download the missing certificates manually according to the web pages that are triggering the error. You can either use the Windows Root Certificate Program or you can go for a 3rd party alternative like GeoTrust.
Press Windows key + R to open up a Run dialog box. Inside the text box, type ‘mmc’ and press Enter to open up the Microsoft Management Console. When you see the UAC (User Account Prompt), click Yes to grant administrative privileges.
Once you’re inside the Microsoft Management Console, click on the File menu (from the ribbon bar at the top) and click on Add / Remove Snap-ins.
Accessing the Add or Remove Snap-ins button
Inside the Add or Remove Snap-ins menu, select Certificates from the left-hand side menu, then click on the Add button in the middle.
Adding the missing certificates
You’ll see a new menu opening up. Use it to select Computer account > Local Account, then press Finish to complete the procedure. Next, click Ok to Close the Add or Remove Snap-ins.
Configuring the snap to manage the local computer
Once you return to the Management Console, right-click on Certificate and use the context menu to choose All Tasks > Automatically Enroll and Retrieve Certificates.
Automatically enroll and retrieve certificates
Follow the on-screen instructions to install the missing CA certificates.
Once every missing certificate is installed, restart your computer and see if the problem is resolved at the next system startup.
Method 4: Uninstalling Browser Safeguard
As it turns out, this particular issue can also be caused by a PuP (Potentially Unwanted Program) called Browser Safeguard – there might be other similar programs that will cause this behavior.
Some users that have dealt with certificate errors on every installed browser have reported that the issue was completely resolved after they uninstalled the problematic application.
Here’s a quick guide on how to do this:
Press Windows key + R to open up a Run dialog box. When prompted by the UAC (User Account Control), click Yes to grant administrative privileges.
Opening Programs and Features
Once you’re inside the Programs and Features menu, scroll down through the list of installed applications and locate Browser Safeguard (or any other program that you suspect might be causing the issue).
After you manage to identify the culprit, right-click on it and choose Uninstall from the context menu.
Uninstalling Browser Safeguard
Follow the on-screen prompts to complete the uninstallation, then restart your computer and see if the issue is resolved at the next system startup.
The most common reason why users want to open their browser console is to identify problems with page editing, broken interface elements, misbehaving blocks ad other types of JavaScripts errors and conflicts. However, each browser has its own shortcuts and steps that will ultimately allow you to open up the console and see the back-end of a web-page that you visit.
How to open the console on your default browser
Since there are only four different browsers with over 5% market share (Chrome, Safari, Edge, and Firefox), we will show you multiple ways of opening the console on each of them. But keep in mind that with each browser, the elements & errors are generally colour-coded and labelled differently.
How to Open the Console on Google Chrome
On Chrome, there are actually three different ways that will allow you to open the built-in console.
Regardless of the Chrome build that you’re using, you can use one of these shortcuts to open and close the built-in console:
F12
Ctrl + Shift + J (Cmd + Option + J on Mac)
Keep in mind that the same shortcuts can also be used to hide the console. By default, the console of Google Chrome takes exactly half of the screen, but you can adjust the ratio easily via the slider on the middle and the browser will remember the modification the next time you open the console.
If you want to focus on a specific element, you can simply highlight it with your mouse and then right-click on it > Inspect. This will open up the Elements tab and Styles tab of the console, allowing you to focus on the element at hand.
Inspecting an element with Google Chrome’s Console
However, you can also access the console via the GUI menu of Google Chrome. To do this, simply click on the action button in the top-right corner and go to More Tools > Developer Tools.
Developer Tools
If you’re looking to work as efficiently as possible, here’s a list of Chrome Console shortcuts that you can use.
How to Open the Console on Google Microsoft Edge
Like every other browser, Microsoft Edge also has a Console tool meant for developers doing interactive debugging or ad hoc testing.
This tool logs information associated with the webpage that’s being visited. You’ll find information related to Javascript, network requests and security errors.
The easy way of opening the Console Tool on Microsoft Edge is by using the predefined shortcut (F12 Key).
But you can also do it via the GUI menu by clicking on the action button (top-left corner) > More tools > Developer Tools.
Opening the Developer tools on Edge via the GUI menu
And similar to the functionality on the other browsers, Microsoft Edge also allows you to inspect specific elements using the built-in console. To do this, simply select and right-click on an element and choose Inspect Element.
Inspecting an element on Microsoft Edge
Here’s a list with some useful shortcuts that you can use inside the built-in console of Microsoft Edge:
Launching the Console in focus mode
Ctrl + Shift + J
Switching to the Console
Ctrl + 2
Show or hide the Console from another DevTools tab
Ctrl + ` (back tick)
Execute (single-line command)
Enter
Line break without executing (multi-line command)
Shift + Enter or Ctrl + Enter
Clear the Console of all messages
Ctrl + L
Filter logs (set focus to search box)
Ctrl + F
Accept auto-completion suggestion (when in focus)
Enter or Tab
Previous/next auto-completion suggestion
Up arrow key/Down arrow key
How to Open the Console on Mozilla Firefox
The built-in console on Mozilla Firefox works a little differently than the other equivalents that we’ve analyzed so far. What I mean by this is that it will automatically open in a standalone window, rather than splitting your browser screen in half.
This allows for a more productive approach for people with second screens but might get in the way of users that need to work with one small screen. (If you’re in this scenario, you can use Alt + Tab shortcut to cycle back and forth between Firefox and the associated Browser Console.
To open up the build-in browser console on Mozilla Firefox, you have three options:
You can either use the universal shortcut – Ctrl + Shift + J (or Cmd + Shift + J on a Mac)
You can open it from the action menu – By clicking on the action menu > Web Developer > Browser Console.
Accessing the browser console
Or you can force the Browser Console to open directly by launching Firefox from the command line and passing the ‘-jsconsole’ argument:
Note: Firefox also includes a Web console, which is very similar to the Browser console but it’s applied on a single content tab rather than on the whole browser.
How to Open the Console on Google Safari
Unlike every other browser that we’ve looked at so far, the Error Console on Safari is disabled by default. Because of this, you’ll need to do an extra step in order to enable it on your browser.
To do this, open Safari and click on the Preferences tab. Once you’re inside the Preferences tab, click on the Advanced tab and check the box associated with Show Develop menu in the menu bar.
Enabling the console on Safari
Now that you’ve made the Console visible, you can open it by accessing the Develop tab at the top and clicking on Show Error Console.
Show Error Console on Safari
Keep in mind that Safari has a dynamic way of displaying the error console. If the window is small when you open the console, you will see it in a completely different window.
In case you want to open the console in the same window as your page, you will need to ensure that the browser window is of full size before opening the Error console.
The latest Call of Duty release (Modern Warfare) is surrounded by a lot of controversies. The game was riddled with bugs & issues upon its release, and some of them are still wreaking havoc among the PC player base, months after it’s release. One of the most common issues of this kind is Dev Error 6328, which typically occurs when the player attempts to start the game or when waiting in the Multiplayer lobby.
Dev Error 6328
When dealing with this issue, the first fix you should try is to restart your computer along with your router or modem. If that doesn’t work, try disabling the two background Origin services in case you’re launching the game through Origin. On the other hand, if you’re launching the game through Battle.net, clear the cache folder located in ProgramData instead.
In case you’re using an Nvidia GPU, you can try installing the latest Studio driver (some users have reported that this has resolved the issue for them). And in case you are only encountering the Dev Error 6328 when you attempt to join a multiplayer game, try forcing the game to run in borderless mode with VSync on.
Method 1: Restarting Router + Computer
Although this is only a temporary fix, it has worked for a lot of users that we’re desperately wanting to play the game.
Before you start troubleshooting with any of the other fixes below, start simple with a simple PC Restart coupled with a router restart. If the issue is being caused by a network inconsistency, this operation will flush the DNS & clear any temp data that might be causing the issue.
To do a router restart + a power cycle, press the power button on the back once (to turn it OFF) and wait for 30 seconds or more before pressing it again to power the device ON. Additionally, you can simply disconnect the power cable from your power outlet.
A demonstration of restarting the router
After you restart both your router/modem and your PC, launch the game again and see if the issue is now resolved.
In case the same issue is still persisting, move down to the next potential fix below.
Method 2: Disabling Origin services
As it turns out, one of the most common culprits that will end up facilitating the apparition of this error is EA’s Game Launcher (Origin).
The vast majority of users reports with the Dev Error 6328 issue encounter this issue when trying to launch the game from Origin. Some users took it upon themselves to troubleshoot the issue and discovered that there are two Origin background services that are suspect of causing this issue.
Upon disabling these two services via msconfig and restarting their computer, some affected users have reported back that the issue is no longer occurring.
If this scenario is applicable and you’re also encountering the Dev Error 6328 when launching COD Modern Warfare from the Origin store, here’s how to disable the two background processes that might cause the problem:
Note: Disabling these two background services will not affect the game in any way, but it will stop your Origin’s ability to auto-update. So even if this fix works for you, re-enable the two services from time to time in order to ensure that you’re running the latest version (or update manually).
Press Windows key + R to open up a Run dialog box. Inside the text box, type ‘msconfig’ and press Enter to open up the System configuration screen.
Opening System Configuration
Once you’re inside the System Configuration screen, select the Services tab from the menu at the top, then start by checking the box associated with Hide all Microsoft services.
Clicking on the services tab and unchecking the Hide All Microsoft Services option
After you hide every essential Microsoft service, you will be left with a list of 3rd party services. Click on the Manufacturer column to order the listings based on their publisher.
Once the services are ordered properly, scroll down through the list of services and locate the two associated with Electronic Arts (Origin Client Services and Origin Web Helper Service). After you spot them, uncheck the boxes associated with each of them and click on Apply to save the changes.
Disabling the two Origin services
After the two services have been disabled, restart your computer and launch COD Modern Warfare at the next startup to see if the issue is now resolved.
In case the same problem is still occurring, move down to the next potential fix below.
Method 3: Installing Nvidia Studio driver
If you’re encountering this issue with an Nvidia GPU, keep in mind that some users have managed to fix the 6328 error entirely by installing the Nvidia Studio driver (from the Gforce Experience app) instead of the regular Game Ready driver.
This supposedly ensures that your GPU driver runs with the latest hotfix for this issue (Infinity Ward has been trying to fix this for months). But the major downside is that Studio drivers are not properly tested and might create additional problems (might not be the case in your situation).
If you decide to try this fix, here’s a quick guide on installing Nvidia Experience and forcing it to download the Studio driver instead of the Game Ready version:
Open your default browser and visit this link (here) to open up the Download Page of Nvidia Experience. Once you’re inside, click on Download now and wait for the installation executable to download.
Downloading GeForce Experience
Note: If Gforce Experience is already downloaded, skip this step and the next one.
Once the executable is successfully downloaded, open it and follow the on-screen prompts to complete the installation of GeForce Experience.
Once you’re inside GeForce Experience, sign in with your user account at the initial prompt.
Sign in with Nvidia Experience
Once you are successfully signed into GeForce Experience, click on Drivers (top-left corner) then click on the Action button in the right section.
Accessing the action button of Drivers in GeForce Experience
Inside the Action button, change the default driver preference from Game Ready Driver to Studio driver.Changing the driver preference mode to Studio Driver
After you do this, the available driver will change. Check to see if the Studio driver is scheduled for download, then click on the Download button associated with it to start the download.
Downloading the Studio Driver version
Wait until the download is complete, then click on Express Installation and follow the on-screen prompts to complete the installation.
Performing an express driver version installation
Note: If you are prompted by the UAC (User Account Control), click Yes and grant administrative privileges.
Wait until the installation is complete, then restart our computer manually if you’re not automatically prompted to do so and see if the issue is resolved at the next computer startup.
In case the same problem is persisting, move down to the next fix below.
Method 4: Forcing the game to run in borderless mode with VSync
As it turns out, some affected users have managed to fix the Dev Error 6328 by forcing the game to run in Borderless mode with Vsync turned out at 60Hz. This seems like a random setting to use, but there are a lot of users confirming that this particular configuration is the only one that allows them to join multiplayer games without the same fatal crash.
This setting can only be changed in-game, so the fix can only be replicated if you get the error when attempting to join a multiplayer game (not at startup). If this scenario is applicable, here’s a quick guide that will show you how to force the game to run in borderless mode with VSync enabled:
Launch COD Modern warfare and wait until you get to the menu screen. Once you arrive there, click on Settings and select the Graphics tab from the horizontal menu at the top.
Next, expand the Display Mode and select Fullscreen Borderless from the newly appeared drop-down menu.
Changing the default mode to Fullscreen Borderless
Next, scroll click on the menu associated with Sync Every frame (V-Sync) and set it to Enabled. Next, use the Advanced menu to set the Vsync frequency to 60hz.
Save the modifications and then launch a multiplayer game to see if the Dev Error 6328 has been resolved.
In case you’re still facing the same error or you’re encountering the error code while attempting to launch the game Battle.net, follow the next potential fix below.
Method 5: Clearing the Battle.net cache (if applicable)
If you’re seeing the Dev Error 6328 while attempting to launch the game from Blizzard’s launcher (Battle.Net), it’s likely that you’re dealing with some type of corrupted cache issue.
Several affected users that we’re encountering the same issue have confirmed that they managed to fix the issue indefinitely by navigating to the location of the Blizzard Entertainment folder and delete every file there in order to clear the cache.
If this scenario is applicable to your current situation, here’s a quick guide on clearing the Battle.net cache in order to resolve the Dev Error 6328:
Ensure that Battle.net any game opened through it is closed.
Press Windows key + R to open up a Run dialog box. Next, type ‘%ProgramData%‘ and press Enter to open up the ProgramData folder.
Accessing the ProgramData folder
Inside the ProgramData folder, access the Blizzard Entertainment folder, then navigate to Battle.net > Cache.
Once you’re inside the Cache folder, select everything inside with Ctrl + A, then right-click on a selected item and choose Delete from the newly appeared context menu.
Deleting the Cache Folder
Once the entire cache folder has been cleared, restart your computer and see if the issue is resolved at the next system startup.
Some users are encountering the 0x80070052 (The directory or file cannot be created) when attempting to copy files to a removable media like a flash drive or external HDD. In most cases, the issue is reported to occur with photos, videos (particularly those with a name over 20 characters).
0x80070052 – The directory or file cannot be created error message
If you’re using an older File System for your removable drive (like FAT16) the root folder can only support a limited number of files on the root folder. In this case, you can avoid the error entirely by pasting the files in a subfolder. But if you’re using an older system file format, you might consider formatting your drive and moving towards a newer iteration to avoid problems of this kind.
If you’re encountering the issue while attempting to copy encrypted files, it’s most likely because the encryption key cannot be move alongside the file. To fix this, ensure that the Credential Manager and/or the 3rd party utility you used to encrypt the files are running at the time when you attempt to copy the file/s.
However, in some instances, the 0x80070052 error can also be caused by some type of system file corruption. To fix it, simply run the Error-checking tool and reconnect the media once the process is complete.
Method 1: Copying the files in a subfolder
If you get this error while trying to copy the files on the root folder, you might be able to avoid the issue entirely by copying the files in a different location (from the root folder).
Keep in mind that regardless on the file system that you are using (FAT16, FAT32, NTFS), each and every one of them has a limitation regarding how many files can the root folder contains. For example, if you’re using FAT16, the root folder can’t contain more than 128 files.
A lot of users that we’re struggling to resolve the 0x80070052 error have confirmed that the issue no longer occurred once they attempted to create a folder on the removable drive (instead of pasting the file directly onto the root folder).
If you think this scenario might be applicable to your current situation, simply open your removable drive, right-click on an empty space and choose New > Folder. Next, name the newly created folder however you want, then paste the files that you want to copy directly into it (not the root folder)
Creating a folder to copy the files away from the root folder
See if you’re still encountering the same 0x80070052 (The directory or file cannot be created) even when copying the files away from the root folder.
In case the same issue is persisting, move down to the next potential fix below.
Method 2: Formatting the drive to FAT32
In most cases, the 0x80070052 (The directory or file cannot be created) error will occur if the file system you’re trying to copy files to is formatted to an older file system that can’t handle files of this magnitude – FAT16 is the most common file system format that is reported to cause this issue.
If you’re not sure what File system you’re using for your external HDD or flash drive, you can find out by right-clicking on your drive letter in File Explorer and choose Properties from the context menu. Inside the Properties screen, select the General tab and check the File system (under Type).
Discovering the File System used for the removable drive
If you discovered that the file system is of an older format (different fro FAT32), there’s a high chance that you will be able to fix the issue by formatting the drive to a modern file system like FAT32. Follow the instructions below for instructions on how to do this:
Open File Explorer and identify the removable media that is triggering the 0x80070052 when you attempt to copy files on it. Once you see it, right-click on it and choose Format from the newly appeared context menu.
Formatting the removable drive
Note: If you have important files stored on that drive, back them up before initiating a formatting procedure – This operation (even if you go for a Quick Format) will remove any data from the drive).
Inside the Format screen, ensure that the drop-down menu associated with File System is set to FAT32. Next, set the Allocation unit size to 4096 bytes.
Configuring the formatting utility
Note: If you had other corruption-related issues with this removable drive, you might need to consider unchecking the box associated with Quick Format. But keep in mind that unless you go for a Quick Format, the operation might end up taking several hours.
Hit Start to launch the operation and wait for the process to complete.
After the operation is finished, attempt to copy the same files that were previously triggering the 0x80070052 error again and see if the issue is now resolved.
In case the same problem is still occurring or this scenario wasn’t applicable, move down to the next potential fix below.
Method 3: Copying encrypted files
If you’re encountering this issue while attempted to move encrypted files, you will need to take additional precautions in order to ensure that the encryption key is also transferred.
In case you used the built-in encryption method, all you need to do is ensure that the service associated with the Credential Manager is set to Automatic and running at the time when the file copying is taking place.
However, if you encrypted the files externally (with a service like McAfee encryption or a different 3rd party utility), you’ll need to ensure that the program is running when you are copying the encrypted files.
Here’s a generic step-by-step guide that will allow you to copy encrypted files on a flash drive without encountering 0x80070052 (The directory or file cannot be created):
Ensure that the 3rd party program you used to encrypt the files is running.
Enabling Encryption
Note: Ignore this step if you’ve only used the built-in Windows encryption.
Press Windows key + R to open up a Run dialog box. When you see the Run box, type ‘service.msc’ inside the text box and press Enter to open up the Services screen.
Opening services by typing “services.msc” in the RUN command.
Once you’re inside the Service screen, move over to the right-hand section and scroll down through the list of locally installed services until you find the Credential Manager.
After you manage to locate it, right-click on it and choose Properties from the newly appeared context menu.
Accessing the Properties screen of Credential Manager
Inside the Properties screen of Credential Manager, select the General tab and ensure that the Startup type is set to Automatic. Then, click on the Start button to ensure that the service is currently running and click Apply to save the changes.
Configuring the Credential Manager
Copy the encrypted files that were previously triggering the 0x80070052 (The directory or file cannot be created).
In case the same issue is still persisting, move down to the next potential fix below.
Method 4: Repairing the drive for corruption
As it turns out, this particular issue can also occur due to some type of corruption that is forcing the removable storage device to throw this error. In most cases that we looked at, the issue has started occurring after an unexpected machine interruption.
The problem is fairly common with SD cards that are being used on cameras (they work totally fine there) but throw this error while the user tries to copy the files from the SD card on their computer HDD / SSD.
If this scenario is applicable, be advised that some affected users have managed to fix the issue by triggering a drive repair from the Properties menu.
Here is a quick guide on scanning & repairing the drive from any corruption that might end up causing the 0x80070052 error:
Open File Explorer, right-click on the removable drive that you’re encountering issues with and choose Properties from the context menu.
Repairing the drive
Inside the Properties screen, select Tools from the horizontal tab at the top. Then, click on the Check button under Error-checking.
When you’re prompted by the UAC (User Account Control), click Yes to grant administrative access.
Once you get at the next screen, click on Scan and repair drive and wait for the process to complete.
Scanning and Repairing removable drive
After the operation is complete, remove & reinsert the removable drive, then see if the issue is resolved when you attempt to copy the files again.
Some Windows users are encountering the “You cannot use Internet Calendar Subscriptions. Your system administrator has turned off this feature.” error when attempting to use the Internet Calendar feature in Outlook. In most documented cases, this issue occurs with Outlook 2010 and older versions – Typically Outlook 2013 and newer no longer shows this error when opening .lcs files.
Cannot use Internet Calendar Integration
If you’re encountering this issue on Windows 10, there’s a high chance that the issue is being caused by two distinct policies that are enabled in your Registry – DisablePST and webcal. To fix the issue in this case, you’ll need to change the value of these keys to 0 in order to disable then.
In case you are using Microsoft Outlook 2010 when you are encountering this issue, the problem is most likely caused by the missing of an essential system admin template. You can fix the issue in this case by downloading the collection of Office 2010 Administrative Templates manually and importing the outlk14.adm template manually before configuring it.
However, if you’re unable to import any calendar data into your desktop version of Outlook but you don’t get an error message, it’s most likely due to the newest authentication server method that Outlook 2016, Outlook 2019 and Office365 use. The most efficient way to import the calendar data, in this case, is to use the OWA (Outlook Web App).
Method 1: Modifying Registry keys linked with .ICS Files
As it turns out, there are 2 different policies enforced through Registry Editor that could end up creating the “You cannot use Internet Calendar Subscriptions.” error. DisablePST and webcal are two policies that aren’t found on Windows 8.1.
Several affected users have reported that they managed to fix the issue by changing the values of these two policies two 0 in order to ensure that they are not producing effects. After doing these modifications and restarting the computer, most affected users have confirmed that they no longer encountered the error while trying to add an Internet Calendar file into Outlook.
Here’s a quick guide on modifying the values of DisablePST and webcal in order to fix the ‘You cannot use Internet Calendar Subscriptions’ Error:
Press Windows key + R to open up a Run dialog box. Next, type ‘regedit’ inside the run text box and press Enter to open up Registry Editor. When you’re prompted by the UAC (User Account Control), click Yes to grant administrative privileges.
Running the Registry Editor
Once you’re inside the Registry Editor, use the left-hand section to navigate to the following location:
Note: You can either navigate manually via the menu on the left or you can paste the location directly into the navigation bar and press Enter to get there instantly.
After you manage to arrive at the correct location, move over to the right-hand side menu and double-click on DisablePST.
Inside the DWORD (32-bit) Value Edit window associated with DisablePST, set the Base to Hexadecimal and set the Value Data to 0 and click Ok to save the changes.
Setting the value of DisablePST to 0
After this modification is operated, navigate to the following location using the left-hand side menu or by pasting the location directly into the navigation bar:
Once you arrive at the correct location, move over to the right-hand section and double-click on the webcal Dword registry.
Inside the Edit screen associated with the webcal dword value, set the Base to Hexadecimal and the Value data to 0.
Changing the value of webcap
Once you’ve ensured that the two policies are disabled, restart your computer and wait for the next startup to complete.
After your computer boots back up, repeat the action that was previously causing the “You cannot use Internet Calendar Subscriptions.” error and see if the issue is resolved.
In case the same problem is still persisting, move down to the next potential fix below.
Method 2: Installing System Admin templates (if applicable)
As it turns out, this issue is often reported to occur due to one particular missing Office Admin template (outlk14.adm). This is only encountered to occur with Office 2010 or older since newer versions will automatically install this template during the initial setup.
If this method is applicable, you can get the issue resolved by downloading the entire collection of Office system admin templates and then using the Gpedit (Local Group Policy Editor) to add and disable the policy associated with ‘Do not include Internet Calendar Integration in Outlook’.
Note: Keep in mind that depending on which Windows 10 version you’re using, the Local Group Policy Editor might not be available on your computer. If you’re using Windows 10 home, follow this article to enable the Gpedit utility.
Here are the step by step instructions to fixing the issue by adding the outlk14.adm template and configuring it via Local Group Policy Editor:
Visit this link (here) and click on the Download button to download the collection of Office 2010 Administrative Template files.
After the download is complete, open the executable appropriate to your OS bit version (AdminTemplates_32.exe or AdminTemplates_65.exe) and click Yes at the UAC (User Account Control) prompt.
At the first prompt, check the box associated with Click here to accept the Microsoft Software License Terms, then click on Continue.Accepting the license agreement of Microsoft Office 2010 Administrative Templates
Choose a suitable location where you want to extract the collection of templates that you just downloaded.
Press Windows key + R to open up a Run dialog box. Inside the text box, type ‘gpedit.msc’ and press Enter to open up the Local Group Policy Editor. When you’re prompted by the UAC (User Account Control), click Yes to grant administrative privileges.
Typing gpedit.msc in RUN
Once you’re inside the Local Group Policy editor, use the left-hand section to right-click on Administrative Templates and choose Add / Remove Templates… Add or Remove Templates
Once you’re inside the Add / Remove Templates screen, click on the Add button in the bottom-left corner of the screen.
Use the Policy Templates window to navigate to the location where you previously extracted the Office 2010 Administrative Template and select outlk14.adm (ADM > en-us > outlk14.adm) before clicking Open.Importing the admin template
After you return to the Add / Remove Templates, click on Close.
Next, navigate to Administrative Templates > Classic Administrative Templates (ADM) > Microsoft Outlook 2010 > Account Settings > Internet Calendars and then double-click on Do not Include Internet Calendar integration in Outlook. Do not Include Internet Calendar Integration policy
Inside the Do not include Internet Calendar integration in Outlook policy, set the status of the policy to Disabled, then click on Apply to save the changes.
Disabling the Internet Calendar integration policy
After the policy is enforced, restart your computer and see if the issue is resolved at the next computer startup.
In case the same “You cannot use Internet Calendar Subscriptions.” error is still occurring, move down to the final potential fix below.
Method 3: Using the Outlook Web app instead
In case you are unable to add an Internet Calendar in Outlook 2016, Outlook 2019 or Office365 but you don’t really receive an error message, the issue is most likely occurring due to a modern authentication server containing the calendar than only newer Outlook versions use.
While in most cases the server responds by supporting this modern authentication method, some servers end up considering this to be an invalid client request, thus forcing the Outlook client to cancel the attempt to add to the calendar.
If this scenario is applicable, you should be able to work around this issue by using the Outlook Web APP (OWA). As opposed to the desktop versions of Outlook, the OWA equivalent doesn’t have the same authentication header behavior, so you should no longer encounter this problem.
Here’s a quick guide on using the Outlook Web App to add the calendar:
Visit this link here and sign in to the Outlook Web App using your Outlook Account.
Click on the Sign In button (top-right) corner, then insert your user account credentials to complete the sign-in process.
Sign in to Microsoft account
Once the sign-in process is complete, switch to the Calendar module by clicking on the associated icon (bottom-left corner).
Accessing the Calendar module
Once the Calendar module is fully loaded, click on Add calendar option from the left-hand side menu.
Inside the Add Calendar menu, use you’re preferred way of adding the calendar to your Outlook account using the left-hand vertical menu, then complete the process by clicking on Import.Importing the Calendar via the OWA app
Some Windows users are experiencing a BSOD (Blue Screen of Death) pointing towards the amifldrv64.sys, whenever they try to update their BIOS version (at the very beginning of the flashing process). There are multiple error codes linked with this issue, but the most common one is 0xc1 error.
Amifldrv64.sys BSOD when Updating BIOS
In case you’re trying to update your BIOS directly through your OS, keep in mind that this is not the best approach and this procedure by itself might end up facilitating the apparition of various BSOD due to two 3rd party drivers conflicts. If possible, try updating your BIOS version from a flash drive.
As it turns out, one of the most common causes that will end up triggering a BSOD during the process of updating the BIOS version is a utility called Driver Verifier. This built-in tool puts stress on the driver intentionally, and some BIOS flashing utility will crash as a result. In this case, you can resolve the issue by disabling the Driver Verifier while the BIOS updating process is taking place.
If a machine interruption during the BIOS has caused the problem, you can resolve the issue by using the System Restore utility to return your computer to a healthy state. If that doesn’t work, consider performing a repair install.
Another potential driver that might cause conflict is the WiFi (wireless), driver. Reinstalling it has solved the problem for some affected users.
Method 1: Disable Driver Verifier
Driver Verifier is a built-in diagnostic tool that is present on Windows 7, Windows 8.1 and Windows 10. Its main purpose is to verify both native Microsoft drivers and third-party drivers. It works by putting the drivers under a lot of stress in order to force incompatible or outdated drivers to misbehave.
While this feature is good for maintaining a healthy selection of drivers, it tends to conflict with BIOS flashing utilities. Keep in mind that BIOS flashing utilities tend to be a little more than basic scripts that aren’t updated often by motherboard manufacturers.
Because of this, the vast majority of BSODs that show up during a BIOS updating procedure are actually caused by Driver Verifier – especially if it points to the Amifldrv64.sys.
If this scenario is applicable, the solution to your problem is simple – you’ll need to disable the driver verifier while updating the BIOS firmware and then enable it again after the procedure is complete.
And since the procedure is different according to your OS version, we featured two different sections – one for users that are able to boot and one for users that are unable to get past the login screen.
Use the first guide if you can get to the Windows menus, or use the second one if your machine is no longer able to boot in order to do it from the Recovery menu.
How to Disable & Enable Driver Verifier via Driver Verifier Manager
Press Windows key + R to open a Run dialog box. Next, type ‘verifier.exe’ inside the text box and press Enter to open up the Driver Verifier utility.
Opening the Driver Verifier utility
Note: If you are prompted by the UAC (User Account Control) window, click Yes to grant administrative privileges.
Once you’re inside the Driver Verifier Manager window, select Delete existing settings (under Select a task) and click Finish.Deleting Existing settings
Now that Driver Verifier is disabled, restart your computer and attempt to flash your BIOS once again.
If you manage to install it without issues this time, move down to the steps below to enable driver verifier once again.
Press Windows key + R to open up a Run dialog box. Next, type ‘verifier.exe’ inside the text box and press Enter to open up the Driver Verifier utility.
Opening the Driver Verifier utility
Once you manage to return to the Driver Verifier Manager utility, select the toggle associated with Create custom settings (for code developers) under Select a task and click Next to advance to the next menu.
Create custom settings driver verifier
After you move forward to the next menu, ensure that the boxes associated with Standard settings, IRP Logging and Force pending I/O requests are enabled. Then, click Next to advance to the following screen.
Configuring Driver Verifier
At the next screen, select the toggle associated with Select driver name from a list and click on Next to advance to the next menu.
Selecting the drivers names from the list (Driver Verifier)
Once you see the list of drivers, click on Provider once to sort out the list according to their manufacturers. Next, begin to check every driver that is not provided by Microsoft Corporation. After you are done with the entire list, click on Finish and click Ok at the final confirmation prompt.
Restarting computer to save the changes
Restart your computer. After your machine boots back up, the Driver Verifier should be re-enabled.
How to Disable & Enable Driver Verifier via Windows Recovery
Insert the installation media compatible with your Windows version, restart your computer and press any key once you get asked if you want to boot from the installation media.
Press any key to boot from installation media
Once you arrive at the first screen of Windows Setup, click on Repair your computer (bottom-left corner of the screen). This will take you directly to the Recovery Menu.
Select ‘Repair my computer’
Note: Keep in mind that you can also force the Advanced Recovery menu to appear by itself (without an installation media) by forcing 3 consecutive machine interruptions – By restarting/powering off your computer during the booting procedure.
Once you’re inside the Recovery Menu, click on Troubleshoot, then click on Advanced Options from the list of troubleshooting sub-items.
Advanced options in Troubleshoot screen
At the Advanced Options menu, click on Command Prompt to open up an elevated CMD prompt.
Clicking on the command prompt option
You will then be prompted to choose your account and type the password associated with it.
After you do so, and you manage to get inside the elevated Command prompt, type the following command and press Enter in order to disable Driver Verifier:
verifier /reset
Close the elevated CMD prompt and restart your computer. At the next startup, follow the procedure according to your motherboard manufacturer to update your BIOS version and see if the procedure now completes without issues.
Regardless of the outcome, follow the steps below to re-enable Driver Verifier and configure it in the same way that it was before.
Follow steps 1 to 4 in order to return to the elevated CMD Prompt. This time, type in ‘Verifier’ and press Enter in order to open up Driver Verifier.
Once you’re inside the Driver Verifier Manager window, select Create custom settings (for code developers) and click on Next to advance to the next window.
At the next prompt, ensure that the checkboxes associated with I/O verification,/ Force pending I/O requests (*) and IRP logging (*) are enabled. Once every essential setting is enabled, click on Next to advance to the next menu.
Enabling every essential individual service
Once you get to the next screen, select the toggle associated with Select driver names from a list, then click on Next to advance to the next menu.
Selecting the driver names from the list
After you manage to get to the next screen, click on Provider to order everything alphabetically, then go ahead and enable the checkbox associated with every driver that is not signed by Microsoft Corporation. Once you are finished with it, click on Finish to complete the process.
Including every relevant driver
Finally, you will be prompted to restart your computer in order to allow the changes to take effect. Do this by clicking Ok, then wait for your computer to boot back up.
In case the same issue is still occurring even if after you disable the Driver Verifier, move down below for an alternative of fixing the amifldrv64.sys BSOD.
Method 2: Using system restore
Keep in mind that amifldrv64.sys is normally associated with the MSI Live update agent and a BSOD (Blue Screen of Death) associated with it typically appears after a failed BIOS update.
If this happened in your scenarios, chances are you are no longer able to boot up your computer properly. In this case, one viable fix is to use the system restore utility to bring back your computer to a state before the BIOS update was attempted.
To do this, you can follow this article here. It will show you how to use a previously created restore point and how to open the System Restore utility in case you can’t get past the initial booting sequence.
In case you’ve already tried this with no success or you don’t have an appropriate restore snapshot, move to the next potential fix below.
Method 3: Uninstall the MSI Live Update Program
If the BSOD points towards the amifldrv64.sys or NTIOLib_X64.sys files, but the BSOD doesn’t happen at startup (you can get past the booting sequence), it’s very likely that the random BSOD crashes are caused by the MSI Live update program.
Several affected users that we’re also struggling to resolve this problem have reported back that they finally managed to stop the BSOD from occurring after uninstalling the Live Update program.
Getting rid of it means that you’ll lose the ability to update BIOS and chipset drivers automatically, but if it allows you to achieve stability it’s better than frequent BSOD crashes.
Here’s a quick guide on how to uninstall the MSI Live Update Program:
Press Windows key + R to open up a Run dialog box. At the next screen, type ‘appwiz.cpl’ and press Enter in order to open up the Programs and Features menu.
Type appwiz.cpl and Press Enter to Open Installed Programs List
Once you’re inside the Programs and Features menu, scroll down through the list of installed applications and locate the MSI Live Update Program.
When you see it, right-click on it and choose Uninstall from the newly appeared context menu to get rid of it.
Uninstalling the MSI Live Update app
Inside the uninstallation wizard, follow the on-screen prompts to complete the uninstallation process, then restart your computer and see if the frequent BSODs stop with the next booting sequence.
In case you’re still encountering this issue, move down to the next method below.
Method 4: Creating a Bootable BIOS Update USB
If you’re receiving this BSOD while trying to flash your BIOS within your OS, chances are you’ll have to go for the flash drive utility method in order to complete the procedure without receiving the error.
Flashing the BIOS in your OS is definitely an easier procedure, it’s also known to cause a lot of problems and might even break your PC ability to boot up.
If this scenario is applicable, you should be able to fix the issue by creating a bootable USB containing the BIOS update and install it from the initial screen.
Keep in mind that each manufacturer has its own BIOS updates according to their various models and the steps of installing it will be slightly different. Although there is no universal way of flashing a BIOS via USB, we’ve created some general steps that should point you in the right direction.
Important: Consult the official documentation provided by your manufacturer on how to update your BIOS version via USB.
Here’s how to create bootable BIOS Update USB:
Ensure that you have a blank USB flash drive at the ready. If it already contains data, back it up and then right-clicks on the flash drive and choose Format from the newly appeared context menu.
Formatting the USB drive
Inside the Format screen, set the File System to FAT32 and check the box associated with Quick Format. Click Start once you are ready to format the drive.
Formatting the drive
Once the process is complete, go ahead and download the BIOS update that you want to install from the manufacturer’s website and copy it on the USB flash drive.
Downloading the latest BIOS version
Note: Depending on your motherboard manufacturer, you might be required to make some specific files to the files in order to allow them to install them from a USB drive.
After the Boot files are copied on the USB flash drive, restart your computer and press the required key (Setup key) at the next startup to enter your BIOS settings. Press [key] to enter setupNote: Typically, the setup key is either Esc, Del, or one of the F keys (F2, F4, F6, F8, F12). In case you can’t find it by yourself, look online for specific steps of accessing your BIOS settings according to your motherboard model.
Once you’re inside your BIOS settings, look for an option named Update System BIOS (or similar).
Updating the System BIOS via USB flash
You will then be asked to confirm the process and select the drive containing the BIOS update. Once you select the appropriate drive and confirm, the process of updating your BIOS will start automatically.
Updating BIOS via USB flash
Once the procedure is complete, restart your computer and wait for it to boot up. At this point, you can safely remove the USB flash disk from your computer.
In case the same issue is still occurring or the issue started occurring after you managed to install your BIOS update, move down to the next potential fix below.
Method 5: Reinstalling the WiFi adapter
If you started to encounter the issue immediately after you completed a BIOS update (or after a failed attempt), you should also investigate your WiFi adapter driver. As it turns out, a botched BIOS update can also affect the WLAN driver.
We managed to identify several users reports confirming that this particular culprit was causing the issue in their case – In every case, the issue was resolved by reinstalling the WiFi adapter driver via Device Manager.
Here’s a quick guide on reinstalling the WiFi adapter driver via the Device Manager in order to stop any BSOD’s pointing towards amifldrv64.sys or NTIOLib_X64.sys:
Press Windows key + R to open up a Run dialog box. Next, type ‘devgmt.msc’ and press Enter to open up Device Manager. When prompted by the UAC (User Account Control), click Yes to open Device Manager with admin access.
Run devmgmt.msc
Once you’re inside the Device Manager, scroll down through the list of installed devices and expand the drop-down menu associated with Network Adapters.
Next, from the list of available sub-items, right-click on the entry associated with your WiFi driver and select Properties from the newly appeared context menu.
Accessing the Properties screen of your network driver
Once you’re inside the Properties screen of your Wi-Fi Driver, select the Driver tab from the menu at the top, then click on Uninstall Device to remove it from your computer.
When you’re prompted by the confirmation prompt, click Uninstall once again to confirm the process, then wait for it to complete.
Uninstalling the wireless driver
Once the process is complete, restart your computer in order to allow your OS to replace the missing WIFI driver with a generic equivalent. At the second restart (once your internet connection is working again), Windows will update the WiFi driver to the latest version according to your motherboard manufacturer.
After your WI-Fi driver is reinstalled, repeat the action that was previously causing the BSOD to see if the issue is now resolved.
In case the issue persists, move down to the final method below.
Method 6: Performing a repair install
If none of the instructions above have worked for you, chances are you’ll need to refresh every OS component in order to replace the corrupted instances.
The most efficient way of doing so is by doing a repair install. But keep in mind that you’ll need a compatible media in order to complete the process.
Here’s how to create compatible installation media for Windows 7 or Windows 10.
Some Windows users are encountering the ‘GTA IV Fatal Error WTV270‘ whenever they try to launch GTA (Grand Theft Auto 4). This happens with both game clients (like Steam, Origin, etc.) and while double-clicking the game’s executable. The issue is most commonly reported on Windows 10.
GTA IV Fatal Error WTV270
One of the most common causes that will trigger the GTA IV Fatal Error WTV270 is an instance in which the GFWL client is outdated or partially installed. To fix the issue in this case, simply update the Games for Windows Live utility to the latest version.
However, another possibility is that the error is being thrown due to the fact that one key Windows Live service (wllogin_64 or wllogin-32) is not running. This issue can be resolved swiftly either by starting the service manually via the game folder or by installing the whole windows live sign-in assistant utility.
But if you’re looking for a quick workaround, you can force the main executable to launch in windowed mode (either via Steam settings or via Properties screen). A lot of affected users have confirmed that this operation was successful.
If you’re encountering the issue on Windows 10, you might need to use a modded file from a patch called XLiveLess in order to get the game to run (especially on newer configurations). But keep in mind that this will make you lose access to every online component. An additional fix in this case (with limited success) is to run the game in compatibility mode with Windows 7.
If all else fails, you should be able to fix the issue by downgrading to version 1.0.7.0 -but this operation will also make you lose access to multiplayer features.
Method 1: Updating the GFWL utility
As it turns out, one of the most common causes that will trigger the Fatal Error WTV270 is an instance in which the end-user didn’t update the Games for Windows Live (GFWL client). This is automatically resolved on Windows 10 but needs to be done manually on Windows 8.1, Windows 7 or older.
Keep in mind that this client (GFWL) is now obsolete and was replaced by the newer infrastructure powered by Xbox Live. If you don’t take measures to accommodate this change, parts of SecuROM will fail and you will be unable to run the game regardless of your system configuration.
In order to resolve this issue, you will need to install a patch that will replace the traditional GFWL login so that it connects to the Xbox server instead.
If this scenario is applicable, you can resolve the issue swiftly simply by installing the Games for Windows Live patch. Here’s a step by step guide on doing this:
Visit this link (here) from your default browser and wait until the download is initiated and completed.
Once the download is complete, double-click on it and click Yes at the UAC (User Account Control) in order to grant administrative privileges.
Next, follow the on-screen prompts in order to complete the installation.
When you get to the Install Success screen, there is no need to launch the application.
Installing the GFWL client
Instead, simply restart your computer and launch the game once the next startup is complete. The game should now launch normally without the same Fatal Error WTV270.
In case the same issue is persisting, move down to the next potential fix below.
Method 2: Ensuring that the Windows Live Sign-in Assistant is running
The Fatal Error WTV270 error is also known to appear if the service associated with the Live ID Sign-in Assistant is not running.
This service is obsolete on newer games, but if you installed Grand Theft Auto IV from a traditional media, you will need to ensure that the background service (wllogin_64 or wllogin_32) associated with the Windows Live ID Sign-in Assistant 6.5 is running.
Fortunately, the game files of GTA files already contain the services that you need, so you don’t need to install the dedicated client. All you need to do is open the service associated with your OS architecture from the game folder.
Here’s a quick guide on how to do this:
Open up File Explorer conventionally, right-click on This PC (My Computer on older Windows iterations) and choose Properties from the newly appeared context menu.
Opening the System Properties screen
Once you’re inside the System Properties screen, look under System category and check your System type. If it shows 64-bit Operation System, you will need to run the wllogin_64 executable. In case it shows 32-bit Operating System, you will need to run the wllogin_32 executable.
Verifying your OS architecture
Now that you know you’re system architecture, open File Explorer and navigate to the following location:
'Drive letter':\'Game Folder'\Installers\
Note: Keep in mind that both ‘Drive letter‘ and ‘Game Folder‘ are placeholders. Replace them with the actual drive letter where you installed the game and the game folder respectively.
Next, access the System64 (if you’re on a 64-bit Windows version) or System32 (if you’re using a 32-bit version).
Once you’re inside the System64 or System32 folder, double-click on wllogin_32 or wllogin_64 executable.
Wait a full minute to make sure that the service is working, then launch the game and see if it runs without triggering the Fatal Error WTV270.
In case you’re still encountering the same issue, move down to the next method below.
Method 3: Installing the Windows Live Sign-in Assistant
If the method above didn’t allow you to resolve the issue, it’s possible that launching the Windows Live Sign-in Assistant process included in the game executable is not enough to resolve the issue. In this case, you will need to install the full version of the Windows Live-Sign in Assistant from the official Microsoft download link.
If this scenario is applicable, here’s a quick guide on downloading and installing the full version of Windows Live-Sign in Assistant in order to resolve the issue:
Visit this link (here), select your default language and click on the Download button to initiate the download.
Downloading the live-sing in assistant
Once the download is complete, double-click on the installation executable and follow the on-screen prompts to complete the installation.
Installing Windows Live Sign-in assistant
After the operation is complete, restart your computer and see if the issue is resolved at the next startup when you try to launch the game.
In case you’re still encountering the same Fatal Error WTV270, move down to the next potential fix below.
Method 4: Running GTA IV in windowed mode
If you’re encountering the issue on a newer configuration, chances are GTA IV is not optimized to run on your native resolution. This problem should have been resolved with the update pushed for Windows 10, but some users are reporting that they can only run the game if they force the executable to run in ‘windowed’ mode.
Sure, the immersion will be less than ideal since you will see borders, but it’s still better than being unable to play the game at all.
Keep in mind that when it comes to doing this, you can either do it directly from your Steam client or by modifying the shortcut that you use to launch the game.
If you’re encountering the issue while trying to start GTA IV from your Steam’s library, follow the instructions below to force the game to run in windowed mode:
Forcing GTA IV to run in Windowed mode from Steam settings
In case GTA IV is part of your Steam’s library, here’s a step by step guide that will allow you to force the game to run in windowed mode:
Open your Steam application and make sure you are signed up with your account.
Next, access your library to view all your games, then right-click on Grand Theft Auto IV and click on Properties from the newly appeared context menu.
Opening Properties.
Once you’re inside the Properties screen of GTA IV, select the General tab from the horizontal menu at the top, then click on Set Launch Options. Accessing the Launch Options menu
Inside the Launch Options screen, simply type ‘-windowed’ (without quotes) and click Ok to save the changes.
Launch the game normally and see if the issue is now resolved and you’re able to run GTA IV without encountering the Fatal Error WTV270 error.
Forcing GTA IV to run in Windowed mode by modifying the shortcut
If you are not using Steam to launch GTA 4, here’s a step by step guide on forcing the shortcut of the main GTA IV executable to run in windowed mode:
Open up File Explorer and navigate to shortcut that you use to launch the game (not the location where GTA IV files are installed).
Once you get to the correct location, right-click on the main GTA IV executable (the one you use to launch the game) and choose Properties from the newly appeared context menu.
Accessing the Properties screen of the game executable
Inside the Properties screen of the window, select the Shortcut tab and look for the Target location. Once you get to the correct location, simply add ‘-window’ after the target location.
Forcing the shortcut to work in -window mode
Click Apply to save the changes, then double-click on the executable shortcut once again and see if you are able to launch the game without encountering the same Fatal Error WTV270.
In case the same issue is still occurring, move down to the next potential fix below.
Method 5: Using XLiveLess.DLL
If you’re on Windows 10, you might need to go the extra mile in order to ensure that your GTA IV is allowed to run normally. Fortunately, the modding community behind Grand Theft Auto IV has released a patch called XLiveLess which serves as a small replacement of the xlive.dll (the main culprit for this issue) minus the online support.
Among other things, this XLiveLess.DLL will fix a common glitch causing the Fatal Error WTV270.
Important: If you want to play GTA IV for its online components, keep in mind that this operation will disable all online functions.
If you want to follow this method, here’s a quick step-by-step guide on using the xliveless.dll patched DLL file in order to replace the problematic xlive.dll file:
Visit this link (here) and hit the Download button from the left-hand side menu in order to download the XLiveLess tool.
Downloading the xLiveLess utility
Once the download is completed successfully, open the archive and extract the content in a separate folder with a utility like 7zip, WinZip or WinRar.
After the extraction is complete, open the folder that you just extracted, right-click on xlive.dll and choose Cut from the newly appeared context menu.
Using the patched xlive.dll file
Navigate to the location of your game installation and paste the xlive.dll l file inside the GTA IV folder. By default, the location is:
C:\Steam\SteamApps\common\Grand Theft Auto IV\GTAIV
Launch the game and see if the issue is now resolved.
In case the same Fatal Error WTV270 problem is still persisting, move down to the next method below.
Method 6: Running the executable in compatibility mode
Keep in mind that at the time of the GTA IV release, Windows 10 was not out yet. This means that the game was not designed to run with the newer OS architecture (that’s precisely why there are this many issues with GTA IV on Windows 10).
Fortunately, most of these incompatibilities can be resolved by forcing the main executable in Compatibility mode with Windows 7 with admin rights. This modification only needs to be done one from the Properties menu.
Here’s a quick guide on forcing the GTA IV executable to run in compatibility mode with Windows 7:
Right-click on the executable (or shortcut) that you always use when you launch the game and click on Properties from the newly appeared context menu.
Accessing the Properties screen
Once you’re inside the Properties screen, select the Compatibility tab from the menu at the top, then click enable the box associated with ‘Run this program in compatibility mode for’, next select Windows 7 from the drop-down menu below.
Next, check the box associated with Run this program as an administrator, then click on Apply to save the changes.
Running the GTA executable in Compatibility Mode
Launch the game and see if the issue is now resolved.
In case the same problem is still occurring, move down to the next potential fix below.
Method 7: Downgrading to version
As it turns out, for a lot of users, the Fatal Error WTV270 problem will only occur with version 1.0.8.0 and older. We’ve been unable to find an official explanation detailing why this happens, but a lot of affected players have confirmed that they were able to fix the issue by downgrading to version 1.0.7.0 version by installing the dedicated patch.
But keep in mind that going this route means that you will also prevent the game from accessing any type of multiplayer components.
If you decide to go through with this method, here’s a step by step guide on downgrading to GTA IV version 1.0.7.0:
First things first, make sure that GTA IV and any associated instance is completely closed.
Visit this link (here) to automatically download the 1.0.7.0 patch for English, or download the patch for a different language using this link (here).
After the patch is completely downloaded, open the archive with a utility like 7zip, WinZip or WinRar and extract it directly into your game installation folder. By default, the game folder is created in:
C:\Steam\SteamApps\common\Grand Theft Auto IV\GTAIV
Once the extraction is complete, navigate to the GTA IV game folder and double-click on UpdateTitle.exe to apply the patch.
Opening the update title executable
Next, follow the on-screen prompts to complete the installation, then restart your computer and launch the game again to see if the issue has been resolved.
Some Windows users are seeing the Error Code 0x80040902 when they try to update Google Chrome to the latest version. In most cases, the problem occurs with the 64-bit version of Chrome.
Chrome Error 0x80040902
In some cases, this problem will occur due to a series of stuck Chrome processes that are unable to establish connections with the Google download server. In this case, a restart or a series of commands that will kill every involved process should fix the issue.
If your A/V solution has recently resolved a browser hijacker threat (or a similar malware rooted in your Browser), it’s possible that it also ended up quarantining some files used during the updating process. If this scenario is applicable, you should use a powerful uninstaller to remove every leftover file, then install the latest version of Chrome manually.
Kaspersky AV and a few other 3rd party A/V might end up blocking communications with the Google update server due to a false positive. In this case, whitelisting the Chrome processes or uninstalling the overprotective suite should fix the issue.
Method 1: Taskkill every stuck Chrome process
As it turns out, one of the most common instances that will trigger this process is a selection of stuck Chrome processes that will inhibit the browser’s ability to update itself. This typically appears for users that are using hibernation or sleep instead of the regular shut down option.
In this case, you can start by doing a simple reboot and try to update after the next startup is complete.
If that’s not an option or the problem is still persisting, you should proceed by using the ‘taskkill’ command in an elevated CMD window in order to force-close every Chrome process that might be hung.
Here’s a quick guide on using the ‘taskkill’ command to close every Chrome process:
Ensure that Google Chrome and any associated instances are completely closed.
Press Windows key + R to open up a Run dialog box. Next, type ‘cmd’ inside the text box, and press Ctrl + Shift + Enter to open up an elevated Command Prompt window.
Running the Command Prompt
Note: When you see the UAC (User Account Control), click Yes to grant administrative privileges.
Once you’re inside the elevated CMD, run the following commands in order and press Enter after each one to kill every involved Chrome process:
After every command has been successfully processed, close the elevated CMD prompt, open Google Chrome and attempt to update again to see if the problem is resolved.
In case you’re still seeing the Error Code 0x80040902 when attempting to update your Google Chrome browser, move down to the next potential fix below.
Method 2: Using an uninstaller software
As it turns out, this particular issue can also occur due to some corrupted Chrome data that is interfering with the updating function. This typically occurs after an A/V software successfully detects and removes parts from your Chrome browser in order to contain an infection caused by a browser hijacker.
In this case, the recommended fix is to use powerful uninstalling software to remove Google Chrome along with every piece of remnant data, then do a clean install of the latest version of Chrome. When it comes to doing so, there are a few 3rd party tools that you can use. IObit Uninstaller, CCleaner and Revo Uninstaller.
We used Revo Uninstaller in the guide below, but feel free to use whichever uninstalling software you feel most comfortable with
Here’s a quick step-by-step guide on doing a powerful uninstall on Google Chrome and then installing the latest version:
Visit this link (here) and download the latest free version of Revo Uninstaller by clicking on the Download button.
Downloading the latest version of Revo Uninstaller
Note: Avoid the portable version since it’s not as effective as the regular version.
Once the installer executable is downloaded, double-click on it and follow the on-screen prompts to complete the installation.
Installing the Revo Uninstaller
Note: Click Yes at the User Account Control window to grant admin access to the installer.
Once you’re inside the Revo Uninstaller app, select the Uninstaller tab and scroll down through the list of installed applications until you locate the Google Chrome entry.
Once you locate the correct entry, select Google Chrome and click the Uninstall button from the top of the application.
Uninstalling the Chrome application
Inside the next window, wait until the restore point is created, then select Advanced from Scanning modes and click on Scan to remove every leftover file.
Uninstalling Google Chrome
Follow the rest of the prompts to complete the installation, then restart your computer manually.
Once the next startup sequence is complete, visit this link (here) with Edge or IE and click on Download Chrome to get the latest version.
Downloading Google Chrome
Once the installer is downloaded, open it and follow the on-screen prompts to install the latest available version of Google Chrome.
In case the same Error Code 0x80040902 is still persisting, move down to the next fix below.
Method 3: Disable or Uninstall 3rd party suite (if applicable)
According to some affected users, the Update Failed Error Code 0x80040902 on Chrome can also be caused by an overprotective AV suite. Most commonly, Kaspersky Antivirus is reported for blocking the updating function on Chrome, but there might be other AV solutions that exhibit the same behavior.
If this scenario is applicable to your current situation, you have two options:
Whitelist every Chrome process from your 3rd party Antivirus or Firewall in order to prevent it from interfering with the updating function.
Uninstall the 3rd party antivirus altogether and go for a more permissive security suite (Windows Defender or a different 3r party AV)
Option 1 is specific depending on the AV tool that you’re using. You can either search online for steps that will allow you to do it or disable the real-time protection while updating Google Chrome.
Most 3rd party AV suites will allow you to disable the real-time protection directly from the Taskbar menu. Simply right-click on your AV icon and look for an option that stops the AV from actively maintaining your network communications. The name of this option will be different from tool to tool.
Disabling Avast’s shields
If Option 1 is off the table, here are some step-by-step instructions that will allow you to uninstall the 3rd party AV or firewall from your computer:
Press Windows key + R to open up a Run dialog box. Next, type ‘appwiz.cpl’ and press Enter to open up the Programs and Features menu.
Opening Programs and Features
Inside the Programs and Files menu, scroll down through the list of installed applications and locate the 3rd party AV suite that you’re using and you want to uninstall. Once you see it, right-click on it and click on Uninstall from the newly appeared context menu.
Uninstalling Avast Firewall
Inside the uninstallation screen, follow the on-screen prompts to complete the uninstallation, then restart your computer. Note: Additionally, you can follow this article (here) to ensure that you’re not leaving behind any leftover data that might still block your connection (highly recommended for 3rd party firewalls)
At the next startup, attempt to update Google Chrome again and see if the issue has been resolved.
Some Amazon Prime users are reporting that they are suddenly unable to stream and download video content. The error code that they get is 1060. The issue is reported to occur on PC, Android, Blu-ray players and a wide selection of smart TVs.
Amazon Prime Error Code 1060
One of the first things you should look out for when encountering the Error Code: 1060 is a network inconsistency. Most of these issues can be resolved either by rebooting or resetting the network device (modem or router).
However, it’s also possible that your current ISP plan doesn’t have enough bandwidth to support HD streaming. You should test this theory out and upgrade it if necessary. And if you’re using Wi-Fi, try switching on ethernet or get a Wi-Fi expander in case your signal is weak.
Also, keep in mind that Amazon Prime will end up blocking Proxy users and even some VPN clients. In case you’re using a service of this kind, disable it first and see if it resolves the issue.
Method 1: Reboot or reset your router/modem
One of the situations that will cause the Amazon Prime Error Code 1060 error is a common network inconsistency. In this case, you can most likely resolve the problem by rebooting or resetting your networking device (modem or router).
Important: But before you do this, confirm that you have Internet access, by doing a Google search or by attempting to play a video on YouTube.
If you want to avoid resetting any previously established settings, you should start with a network reboot, and it that doesn’t work, you might consider a reset.
Forcing a network reboot will not make any changes to your network credentials and it will not override any custom settings that you previously established.
To perform a router/modem reboot, simply use the dedicated On / Off button twice. Press it once to turn the device off, then wait at least 30 seconds before pressing the button once again. This will ensure that the power capacitors are drained.
A demonstration of restarting the router
Note: You can achieve the same thing by physically disconnecting the power cable from the power outlet and wait for 30 seconds or more before plugging it back in.
Do this and attempt to stream a video using Amazon Prime once again. If it still fails with the same 1060 error code, you should proceed by doing a router reset. But keep in mind that this operation will reset your custom login credentials (from your router page) and any custom network settings that you established.
To perform a reset on your networking device, use a sharp object (like a toothpick or a needle) to reach the reset button on the back on your router or modem. Press it down and keep it pressed for a minimum of 10 seconds – or until you see that all of the front LEDs start flashing at once).
Resetting Router
Once the reset is complete, go to the affected device that refuses to stream from Amazon Prime and see if the problem is now resolved.
If this didn’t resolve your issue, move down to the next potential fix below.
Method 2: Switch to a cabled connection (if applicable)
As it turns out, Amazon Prime is the most bandwidth-demanding streaming service (especially on Smart TVs). Due to the fact that it always tries to force HD playback (even on limited bandwidth) on Smart TVs, you might expect to see the Error Code 1060 when connected to a Wi-Fi network with a limited signal. It’s entirely possible that you see the error because your network is not strong enough to sustain HD quality streaming.
If this scenario is applicable, one way to resolve the issue is to switch to an ethernet (cabled) connection. Additionally (if a cable is not an option), you should consider getting a Wi-Fi expander to ensure that you have enough signal to sustain HD playback.
Example of a Wi-Fi Expander
In case this didn’t resolve the issue or this method wasn’t applicable to your current situation, move down to the next potential fix below.
Method 3: See if you meet minimum bandwidth requirements
Even though Amazon Prime only requires 900 Kbps to stream, this only applies to small screens (Android, iOS) and desktop (PC, Mac). However, if you try to stream Amazon Prime from a Smart TV (or using Chromecast, Roku, etc.) the bandwidth requirement is 3.5 Mbps.
If you’re on a limited plan, there’s a chance that your current Internet Service Provider is not providing you with enough bandwidth to use this service.
Fortunately, you can test out this theory quite easily by doing a simple test speed of your Internet connection. We will show you how to do it directly from any browser, so you can do the test regardless of the device you’re on.
Here’s a quick guide on doing a speed test of your Internet connection to see if you meet the minimum requirements:
Close any other browser tab and any network-hogging application that might be slowing down your internet connection.
Visit this link (here) from any browser and click on GO to initiate a Speed Test.
Doing a Speed Test from your favorite browser
Wait until the operation is complete, then analyze the results.
If the DOWNLOAD bandwidth is lower than 4 Mbps, you will need to upgrade to a better internet connection in order to get rid of the Error Code 1060. Analyzing the results of the Speed Test
In case the internet test revealed that you have enough bandwidth to stream Amazon Prime, move down to the final potential fix below.
Method 4: Disabling Proxy or VPN client (if applicable)
Just like Netflix, HBO Go and especially Disney+, Amazon Prime is becoming a lot more pro-active in preventing VPN and Proxy users from streaming content.
Judging from the user reports, It’s now evident that Amazon Prime is smart enough to figure out if you’re using a Proxy server and it’s capable of detecting a wide selection of VPN clients.
If you’re using a Proxy server or VPN client and you have previously confirmed that you have enough bandwidth to stream from this service, you should disable your anonymity service and see if it resolves your issue.
Since the steps of doing so are specific to the type of surfing anonymity technology that you’re using, we created two separate guides that will help you remove your proxy or VPN client.
STEP 1: Remove Proxy Server from Windows 10
Press Windows key + R to open up a Run dialog box. Next, type ‘ms-settings:network-proxy’ inside the text box and press Enter to open up the Proxy tab of the Settings tab.
Run dialog: ms-settings:network-proxy
Once you’re inside the proxy tab, move over to the right section and scroll down to the Manual Proxy setup. Once you’re there, simply disable the toggle associated with ‘Use a proxy server’. Disabling the Proxy server
Once the proxy server is disabled, simply close the Settings menu and restart your computer.
At the next startup, attempt to stream from Amazon Prime again and see if the issue is now resolved.
STEP 2: Remove a VPN Client from Windows 10
UPDATE: As it turns out, there are still some VPN clients that aren’t detected by Amazon Prime: Hide.me, HMA VPN, Surfshark, Super Unlimited Proxy, Unlocator, and Cloudflare. This list is subjected to change with time. If you’re using a different VPN, uninstall it using the steps below, then uninstall one of these solutions.
Press Windows key + R to open up a Run dialog box. Next, type ‘appwiz.cpl’ and press Enter to open up the Programs and Features screen.
Type appwiz.cpl And Press Enter to Open Installed Programs Page on Windows
Inside Programs and Features, locate the VPN client that you’re currently using by scrolling down through all installed applications.
Once you discover the client that you wish to uninstall, right-click on it and choose Uninstall from the newly appeared context menu.
Uninstalling the VPN client
Once the operation is complete, reboot your computer and see if the issue is resolved at the next system startup.
Audacity is a free, open-source audio software that is used for editing and recording audio tracks on multiple platforms. It is an easy to use application for editing any kind of audio files. However, sometimes a feature can be hard to find, such as removing vocals from audio tracks. In this article, we will show how to remove vocals from any soundtrack in Audacity.
Removing Vocals in Audacity
Removing Vocals in Audacity
Audacity is one of the famous application for modifying the audio files. Removing vocals from audio tracks is easy, but there is more to that. It is illegal to use the soundtrack of anyone without their permission. Even by removing the vocals, one cannot use the track without the rights. If the user is using it for their own personal use then it’s fine to remove vocals and use the soundtrack. However, it is strongly recommended to not use it for commercial, YouTube, or any social media.
Important: It will be hard or impossible to remove vocals from most of the audio files, so some soundtracks might not work the same as others.
Method 1: Removing Vocals by Using the Remove Vocal Action in Audacity
With the latest updates, Audacity is getting more and more features. Audacity now has a feature for removing vocals from any soundtrack. This is a default method to remove vocals, however, users can combine and use multiple other effects with this one to adjust it as they want. Follow the below steps to remove vocals from the audio file:
Open Audacity by double-clicking the shortcut or by searching it through the Windows search feature.
Click on File in the menu bar and choose the Open option.
Selecting the Open option in the File menu
Find the audio file that you want to remove vocals from and open it.
Select the part of the track where vocals exist by left-clicking on the track with the mouse as shown below: Note: You can select each vocal part separately and then apply the below steps.
Selecting part of the track
Click on the Effect menu in the menu bar and choose the Vocal reduction and isolation option.
Opening the Vocal reduction and isolation
Change the action to Remove Vocals and click the Ok button.
Changing action to Remove Vocals
The vocals will be removed from the track.
Method 2: Removing Vocals by Using the Invert Split Stereo in Audacity
This method was used before there was no option for removing the vocals in Audacity. Audacity provides the two channels of each file you open, you can split them and invert the bottom one to remove the vocals. This method may require some other optional effects to make it better. Follow the below steps:
Double-click the Audacity shortcut to open it or search it in the Windows search feature and click on it.
Click on the File in the menu bar at the top and choose the Open option.
Selecting the Open option in the File menu
Select the audio file that you want to remove vocals from and click on the Open button.
Opening File in Audacity
Click on the Track menu and select the Split Stereo to Mono option.
Splitting track channels
Now double-click the bottom channel to select the full track. Click on the Effect menu in the menu bar and choose the Invert option. Note: If you still hear the vocals, you can also use the Amplify option in the Effect menu by moving it to negative to modify it more.
Inverting the bottom channel
Echo Dot is an Amazon device that provides us with many functionalities such as listening to daily news, playing your favourite music and much more. However, there can be a problem with this device where it becomes unresponsive and seems to be stuck.
Recognizing the echo dot generation
If you want to reset your device for the reason that it is stuck or may it be any other case, follow the steps below to ensure that you are successful and do not end up breaking your device any further than it already is.
Determine your Echo Dot Generation
There are currently 3 generations of echo dots. In order for you to reset your device, first of all, determine the echo dot generation you are currently using.
Go to your browser and type in Amazon echo dot generations.
Click on the images and then compare your device with the results.
After identifying your echo dot generation follow the steps below for your corresponding generation.
Method 1: Resetting First Generation Echo Dot
Locate the reset button/reset hole located at the base side of the device, it will be at the bottom side on the top.
Resetting the device with a pin
Find a paper clip or something small enough to poke the reset button with.
Press and hold the reset button for at least 5 seconds.
You will notice that the light right turns off and on again.
The light ring then turns orange which is an indication that it has entered setup mode.
You can then register the device to Your Amazon account using the Alexa App.
Make sure that the device is connected to WiFi in order for it to register with the Amazon account.
Method 2: Resetting Second Generation Echo Dot
The procedure for resetting this 2nd Gen device is a little different from 1st Gen devices but no need to worry. Follow the steps below to successfully reset your device:
Locate the “Volume down” and “Microphone off” button, they are located at the bottom and left of the front of the device respectively.
Pressing the buttons to reset
Hold down the two buttons mentioned above at the same time.
Wait for the light ring to turn orange and then blue while holding down the buttons.
The light ring will then turn off and on again.
The light ring will then turn orange and enter setup mode.
You can then register the device to Your Amazon account using the Alexa App.
Make sure that the device is connected to WiFi in order for it to register with the Amazon account.
Method 3: Resetting Third Generation Echo Dot
The procedure for this device is somewhat similar to the 2nd Gen devices. See the steps below for an easy reset:
Locate the action button (button with a dot embedded on it) which is on the front side to the bottom of the device.
Locating the button to reset the device
Press and hold this button for at least 25 seconds.
The light ring will flash orange and then turn off.
The light ring will turn back on and turn to blue, wait for it if it doesn’t happen instantly.
The light ring will turn back to orange and your device will be now in setup mode.